
Hey,
In this article, the series of converting the Flash game Blasteroids to HTML5 continues. The target technology I’m using throughout this process is Phaser, and the primary tools I’m using for development are Visual Studio Code and the amazing Phaser Editor. The latter is an amazing tool, as it aims to provide an integrated environment for HTML5 game development, similar to what Adobe Animate did for Flash.
Adding the first power up item is presented in this article. Most of what’s presented in this article has been covered in previous articles. Nonetheless, they are important aspects of the conversion process as they will be used repeatedly throughout.
Check out this short demo video of the current progress of the game.
As you’re probably aware by now, Adobe is discontinuing Flash by end of this year. If you have Flash games, they will no longer work afterwards, as browsers, such as Google Chrome, will completely block Flash content.
So, if you want to preserve your Flash, you’ll have to re-build it in another platform, and if it’s to remain as a web-based game (meaning you’re NOT converting it from web to mobile), then HTML5 (Canvas/WebGL) is likely your best bet.
I previously announced that I was taking on the challenge to convert a Flash game I made for a previous client to HTML5. I will continue to post progress updates on the game until the conversion has been completed.
The current list of articles is here:
- Part 1 – Setting up the player
- Part 2 – Displaying objects, keyboard input, and object wrapping collisions
- Part 3 – Missiles, animations, and HUD
- Part 4 – Adding text, health, and icons to HUD
- Part 5 – Collision With Missiles, Asteroids, and Player Ship
- Part 6 – First Power-Up Item (this article)
Let’s get started. The updates covered in this article are:
- Adding the power-up item graphic
- Adding a new collision shape
- Player Collects An Item
1. Adding The Power-Up Item Graphic
The power-up item we’re adding is one of the simplest ones in the game: a health booster. When you collect this item, it restores a little health to your ship. Unlike traditional Asteroids game, Blasteroids is not one-hit-kill, meaning, one hit from asteroids, enemy ships, or enemy fire won’t kill you (unless the hit took out all your health).
Setting Up The Item AnimatioN
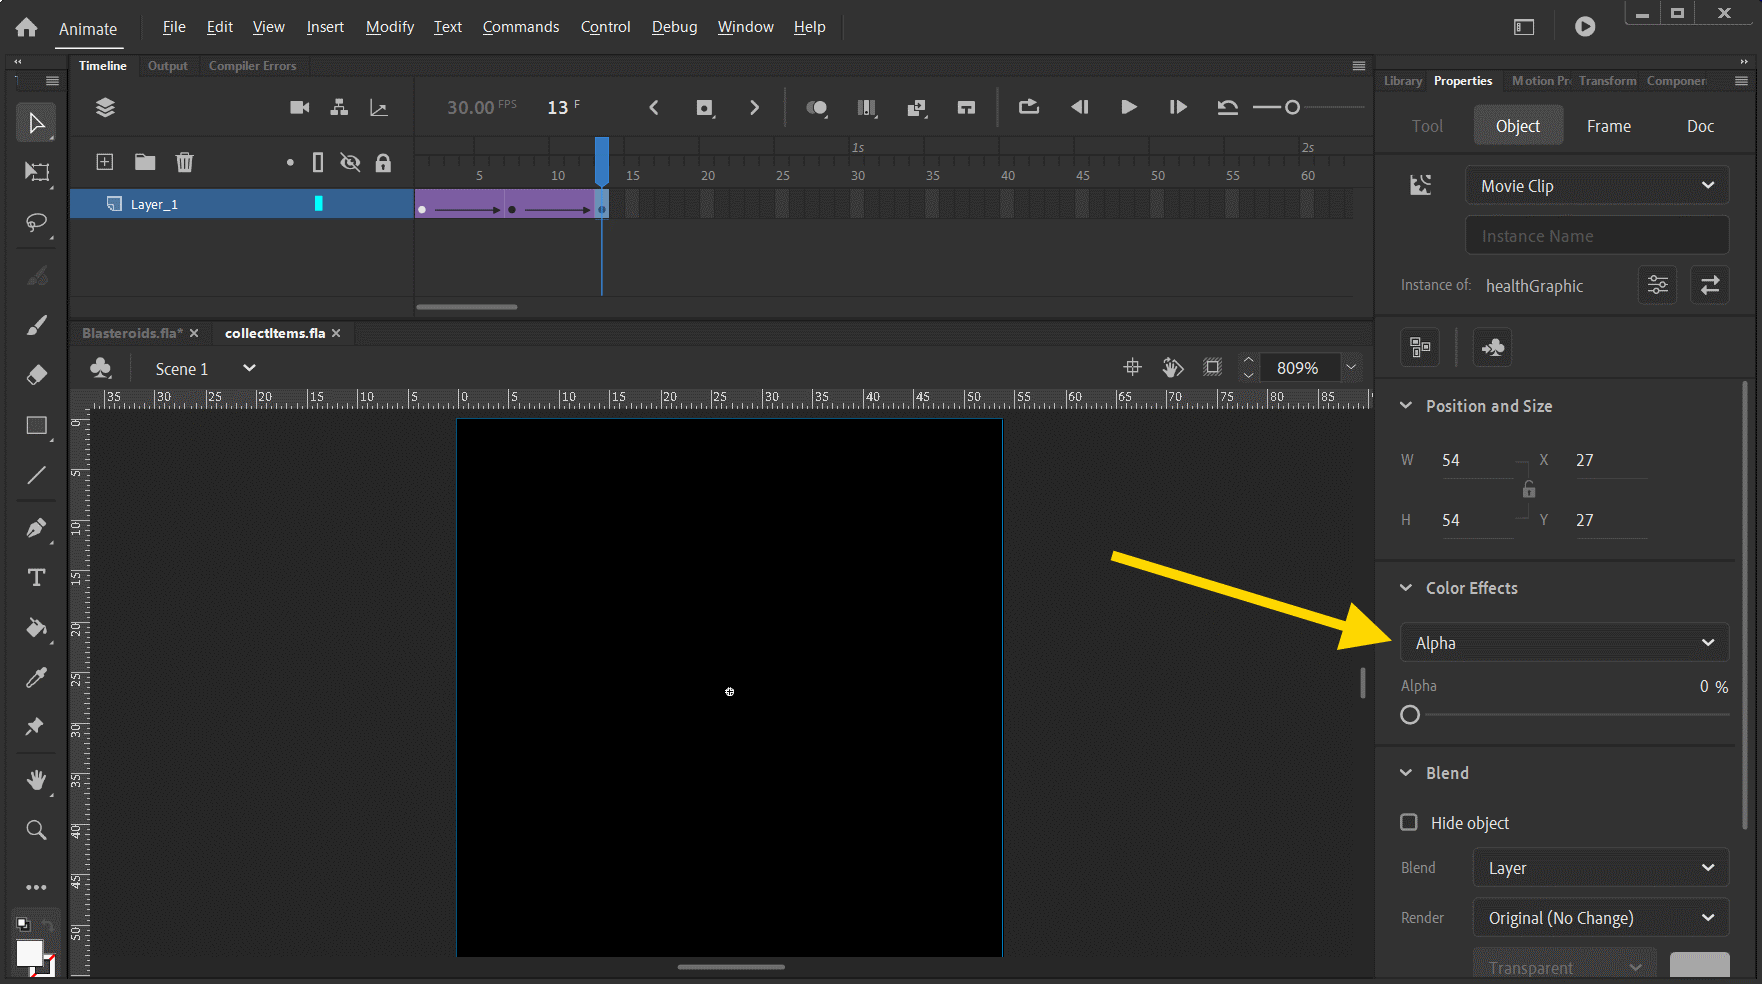
In the original Flash game, power-up items are displayed with two animation states, normal, and highlighted, as you can see from the video demo at the beginning of this article.
In Adobe Animate, the animation timeline sets up the two states like this:
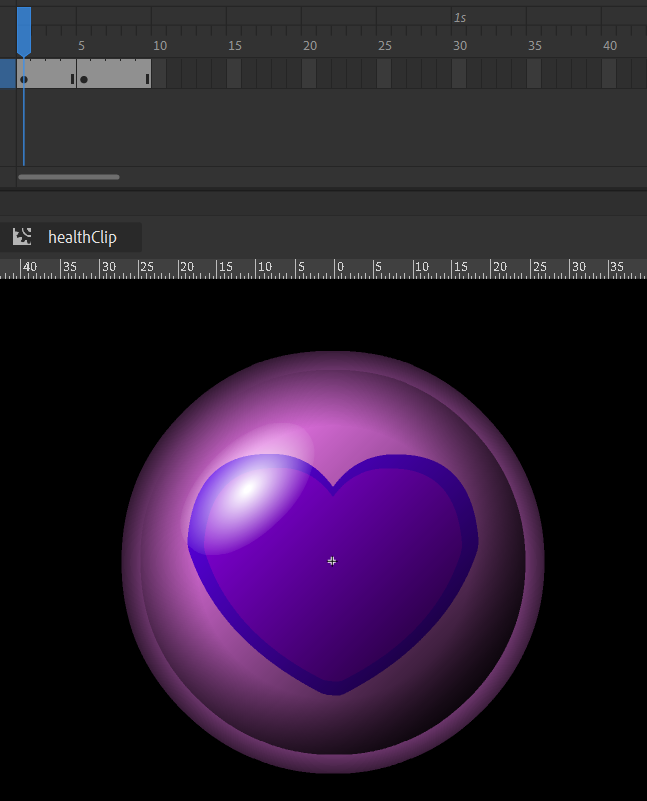
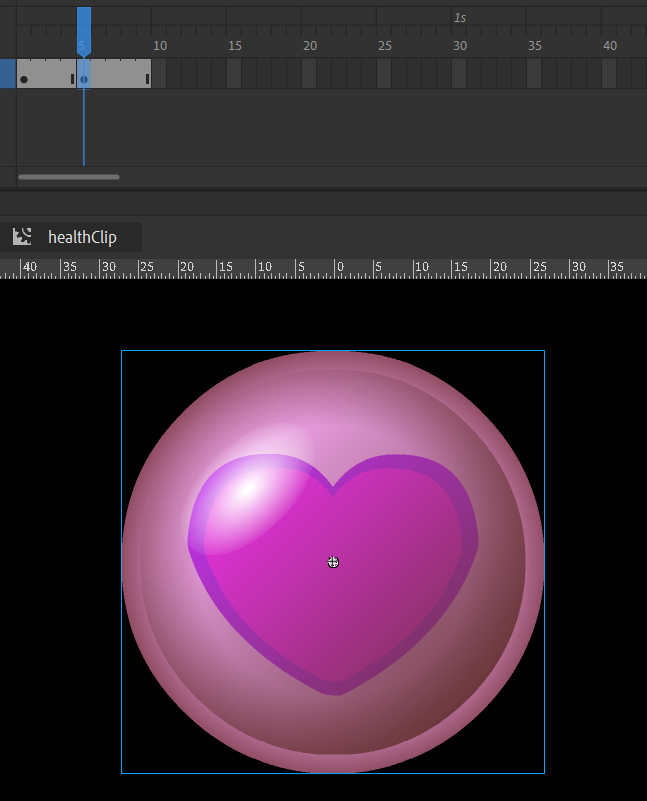
We’ll need to extract both states as bitmap images, as we’ve done previous animations. You can see this animation is nine frames in length. However, we don’t need to extract all nine, because there are only two animation states. So, we can export the graphics only on frames one and five.
Note: Adobe Animate presents a new dialog for exporting images. It presets some new functions you may find useful, but all we need here is to ensure that “Clip to Stage” is unchecked so they we extract only the complete image, without any white space or truncation. And of course, you can still use the legacy dialog if you prefer.

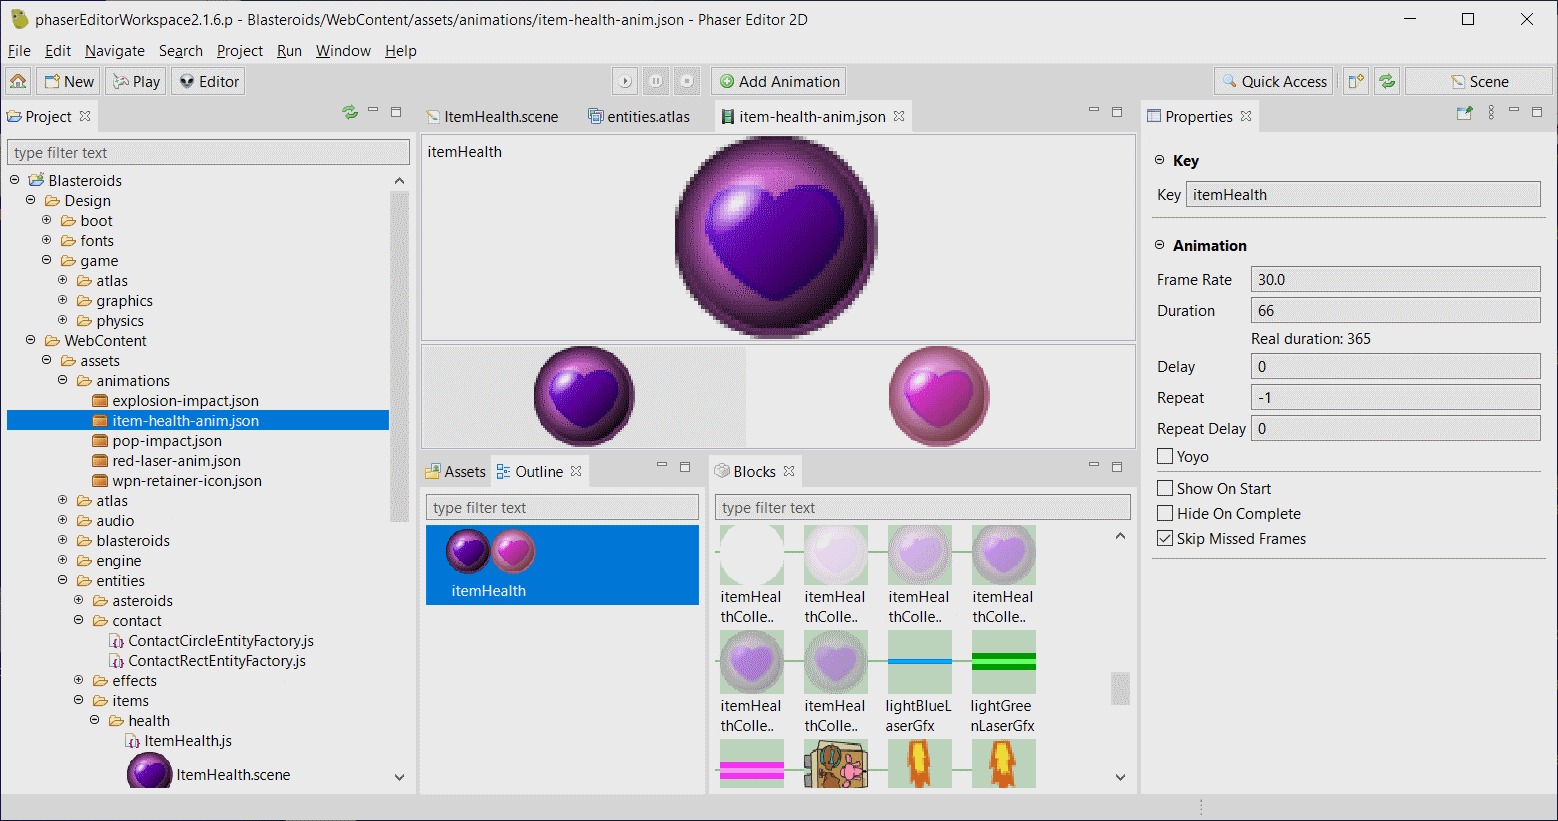
Once those two images are extracted, you can import them into Phaser Editor. You’ll then set up an animation for the item. It’s just like how the animation for the player’s ship missile was setup back in Part 3 of this article series.
Setting Up The Item Collection Animation
When the player collects an item, it’s removed from the scene. And while we could simply make the item disappear, we can add a little polish to that.
😏
If you need to, have another look at the demo video. When an item is collected, it plays a quick animation before being removed.
The original Flash did this using Greensock (GSAP) tweening ActionScript 3 code, like the following:
...
blendMode = BlendMode.LAYER;

var tlVars:Object = {
  onComplete: onTimelineCollectDone
};

var timeLine:TimelineLite = new TimelineLite(tlVars);

var ctVars:ColorTransformVars = new ColorTransformVars();
ctVars.brightness = 2;

var vars:TweenLiteVars = new TweenLiteVars();
vars.colorTransform = ctVars;
timeLine.append(new TweenLite(this, 0.25, vars));

vars = new TweenLiteVars();
vars.addProp("alpha", 0);
timeLine.append(new TweenLite(this, 0.25, vars));

timeLine.play();
...
You can see some color transformations are being applied. As we’ve already learned from this article, there’s no equivalent for applying color filter effects in Phaser 3. So, we’ll need to convert this from code to a series of bitmaps to use as an animation.
This animation can be done using an animation of three keyframes.
The first one is the original image with no effects applied.
The second keyframe will set the brightness to full white. As you can see from the above code, it sets the brightness to 2. The equivalent of this in Adobe Animate is to set the Brightness property to 100%.

The final keyframe sets the alpha property to 0%.
Now that the keyframes are in place, we can set up the duration from one keyframe to the next.
In the code above, each tween runs for 0.25 seconds (Greensock measures durations using seconds instead of milliseconds). We already know how to convert seconds to frames with this formula:frames = seconds x frames-per-second
Note: frames-per-second is set to 30, the running speed of the game.
So the number of frames is 0.25 x 30 = 7.5 frames. You can round to either 7 or 8 frames.

Finally, you’d create Classic Tweens between the keyframes to create finalize the animation.
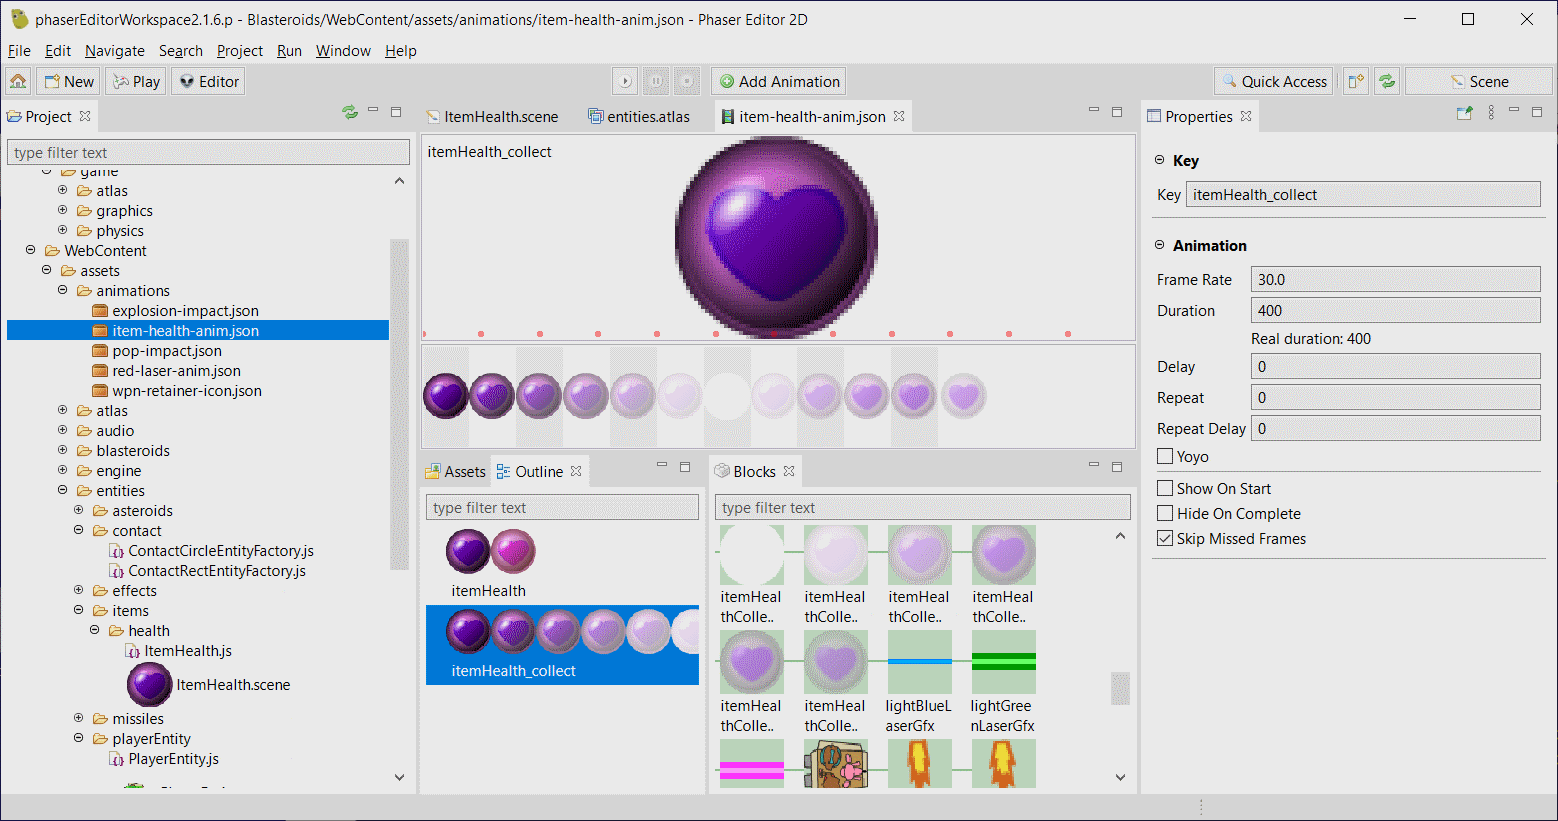
Once that’s done, then the animation can be exported as a series of bitmaps to be imported into Phaser Editor as made into an animation. You can add this animation as a separate one in the same JSON file that you created the first item animation as shown here:
2. Adding A New Collision Shape
Now that the idle and collect animations have been created, we can set up the item game object for collisions, so the player can pick it up.
If you want, you can assign the existing square node to this item, similar to how the player game object was setup here.
But, we’re not gonna do dat.
😎
Since the icon image is circular, we’re gonna set up a new circle shape!
Just like we previously created a ContactRectEntityFactory factory file, the steps are very similar to the rectangular contact factory we made.
- Create a factory class called
ContactCircleEntityFactorywith the factory namecircleContact. - Create a display object class for the factory that extends
Phaser.GameObjects.Image.
When you registercircleContactwithPhaser.GameObjects.GameObjectCreator.register, be sure not to add the display object to the display or update lists. - Just like the player object, create a new Scene in Phaser Editor. Name it
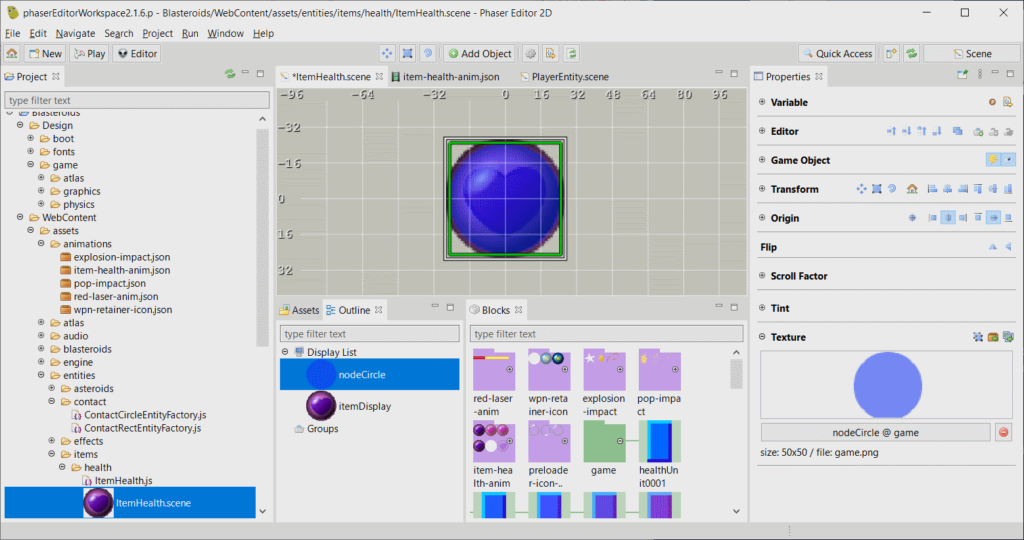
HealthItemEntity. This will be the factory display item. - In Phaser Editor, add the image that will visually represent the health item. Set its Var Name to
itemDisplay, and check the Name box in the Game Object section. Then add a circular image to theHealthItemEntityscene and assign it thecircleContactfactory. You’ll need to create a circle graphic in your graphics tool of choice. This image acts as a temporary placeholder that will determine the size (radius) of the actual circular physics body. Phaser Editor will generate code in the format of:var node = this.add.circleContact(x, y, texture, frame);
- In EntityFactory constructor, add this to the
this.addobject:circleContact: this._make_circleContact;
After the edit (this includes edits from previous articles), theaddobject should look like this:
this.add = {
  image: this._make_image,
  sprite: this._make_sprite,
  rectContact: this._make_rectContact,
  circleContact: this._make_circleContact
};
- Create a new
make_circleContactmethod for theEntityFactoryclass:
EntityFactory.make_circleContact
make_circleContact(x, y, texture, frame) {
  var img = new ContactCircleEntityFactory(this.scene, x, y, texture, frame);
  this._add(img);
  return(img);
}
- In the
Entityclass, create a Matter physics body for every display object that’s an instance of theContactCircleEntityFactoryclass.
You can obtain the bounds of a circle entity by calling the Phaser.GameObjects.getBounds() method on that contact object. Assuming you created the circular image from step 3, once you have the bounds, you can divide the width (or height) of the bounds by two to obtain the radius of the circle. You’ll need the radius when creating the circle physics body. Consider the following code for creating the body:
createCircleBody
function createCircleBody(circleEntity) {
  var bounds = circleEntity.getBounds();
  return(
    this.scene.matter.add.circle(
      bounds.centerX,
      bounds.centerY,
      bounds.width / 2,
      {
        isSensor: true
      }
    ));
}
Similar to this.scene.matter.add.rectangle, which creates a rectangular body, this time, this.scene.matter.add.circle is used to create a circular body. The highlighted line 7 specifies the radius of the circle, which is required when creating a circular body.
Now, when you create your item entity, it will have a circular physics body attached to it.
4. Player Collects An Item
From here, we can collision-check when the player touches an item. While each item has a different effect, we’ll only cover the health item here.
Since all Matter physics bodies are sensors (they don’t respond with colliding with other bodies), we can use something like this:this.scene.matter.overlap(playerEntity, itemEntity);
The function will return true if the player ship and the item are touching.
Once the player has touched the item, you should immediately remove it, so that the player can’t collect it again!
But, we don’t want to do that right away, because we wouldn’t be able to see the “item collection” animation we set up earlier.
Since collision is not handled automatically in Blasteroids by Phaser (it’s using polling by checking collisions each frame), you can add a new property to Entity. This property can be used to determine if the entity will be checked for collisions. Let’s call it Entity.canCollide, and by default (in your Entity constructor), you can set this property to true.
So when an item has been picked up, you can set this property to false.
Ok, say you store all your game entities in an array. Let’s call it gameEntities. Then, your main polling loop might look something like this:
for (var index1 = 0; index1 < this.gameEntitities.length - 1; index1++) {
  var entity1 = this.gameEntitities[index1];
  if (!entity1.canCollide) {
    continue;
  }

  for (var index2 = index1 + 1; index2 < this.gameEntitities.length; index2++) {
    var entity2 = this.gameEntitities[index2];
    if (!entity2.canCollide) {
      continue;
    }

    if (this.scene.matter.overlap(entity1, entity2)) {
      this.handleCollision(entity1, entity2) || this.handleCollision(entity2, entity1);
    }
  }
}
handleCollision
function handleCollision(entity1, entity2) {
  if (entity1 instanceof Player) {
    if (entity2 instanceof Item) {
      entity2.canCollide = false;

      //(if health item
      //add health to player, and update health text on hud
      //otherwise, handle whatever item was just collected)

      //play collection animation
      const ITEM_DISPLAY_NAME = "itemDisplay";
      var itemDisplay = entity2.getByName(ITEM_DISPLAY_NAME);

      const DATA_ANIM_ITEM_KEY = "collectAnimKey";
      var animKey = itemDisplay.getData(DATA_ANIM_ITEM_KEY);
      entity2.anims.play(animKey);

      itemDisplay.on(Phaser.Animations.Events.SPRITE_ANIMATION_COMPLETE,
        this.onItemCollectionAnimationComplete, entity2);

      return(true);
    }
  }

  return(false);
}
onItemCollectionAnimationComplete
onItemCollectionAnimationComplete() {
  this.destroy();
}
To get the name of the animation key for the collect animation, you could store it as a data property in the item entity scene.
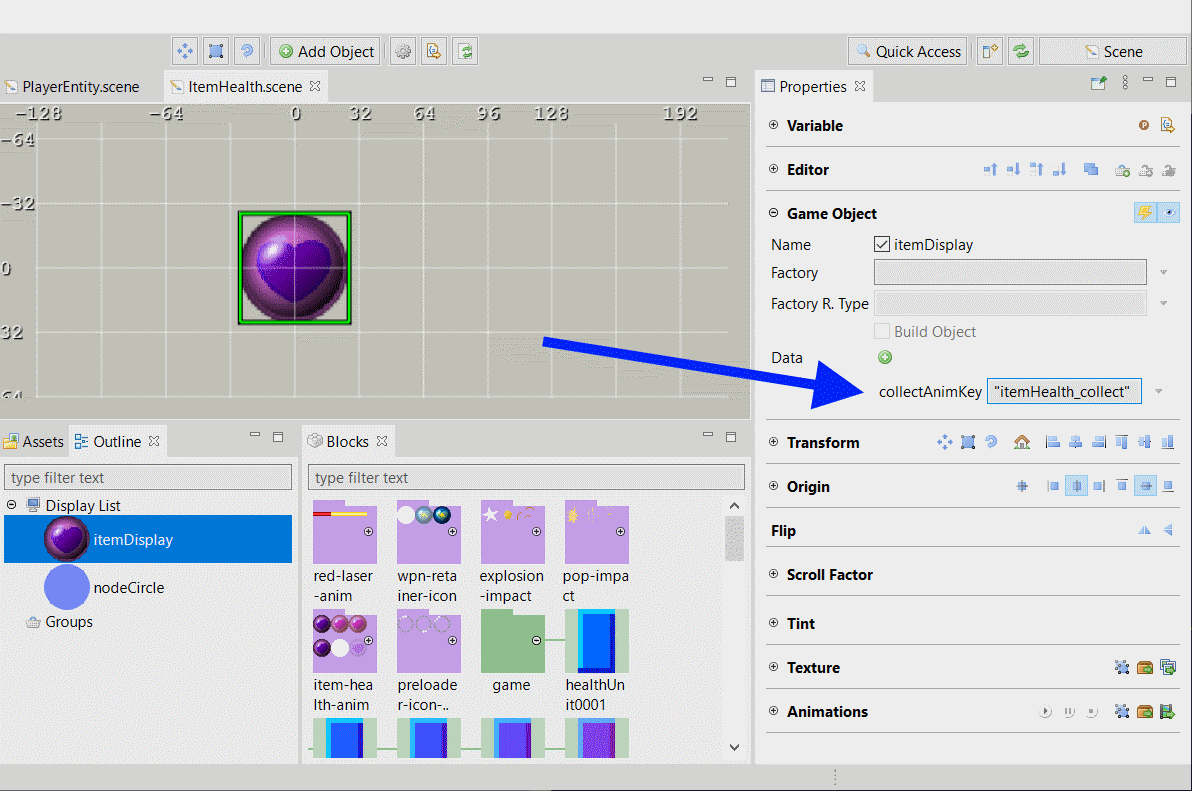
In this image, the name of date key is collectAnimKey and its value is the same value that you used as the key of the collection animation when you set it up. Also, you’ll notice that we get the item display, because the base GameObject class has the Data Manager as a property. In Phaser Editor, when you assign a data property to an object in a scene, Phaser Editor generates code similar to this:itemDisplay.setData("collectAnimKey", "itemHealth_collect");
When we’re creating an entity from our entity factory EntityFactory.DisplayMixin method, it copies the display object onto our Entity class. And in the case of our health item, we named that display object “itemDisplay”. We can get a reference to this display object with getByName. Then, we can get a data property from the underlying Data Manager using the getData method.
Note: Every item will be named “itemDisplay”. However, the name of the key of the animation key must be unique for each item to avoid animation naming conflicts within Phaser.
Also, since the item was not immediately removed when collected, because it’s playing the collection animation, you can remove the item once the animation has completed playing. This can be done using the Phaser.Animations.Events.SPRITE_ANIMATION_COMPLETE event handler. When this event is dispatched, you can finally destroy the item entity.
FYI: The Player entity class was defined back here.
The Item class has not been defined yet, but it would be similar to Player.
Item class
Item = class extends Entity {
  constructor(scene, x, y, itemEntityFactory) {
    super(scene, x, y, itemEntityFactory);
  }
}
The itemEntityFactory would be a reference to the scene that was created for the item. In this case, this would be HealthItemEntity.
That’s it for this article! Now we’ve converted an item to help the player out. Because believe you, once we get this game going with all the other threats coming at you, you’re gonna need all the help you can get. 💪🏾
Stick around as I continue making progress, converting this Flash browser game to HTML5 browser game!
Thanks, and talk to you later.
– C. out.