
Hey there,
As you’re probably aware by now, Adobe is discontinuing the Flash web browser plug-in by end of 2020. If you have Flash games, they will no longer work afterwards, as browsers, such as Google Chrome, will completely block Flash content.
If your game is to be preserved, you’ll have to re-build it for another platform, and if it’s to stay as a web-based game, then HTML5 (Canvas/WebGL) is likely your best bet.
In the last article, I was challenging myself to convert a previous Flash game called Blasteroids that I made for a previous client to HTML5.
Digging up the original source code, I jumped in. But first thing’s first. I’ve also been learning Phaser 3, and the latest version of Phaser Editor, (awesome tool by the way; I highly recommend it for Phaser game development) which supports Phaser 3.
Most of the time spent on the project so far has been figuring out how to convert resources over. Sure, I could just “make” a new Blasteroids game, but the challenge is for the Phaser version to maintain the play and feel as closely as possible to the original Flash game.
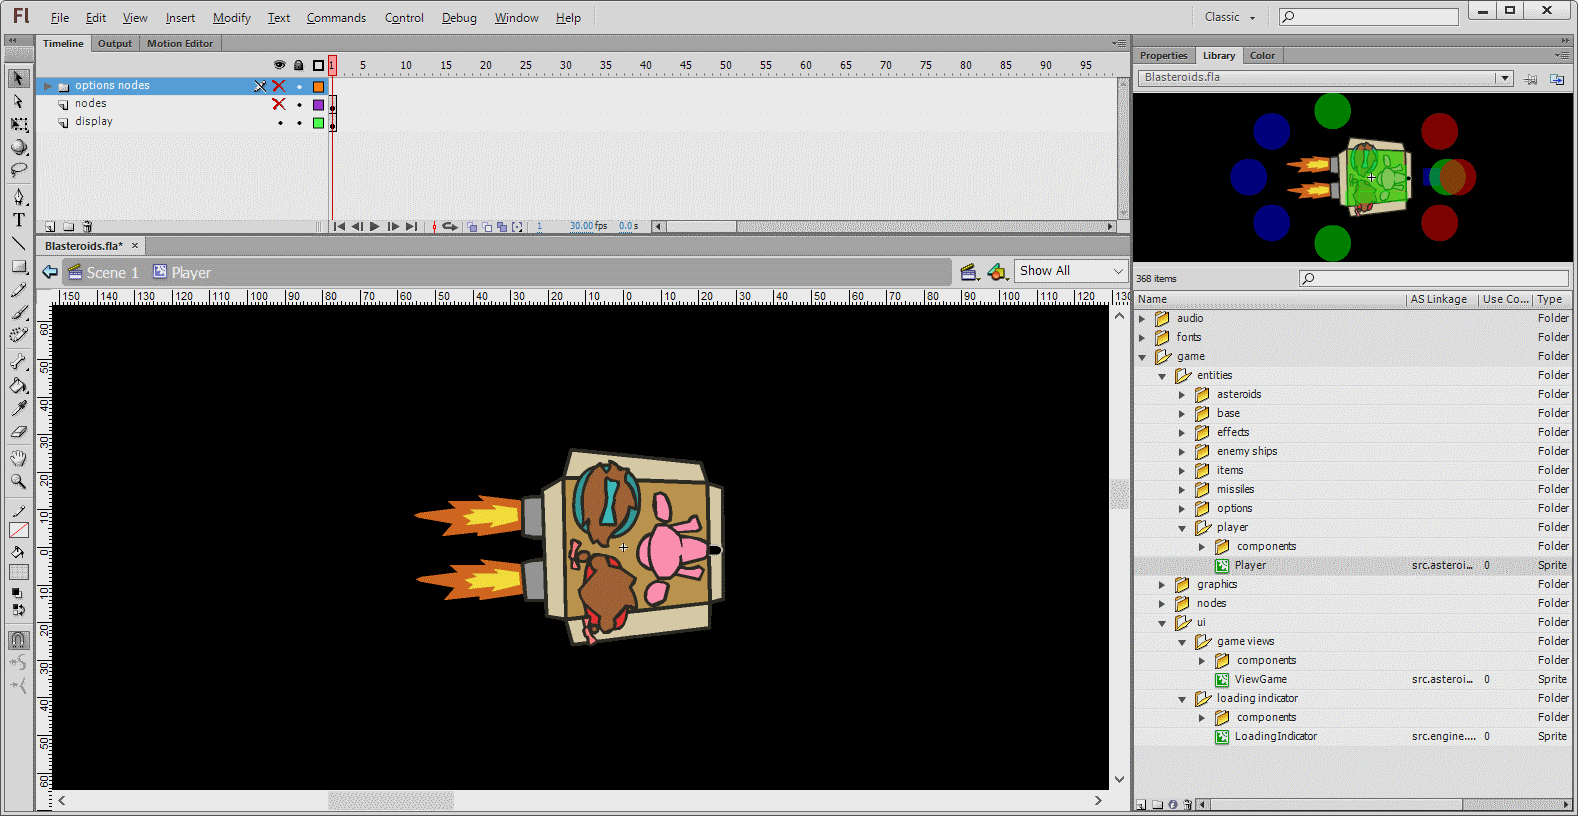
So I started with both editors, Phaser Editor, and Flash CS. I’m examining how the scene is set up in Flash CS and replicating it as closely as possible. Images and locations are super-easy to move over. However, the way that the code is assigned to the images and their underlying “game objects” will change, simply due to how Phaser interacts with the scene, and how Phaser Editor sets up images for you on the scene.
For example, in Flash, many game objects are actually a composition of several images, and not just one image. Flash uses a DisplayObjectContainer class to accomplish this, and images on the scene are based on the ‘Sprite’ class, which extends DisplayObjectContainer.
In Phaser 3, the closest matching class is Container class, which contains other images. However, there may be some potential caveats to using Containers, as noted below from the container’s help page:
It’s important to understand the impact of using Containers. They add additional processing overhead into every one of their children. The deeper you nest them, the more the cost escalates. This is especially true for input events. You also loose the ability to set the display depth of Container children in the same flexible manner as those not within them. In short, don’t use them for the sake of it. You pay a small cost every time you create one, try to structure your game around avoiding that where possible.
I’ll need to test this as I move forward and see what impact it might have. Fortunately, Blaseroids doesn’t use input events on any game objects using containers.
Another challenge is that, as of this writing, Phaser Editor does not use the Container class when creating game objects in the scene.
Adding The Player Game Object To The Scene
In the Flash version, the main player’s ship is composed of three visible images (the ship body, and two exhaust flame images). You can place this on Flash’s stage (similar to Phaser 3’s scene).
As I mentioned, Phaser 3 uses containers, but is there a way to do something like this in Phaser Editor? Not officially, but there is a workaround, which I’ll explain in two steps.
Step 1: Create The Player “Scene”
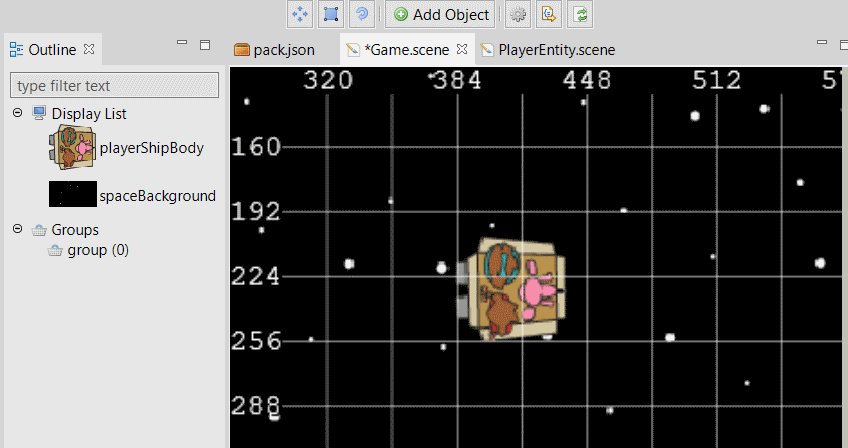
First, we need to recreate the player’s ship which is composed of the three images. The workaround is to create the player object as a scene. When you create a scene, you can add multiple images to it. The player scene would look like this:
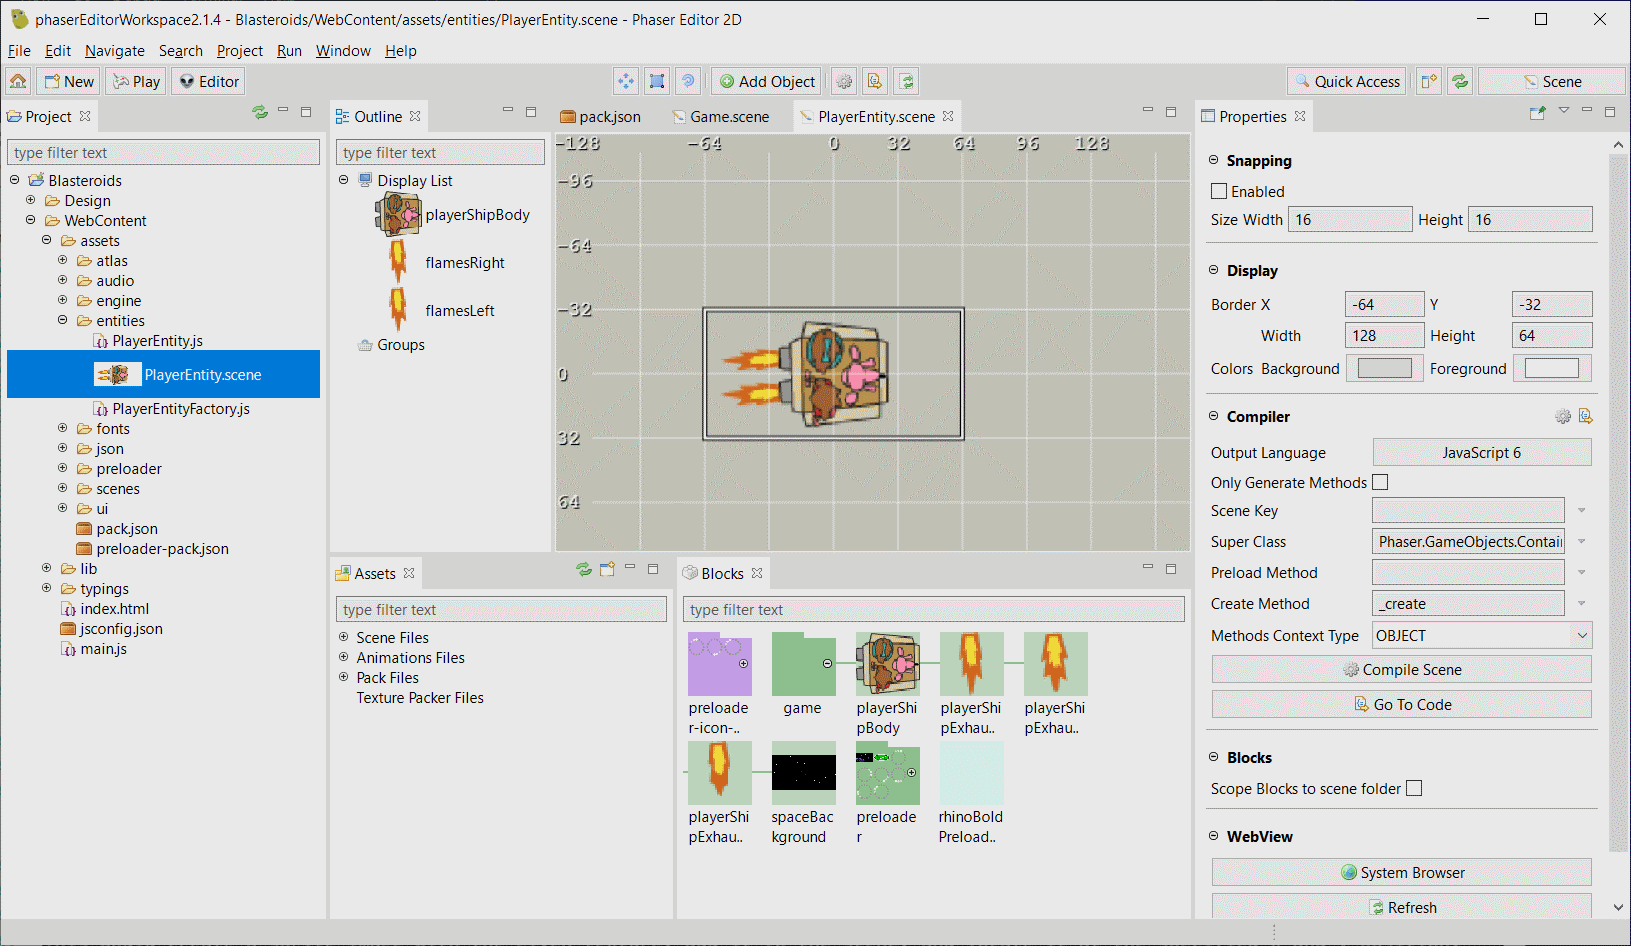
Phaser Editor automatically generates the code that will setup and position them for you. Also, there are some properties you’ll need to adjust, so that it technically won’t be a scene anymore.
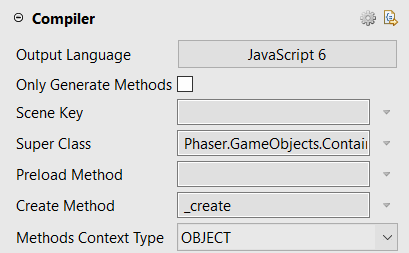
- Name the scene
PlayerEntity.scene - Uncheck the Only Generate Methods box if it’s checked
- Clear out the Scene Key
- Change the Super Class to
Phaser.GameObjects.Container - Change the Create Method to
_create - Change the Methods Context Type to
OBJECT
This gives us a container game object that contains all the ship images.
In Phaser Editor, you can’t add one scene to another (the other being whatever you;re using as your main scene to show to the player). But, you can add an image to the scene using the Add Object button located at the top of the editor.
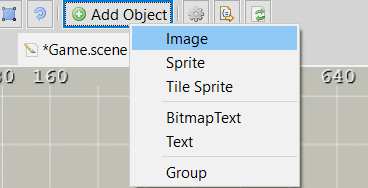
Note: You don’t need to add the flame images, just the ship body. The ship image we’re adding here is just a visual placeholder for the container game object we created earlier.
Step 2: Create The Player Factory
In Phaser, when you create game objects, you use a “factory” which allows you to quickly create many types of game objects, and have them added to your scene. Phaser has many built-in factories, for example, ‘bitmapText’, ‘group’, ‘image’ and ‘sprite’, and you can create your own. If you wanted to create a sprite and add it to your scene, you could write something like:
this.add.sprite(x, y, texture);
The this keyword references the scene that the sprite is being added to.
This would create a sprite image with the given texture, add it to the scene, and locate it at the specified x and y position.
We want to have our player container game object added to the scene, and we’ll use the player ship we added to the scene earlier. But as is, this will create just an image, and we want our container instead. Also, instead of Phaser Editor writing this for us:
this.add.sprite(x, y, texture);
it’d be nice to have it write this instead:
this.add.player(x, y, texture, frame);
Note: Although we ultimately won’t use the texture and frame here, these are created, are we can see the image in the editor.
Note the player part of the code. That is a custom factory, and Phaser allows you to create your own factories. And what’s awesome about Phaser Editor… it supports custom factories YES! 👍🏾
If you’d like more details on how Phaser Editor uses factories, have a look here.
When you create your player factory, the code might look something like this:
Phaser.GameObjects.GameObjectFactory.register("player", function (x, y) {
    var container = new PlayerEntity(this.scene, x, y);
    this.scene.sys.displayList.add(container);
    return container;
});
You want to run this code before you load your main scene, preferably, at your earliest convenience. The PlayerEntity class will come from the player scene you created earlier.
The player string registers your factory with Phaser, so you’ll then be able to write the this.add.player... code shown earlier. It would then create that PlayerEntity object, which in turn creates the three images: our player ship, and the two exhaust flames, places them inside a container, and adds that container to the scene.
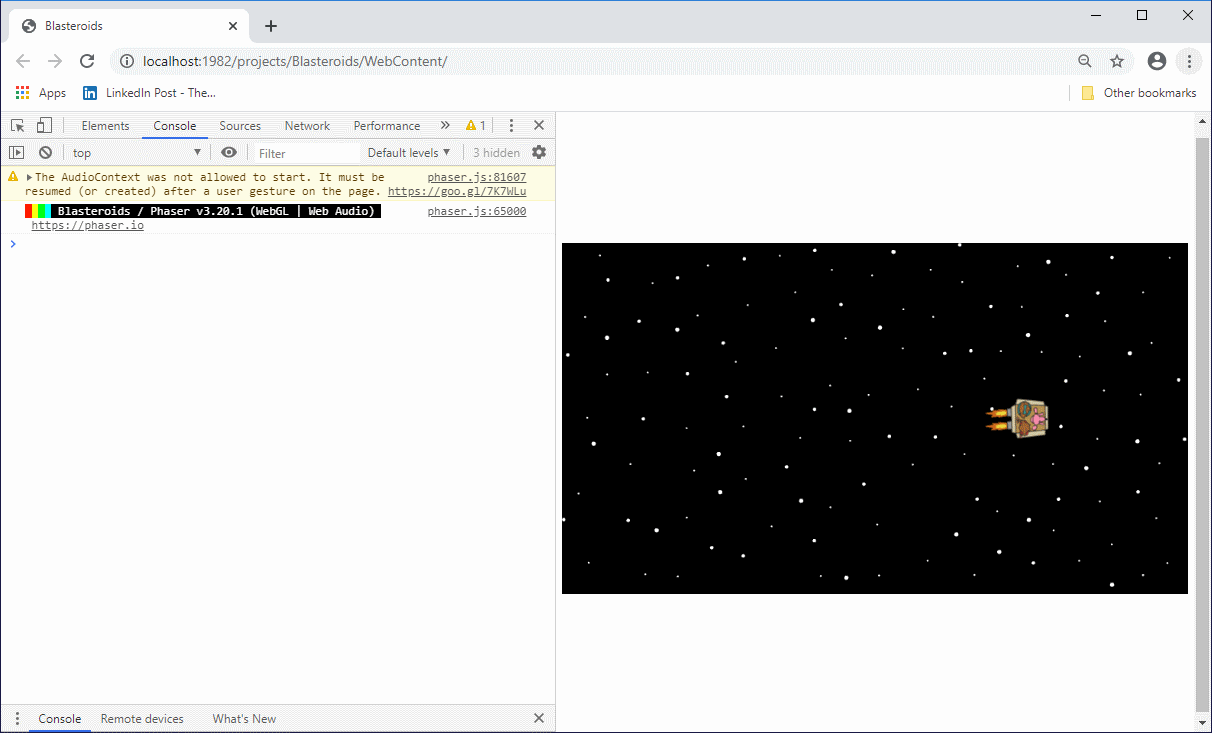
When ran in your web browser, the final output will look something like this:
That’s it for now! I’m really excited about the progress I’ve made so far, but there’s still lots of ActionScript 3 code and images to convert over. As I make more noteworthy progress, I’ll keep you updated.
Thanks, and talk to you later.
– C. out.
Hi, a very nice tutorial to understand how factories can help to create reusable objects and use type of objects not supported by the editor.
We support prefabs in Phaser Editor v1, but in v2 we had no time to implement them, because our decision to put all our energies on Phaser Editor v3, that is a complete rewrite and a web IDE. Actually, this v3 of the editor allows prefabs and containers from day 0.
In relation to the factories, use a texture atlas frame as the factory image to get this code:
this.add.player(x, y, texture, frame);
Great article!
Arian
Thanks, Arian.
I’m familiar with prefabs in v1, as I also use that version of the editor. I use both v1 and learning v2. Looking forward to v3 as well!
– C. out.
It’s just nice that you’re able to convert these even if they take some effort, it’s worth it for the preservation of the games in general and bringing them to a wider audience.
Speaking of preservation, last month, Kongrate announced a collab with a place called The Strong National Museum of Play, which has the world’s largest and most comprehensive collection of historical materials related to play. Basically, Kongregate will allow The Strong to download preserve Flash games that have been uploaded to Kongregate. In addition, The Strong would be able to display Flash games for non-commercial purposes, including archiving these games for educational and research. There are more details, for example, you can opt-out if you don’t want your game possible uploaded to The Strong (though I’d image not every single game will be uploaded – more like the creme de la creme).
But yeah, they do take some effort, especially if you want to emulate the original play, mechanics, and feel as closely as possible (:
– C. out.