

Hey,
Part 4 of the Flash-to-HTML5 game series is here! Added score, level, and lives text to HUD, health bars, and power up icons.
As you’re probably aware by now, Adobe is discontinuing Flash by end of this year. If you have Flash games, they will no longer work afterwards, as browsers, such as Google Chrome, will completely block Flash content.
So, if you want to preserve your Flash, you’ll have to re-build it in another platform, and if it’s to remain as a web-based game (meaning you’re NOT converting it from web to mobile), then HTML5 (Canvas/WebGL) is likely your best bet.
I previously announced that I was taking on the challenge to convert a Flash game I made for a previous client to HTML5. This will be presented in a series of articles, including this one.
The current list of articles is here:
- Part 1 – Setting up the player
- Part 2 – Displaying objects, keyboard input, and object wrapping collisions
- Part 3 – Missiles, animations, and HUD
- Part 4 – Adding text, health, and icons to HUD (this article)
Let’s get started! The updates covered in this article are:
- Adding text to the HUD
- Adding power-up icons to the HUD
- Adding player health bar to the HUD
Here’s a quick video of what’s done so far. This demonstrates functionality for text, health bars, and icons:
Adding Text To The HUD
First, let’s add text that shows the player’s score, level and score.
Adobe Animate uses fonts installed on the system, and can embed those fonts directly into the Flash SWF file when the project is compiled. This allows players to view the fonts, even if they don’t have the fonts installed on their system.
However, you can’t embed a font into an HTML5 game. While Phaser does allow you to use fonts that are available to the browser, you’ll either need to use CSS or a third-party font loading library, because Phaser does not handle this for you.
An alternative is to go “old-school” and put all the characters of the font into a sprite-sheet and using that to draw text onto the scene. This is the route we’ll choose, because this is supported by Phaser, it renders faster, and we don’t need to mess around with CSS, or come up with silly workarounds just to make sure our font is pre-loaded. 🙄
Phaser uses a BitmapText object to support this. BitmapText objects use two resources: a texture that has all the characters in it; and a data file (in XML or JSON) that describes how to find all the fonts in the texture.
There are a few third-party tools that you can use to create your resources:
- Bitmap Font Generator (free for Windows)
- Littera (free, runs in Browser)
- Glyph Designer (commercial for Mac)
Note: While Littera runs in the browser, it is a Flash app. Depending on which when you are reading this article, Flash may have already been disabled/no longer available in your browser. As far as I know, there is no non-Flash equivalent of this app. So, because of this, and because I’m on Windows 10, I’ll be using Bitmap Font Generator.
The only characters Blasteroids needs are the numbers 0-9, so in your font tool, you only need those.

When creating your texture and data file, you’ll get two files: a texture image and data file. For the data file, select XML format if possible.
Note: You may need to rename the extension of your data file to .XML before adding to your Phaser project. For example, Bitmap Font Generator uses a .FNT extension.
After you have your two files, you can go to Phaser Editor, and press Add Object, then select BitmapText. Note that when you position and size your text, it won’t line up at the exact same location as it did in Adobe Animate, so you’ll have to match it manually as best you can. You can add this font for all three text objects (lives, level, and score).

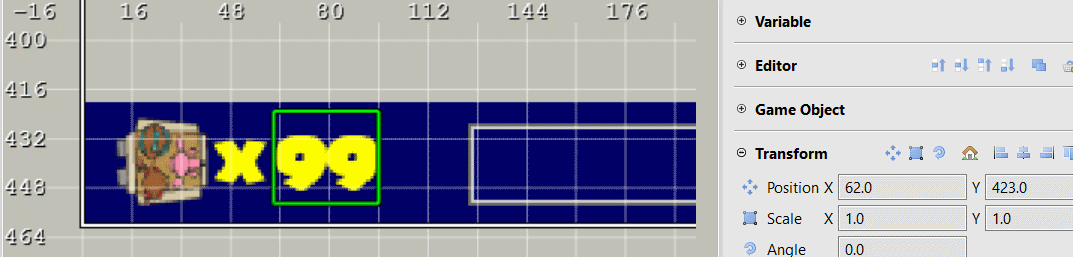
Notice in the image above that the text is yellow. While Littera allows you to color the font before exporting the texture, Bitmap Font Generator does not. You’ll end up with a white font by default. You’ll need to re-color the font in a bitmap editor before importing into Phaser Editor.
Adding Health Bars To The HUD
Next, we’ll add the player’s health bars.
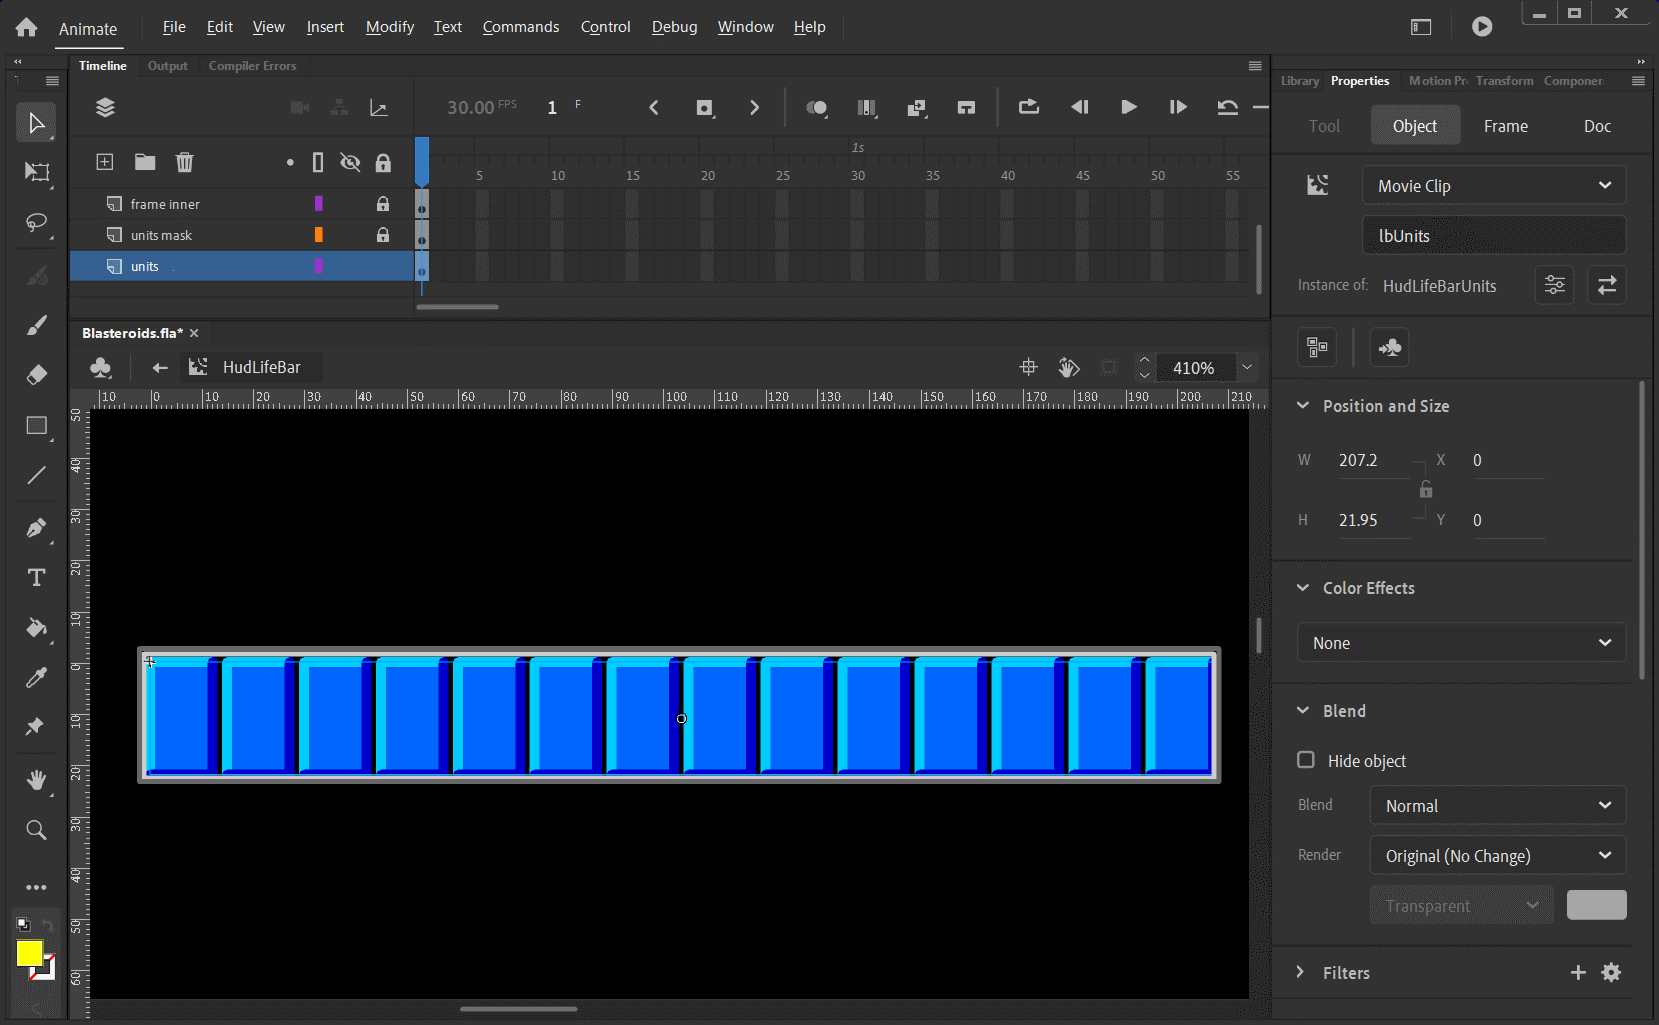
It’s composed of 14 bar units, so we’ll need to export the individual bar graphic.
Also, if you recall the first video in this article, you’ll see how the health goes up and down. This is done using an image mask. A mask can be used to hide part or all of an image. The mask only shows the parts of the image where both, the mask and the image intersect.
When the player’s health is full, we don’t want to show mask. This makes it so the mask wont intersect the health bars, thus showing all of them. As the player’s health decreases, we show more of the mask. The lower the player’s health, the bigger the the size of the mask, this intersecting with more health bars, ultimately, hiding more of them.
We can create a mask that is rectangular in shape and will overlap all 14 health bars.

We can adjust the size of this mask by changing its scaleX property. At full health, scaleX would be 1.0 (showing 100% of the health bars). Say the player has only 25% health. The scaleX of the mask would be set to 0.25.
To create the actual mask, we need two objects. First, we can create a rectangle that assumes the size and position of the white box in Phaser using a Graphics object. Second, in order to make this rectangle into a mask, we can create a GeometryMask object, then attach the Graphics rectangle to it.
This code snipped can accomplish that:
var rectangle = new Phaser.GameObjects.Graphics(gameScene);
rectangle.x = whiteMaskBox.x;
rectangle.y = whiteMaskBox.y;
rectangle.fillRect(0, 0, whiteMaskBox.width, whiteMaskBox.height);
var mask = new Phaser.Display.Masks.GeometryMask(gameScene, rectangle);
To modify the size of the mask (which in turns, affects how many health bars are visible), something like this can be used:
var ratio = player.health / player.maxHealth;
mask.geometryMask.scaleX = ratio;
The geometryMask property of the mask refers to the rectangle Graphics object created and assigned to it.
Changing Health Bar Colors
One more functionality for health bars we need to convert from Flash to HTML5 is changing the health bar colors.
The starting color for the health bars is blue, and the ending color is red. In Adobe Animate, the color change is done by creating a Color Filter and adjusting the hue starting from (0, blue) to (150, red).
My first idea was to use the tint property of a Phaser Image and apply that as needed. However, setting the tint didn’t re-create the same blue-to-red appearance as demonstrated in the above video.
And since there’s currently no equivalent “ColorMatrixFilter” in Phaser 3, we’ll have to get creative again. 😏
In Adobe Animate, we can create a timeline animation where the health bars change from blue to red using our desired color filter settings. I decided to make the transition from blue to red a duration of 16 frames, which produced a decent resolution.

You can then change the texture of each health bar unit using the Phaser.GameObjects.Image.setTexture method.
Adding The Weapons Retainer Icon To The HUD
The final functionality is adding the icons to the HUD.
For the dual-icons, these are very simple, consisting of exporting the icon images, then creating images from them, so I won’t go into detail on those.
However, there is one icon that animates as it appears and disappears, the “weapons retainer icon”.
(Normally, when your ship is destroyed in Blasteroids, you’ll lose all your power-up items – as with most action/shooter games from back in the day. However, if you have this weapons retainer, it will allow you to keep your other power-up items once per usage.)
This icon uses color filters, like the health bars, so we’ll need to export it as individual frames as well. However, this time, it was originally done in Flash using code via a third-party library called the Greensock Animation Platform (GSAP).
When the icon first appears, it starts at twice its size, and is completely white, then quickly scales down to its original size, and the white fades away, revealing the original icon appearance.
Note: While Phaser has its own built-in tweening support, I decided to switch from Greensock’s AS3 version of their tweening library (which has already been discontinued) to their JS version. For the most part, you can copy Greensock’s tweening code over from AS3 to JS with little modifications for basic tweening operations.
Consider the following code for making the weapons retainer icon appear.
var timeline:TimelineLite = new TimelineLite(o_tlVars);

var ctVars:ColorTransformVars = new ColorTransformVars();
ctVars.brightness = 2;

var vars = new TweenLiteVars();
vars.colorTransform = ctVars;
vars.scaleX = 2.0;
vars.scaleY = 2.0;
timeline.append(TweenLite.from(icon, 0.25, vars));
timeline.play();
Note: The classes of TimelineLite, ColorTransformVars TweenLite, and TweenLiteVars all come from Greensock’s library.
A couple things happening here. First, the icon starts completely white (brightness set to 2), and twice its original size (scales set to 2.0).
To make the icon completely white, a color transformation is applied, with the brightness gradually decreasing. As mentioned before, there are no color transformation effects in Phaser, but this tween animation is simple enough to recreate as a sprite animation in Adobe Animate.
From the timeline code above, the tween animation has a duration of 0.25 seconds (Greensock uses seconds for its time durations, instead of milliseconds). We need to figure out how many frames 0.25 seconds so we can create a timeline animation on the stage with that many frames. We can use the following formula:

This gives us 7.5 frames. However, we can only use whole numbers for frames. So, let’s go ahead and round that up to eight frames (or you could use seven if you want 🙂 ).
When re-creating the animation in Phaser Editor, specifying the duration, you can use this equation to convert frames to milliseconds. The short of it is:
milliseconds = frames / 30 * 1000
Full details of the equation are here.
That’s it for this article! With every update, I’m really excited about the progress made and what I’m learning about Phaser, the editor, and the conversion process in general. As I continue to make more noteworthy progress, I’ll keep you updated!
Thanks, and talk to you later.
– C. out.