
Hey,
Welcome to part 3 of this series of converting the Blasteroids Flash game to HTML5!
As you’re probably aware by now, Adobe is discontinuing Flash by end of this year. If you have Flash games, they will no longer work afterwards, as browsers, such as Google Chrome, will completely block Flash content.
But, Flash is not the only Adobe technology being discontinued. Announced on May 30, of 2019, Adobe is also discontinuing Adobe AIR by end 2020. If you’re interested, you can read more details here.
So, if you want to preserve your Flash, you’ll have to re-build it in another platform, and if it’s to remain as a web-based game (meaning you’re NOT converting it from web to mobile), then HTML5 (Canvas/WebGL) is likely your best bet.
I previously announced that I was challenging myself by creating this side project to convert a previous Flash game I made for a previous client to HTML5.
The current list of articles is here:
The current list of articles is here:
- Part 1 – Setting up the player
- Part 2 – Displaying objects, keyboard input, and object wrapping collisions
- Part 3 – Missiles and HUD (this article)
With further ado, let’s dive right in. The progress covered in this article are:
- Adding a player missile
- Adding HUD details
Here’s a quick video of what’s done so far:
1. Adding A Player Missile
Well, you won’t be able to survive for long if you can’t even fire weapons to defend yourself, right? (: So let’s add a missile projectile to the game.
Blasteroids contains over 20 missiles, but at this time, we’re only adding this one (think of it as an MVP). The remaining missiles are added in similar fashion.
A little background on how the player’s weapons system is designed.
When I was first building Blasteroids, I got inspiration from Gunstar Heroes, a run and gun game on the Sega Genesis. That game featured a “weapons combination” mechanic. There were four weapons, and you could hold any combination of one or two of them at once. If you had two, they would combine to form a stronger weapon.
Well, in Blasteroids, I did something similar. I took a series of weapons, and gave them various 2-weapon combinations, hence having so many missile objects.
With that, let’s convert the player’s default missile.
Setting Up The Missile Animation
In the Flash version, most missiles were made of a two-keyframe animation.
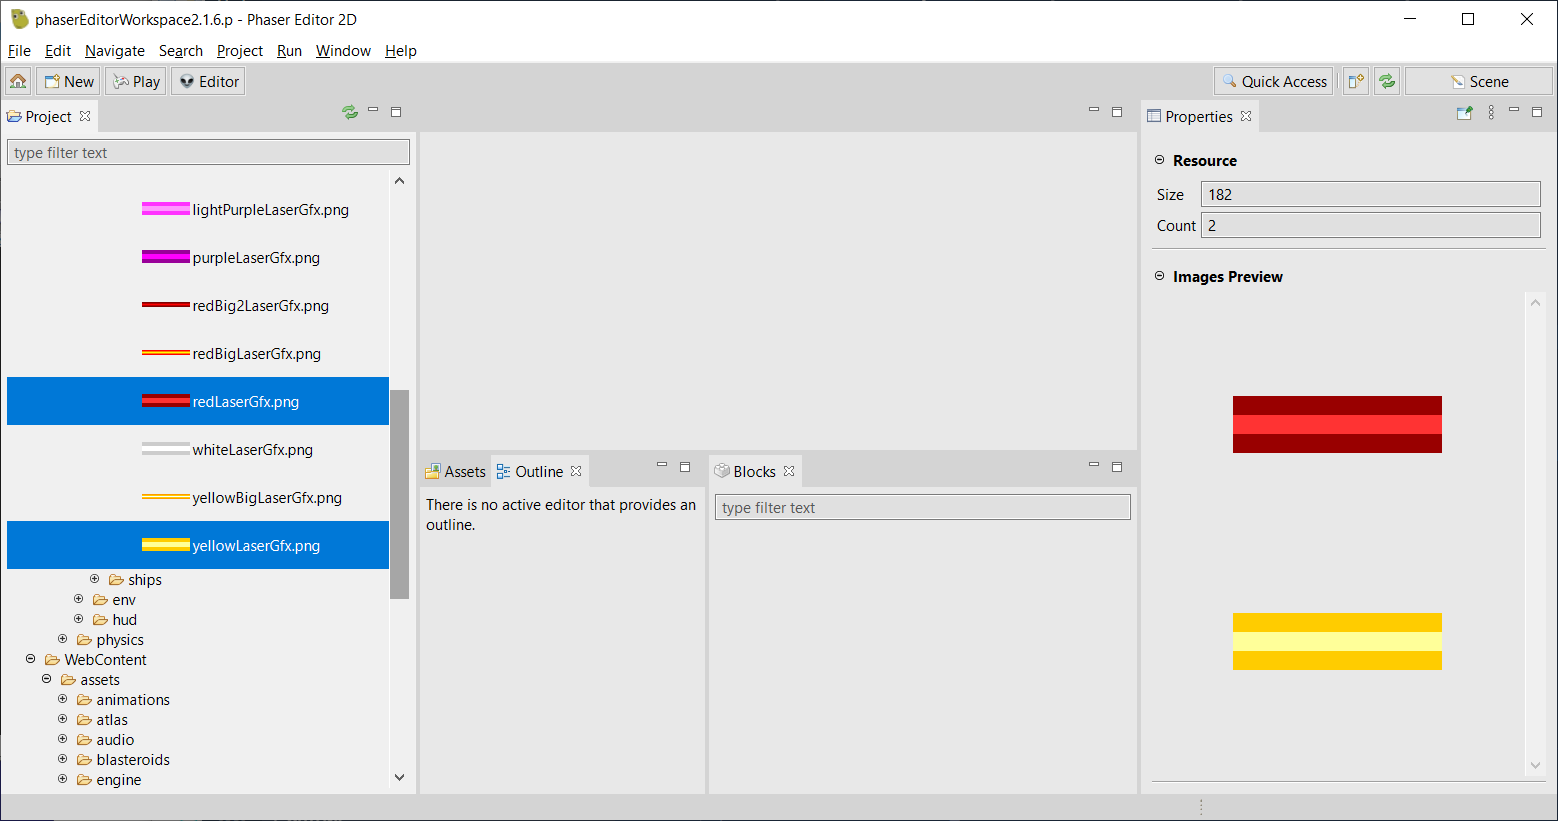
First thing’s first. You need to extract both vector graphics, the red and the yellow lasers, and save them as PNGs. I eventually added them to the game’s texture atlas, which you can easily set up in Phaser Editor.
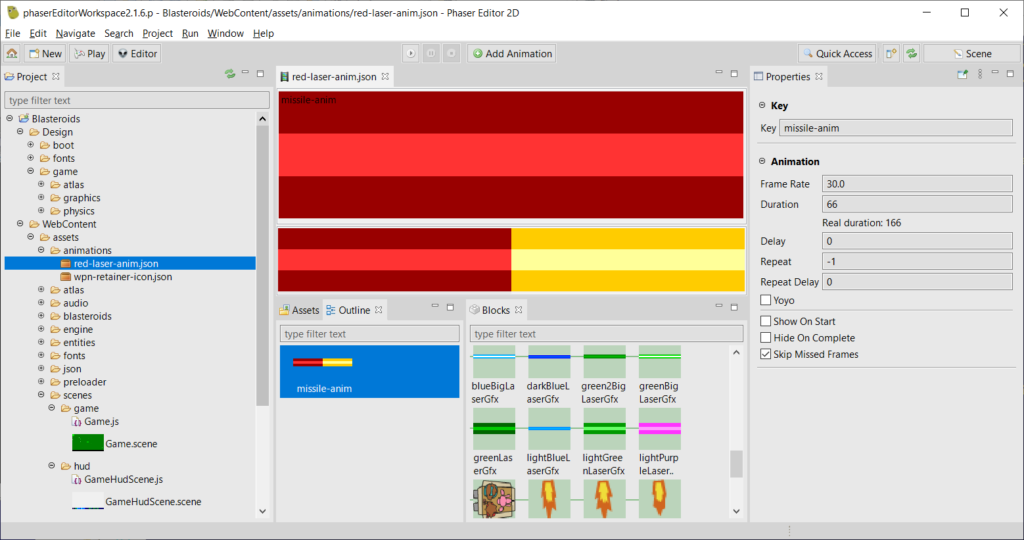
Next, you can create a Phaser animation using those two graphics inside the Editor.
Remember: I want the HTML5 version of Blasteroids to maintain the look and feel of its original Flash counterpart as much as possible. This includes animation speeds and how long each of animation frame is shown.
In a previous article, I added code to make the game appear to run at 30 FPS (frames per second), as the browser runs at 60 FPS, and you can’t change that. So at 60, the game runs too fast.
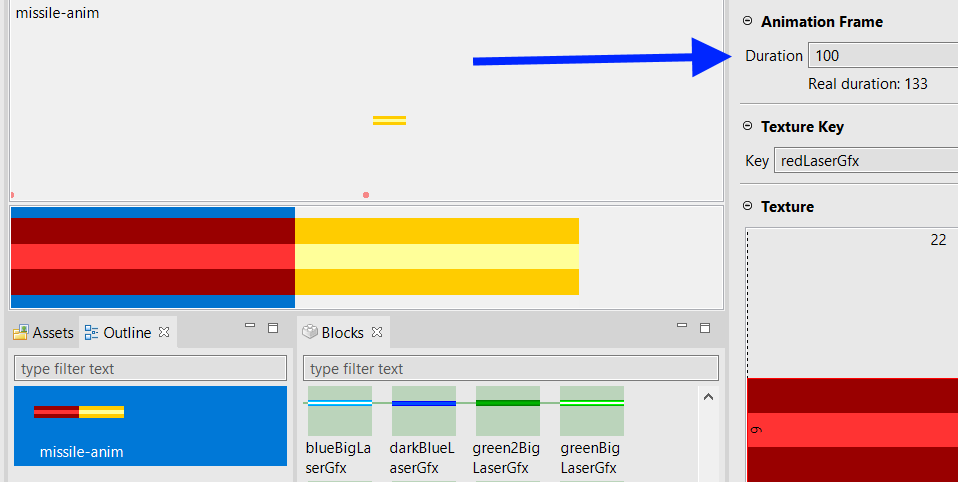
With that in mind, let’s have another look at the original animation frames in Flash. From the image below, that animation is composed of six frames: the first three showing the red laser graphic, and the remaining three showing the yellow laser graphic:

Each frame in that animation is shown for one frame of execution. And each of the two laser images lasts for three frames. But Phaser doesn’t measure duration in frames; it uses milliseconds. So we need a way to convert 3 frames (running at 30 FPS) to milliseconds. This formula is used:
Frames-To-Milliseconds Equation
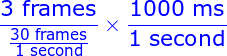
Both “frames” units cancel each other out, as well as both “second” units. The only unit left is ms (milliseconds), which is what we want.

Now we can do the math:3 / 30 x 1000 => 3000 / 30 => 100
So, each animation frame in Phaser Editor will be 100 ms in duration.
Setting Up The Missile Object
Now that the missile animation is ready, we can setup the game object that will be displayed when the missile is fired in-game.
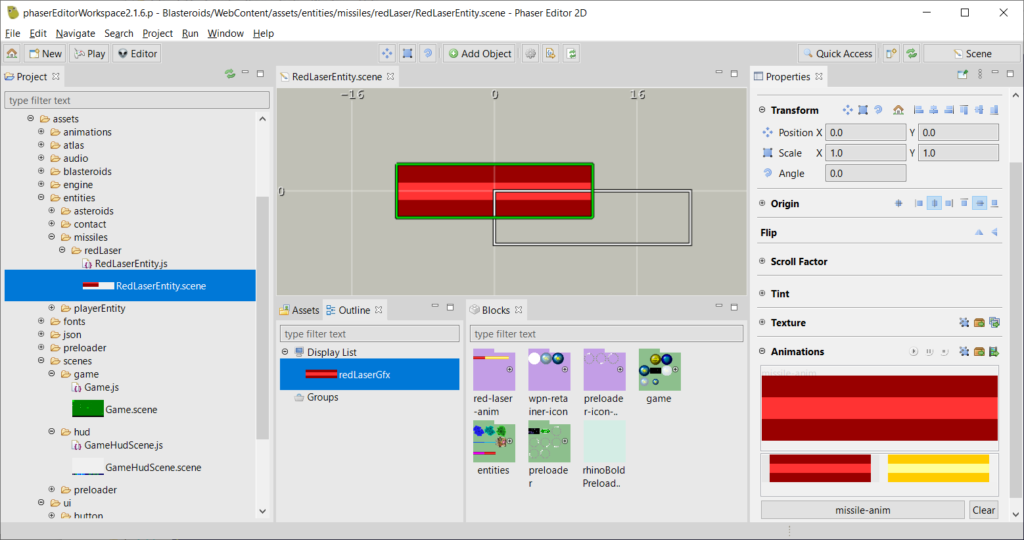
First, create a new Scene in the Editor, add a Sprite. Make sure to add a Sprite, not an Image, because Phaser sprites support animation, while images do not. Be sure it is positioned at (0, 0) on the scene, and assign it the red laser graphic.
Next, select the image, go to the Animations section, and assign it the missile animation you just created. Just like how the player ship object was set up, assign the Super Class as EntityFactory.
We’ll be revisiting the EntityFactory class, because we need to replace the add factory for Phaser Sprite objects similar to what we did with Image objects in the last article.
We’ll need to update the EntityFactor constructor also:
EntityFactor constructor
constructor(scene, x, y) {
  super(scene, x, y);
  this._add = this.add;
  this.add = {
    image: this.make_image,
    sprite: this._make_sprite
  };

  this.add.image = this.add.image.bind(this);
  this.add.sprite = this.add.sprite.bind(this);
}
The highlighted lines are the new line added. As you can see, the first one references a new function make_sprite, which is written below. The second one maps this.add to the base Phaser Container object.
EntityFactory.make_sprite
make_sprite(x, y, texture, frame) {
  var spr = new Phaser.GameObjects.Sprite(this.scene, x, y, texture, frame);
  this.scene.sys.updateList.add(spr);
  this._add(spr);
  return(spr);
}
Note the highlighted line. Unlike make_image, we want to add the sprite to Phaser’s “update list”. Objects that are added to this list will be updated every frame of Phaser execution. The sprite uses animation, and animations need to be updated every frame, so they can, well, animate 🙂
Finally, to create an instance of the missile (when the player “fires” a missile), you’d use the Entity constructor, passing the class of the missile factory scene display you created earlier.
Note: You may have noticed there is no green collision box like there was with the player scene. Since this missile is a rectangle itself, you can simply add a physics body with the same bounds as the missile graphic itself. See EntityFactory.make_rectContact for this. Of course, you can still add a green collision box if you want. (:
2. Adding HUD Details

We’ll begin creating the HUD (Heads Up Display) in this article. But for now, we’re not going to add any functionality to it. We’ll just be adding all the static objects (those that don’t change), and merging them to form the back panel bitmap of the HUD.
Elements like the text, power up icons, and health bars will be created in a later article.
In this image, I’ve temporarily hidden all the non-static objects, then converted the image to a bitmap to be imported into Phaser Editor.
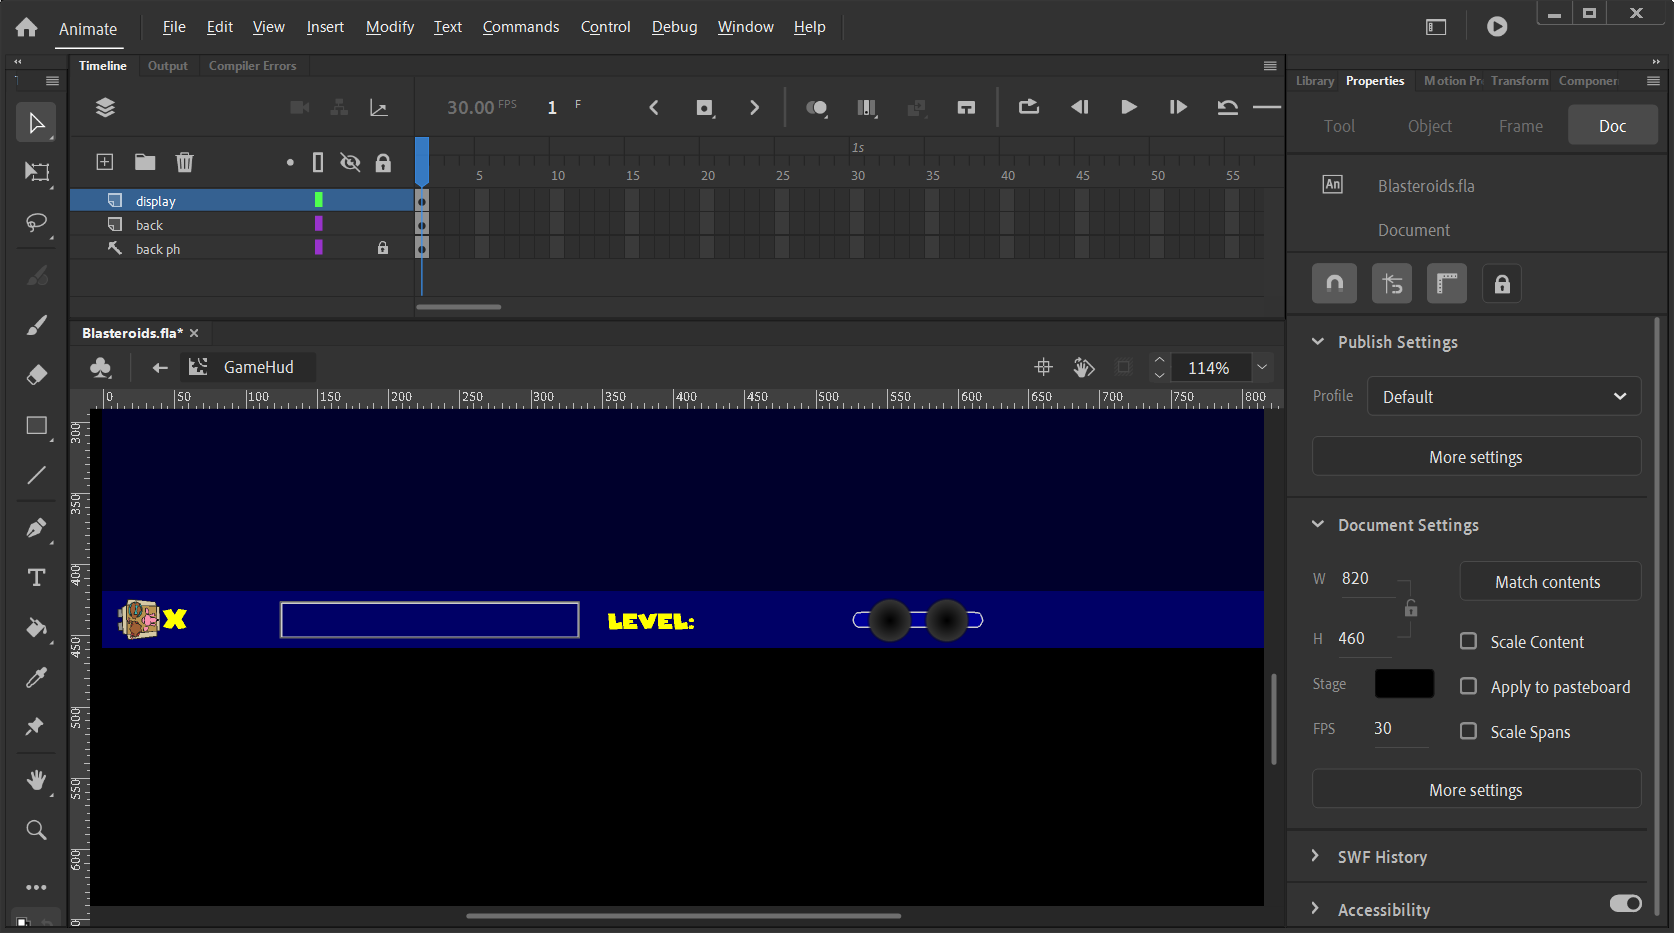
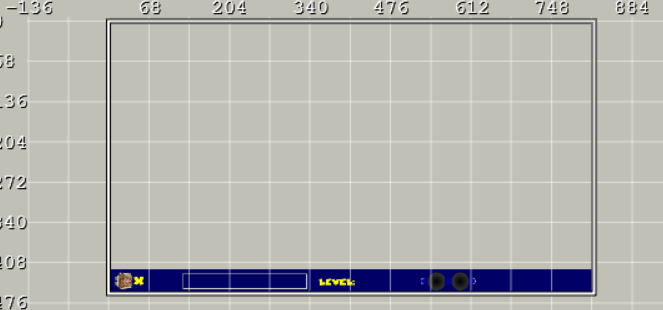
The HUD is another scene, but it is not a game object to be setup like the player or missile. Because the HUD will be shown on screen along with the rest of the game, you can see the HUD is placed at the bottom of the scene view (The original Flash Blasteroids game used a screen size of 820 x 460, so we also use that in the HTML5 version.) The HUD objects placed at the bottom, because you can’t set the position of a scene; it’s always offset at (0, 0) (at least, I don’t know of any way to reposition a scene, if someone knows how, please let me know! 🙃)
I want to keep the HUD code separate from the other game logic, so the HUD will be an additional scene added to the game scene at run-time.
At the same time, I prefer not to add game logic code to the JavaScript scene files created by Phaser Editor. So, I’ll be using object composition, by creating a GameHud class, and from within, creating the GameHudScene.
GameHud constructor
class GameHud {
  constructor(gameScene) {
    this.scene = gameScene.scene.add("gameHud", GameHudScene, true);
  }
}
This code creates the game HUD scene as a new Scene object and adds it to Phaser’s scene manager.
From your main game scene, you can create an instance of the GameHud class with some code that looks like this:
Game constructor
class Game {
  constructor(scene) {
    this.gameHud = new GameHud(this);
  }
}
We’re passing the game scene as the argument for the GameHud instance, so that it can in turn create the GameHudScene, and add it to the scene manager.
That’s it for this article. Next, we’ll add more to the game HUD, including text that shows the lives, current level, and score, the health bars, and game icons. Stick around for more!
– C. out.