It’s been a minute since I’ve posted an update on the multiplayer poker game I’m working on, but it’s still on. While client work has kept me preoccupied for the most part, a lot of progress – and learning has been underway! 😎
Yeah, it’s been quiet around here… a little too quiet…
Ahem, without further ado, have a look at this video, which shows the WIP running in two different browser windows.
An interesting situation happened in this video. OF COURSE, the game would present it while I’m recording, haha! 😅
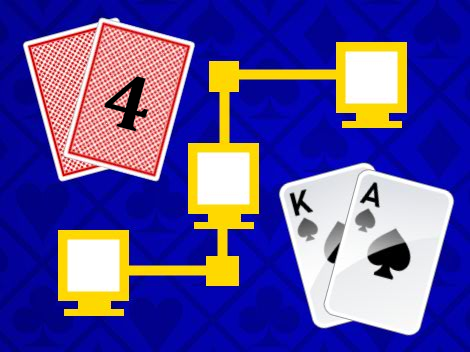
First off, there were four Straights. But that’s not even the most interesting part.
When more than one player wins, they all split the pot. Here, the pot was split four ways. It just happens to result in a fraction – each player winning (30 / 4 = 7.5) – which shouldn’t happen, because the lowest denominator I’m designing for is 1 chip – not partial chip. So I’ll need to correct that…
🤔
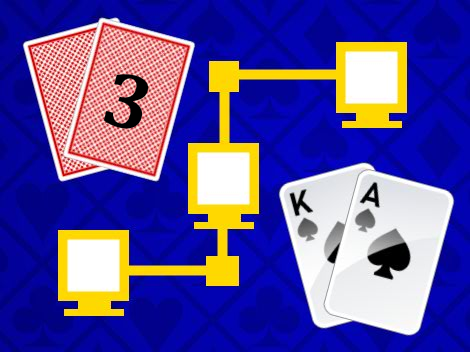
Hmm… well, I could leave it, but that might give the impressions that you can do something with a partial chip value – which you can’t. Or, I could distribute the chips like this:
(2) players win 8
(2) players win 7
I might want to look this one up to see how real poker games handle this situation!
What are your thoughts on how this should be handled?
The poker rules logic is mostly done, so I’ve been spending a lot of time on the back-end logic.
In between rounds, you’ll be able to:
Join a game if you were watching as a spectator (if there are any open slots – max players is six).
Watch a game if you were playing (there is no limit to the number of spectators, but there is currently nothing that shows how many people are watching. I might make an 👁 icon with a number next to it, and stick it in a corner or something.
Leave the game room and return to the lobby.
What I’m currently working on is handling those untimely situations of a player leaving a game mid-game, either because their connection died, or they closed their browser tab.
Leaving a game mid-game messes up the state, because the server and all the players need to be updated on who just left, so I’ll need to improvise here.
My original strategy was to treat it as the player folding, then when the round ends, automatically remove said player from the game. But this caused a problem, because if a player’s connection is lost, their socket is also gone. So, I decided to abruptly remove them from the game, forfeiting their hand.
Leaving mid-game also causes problems if it also happens to be the turn of the player who left. The decision here was to simply move to the next player’s turn.
Every game needs to have a dealer (D), a small blinds (SB), a big blinds (BB), and a host.
Note: The host is not part of poker – that’s a design for this particular game. By default, the host is the person who originally create the game room. The host is also responsible for starting each game when all the players are ready. The host is indicated by the ⭐ icon. When playing offline (yes, there is a single-player mode as well), there is no host.
So, if the D, SB, or BB leaves, then the next person (to their left) automatically assumes that role. It’s also perfectly normal for one player to have more than one role.
There’s also a lobby where players will go once they’ve connected to the server. Here you’ll be able to chat with other players, host your own game, or join an exiting game. Both hosting and joining are demonstrated in the video.
Finally, if you’d like to get in when the first playable beta is ready before the game is released, sign up on my mailing lest here. You’ll also receive updates on other projects as I work on them.
The form you have selected does not exist.
I can’t wait to have this one finished. Definitely a challenge worth completing!
And I don’t care what anyone says. Coding a multi-player game is a LOT harder than it’s single-player counterpart. 🤨
Continuing the series of building a multiplayer poker game, some progress has been made on the game. Development is coming along great using Phaser Editor v3!
A Bit More Technical Setup
I’m using several technologies, as mentioned in the first article of this series, and as I’m moving forward, I’m continuing to make adjustments to my development environment.
Since the game will perform as both a single-player and multiplayer game, I’m working on the single-player aspect first.
The game will be split into two primary projects: one for the client-side, and the other for the server-side.
Both will use common logic for running the game, and to avoid having to duplicate code across both projects. I made a secondary project, which is acts as a “common” repo for sharing code that will be used by both projects.
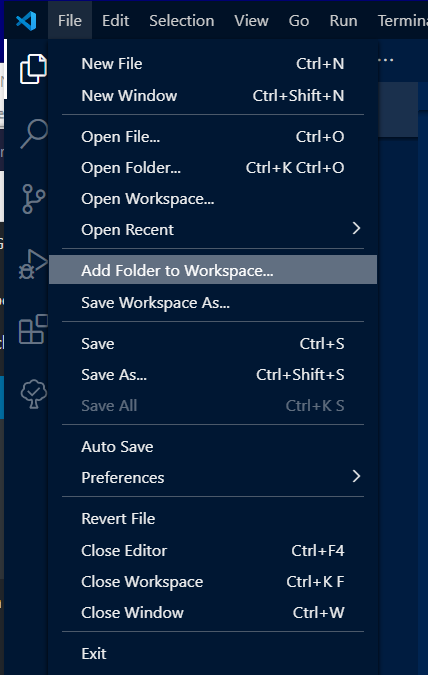
Since the common folder is outside of the client project root folder, I made come adjustments to VSCode to allow it to “see” this external folder and add it to the workspace.
The common folder is in the same folder as the client project (and server project). In order for Webpack to add the common files and folders to the build process, I made some adjustments to the webpack.config.js file. The alias inside of the resolve also makes the import statements look cleaner in VSCode.
I’m learning the rules of poker as I build this game, and the journey has been quite interesting. 🙂
The order in which the players take their turns was fairly straightforward. Play starts with player left of the dealer, small blind (SB). The player left of the SB is the big blind (BB). Play goes clockwise around the poker table.
The object of poker is to win all the money in the pot. You do this by having the best poker hand at the end of the game. Your hand must be built from any combination of two cards that you’ll eventually be dealt (the “hole” cards), plus the five community cards that will eventually be dealt. As players make their turns, they can place bets by adding money to the pot. The player who wins the game (by having the best poker hand) at the end of the game wins all the money in the pot.
The game is split up into rounds and each round doesn’t end until every player has contributed an equal amount of money to the pot.
To start the game off, the SB posts a forced bet bet of 1bb, and the BB posts another forced bet of 2bb, twice the SB’s.
After both blinds make their bets, each player is dealt two face-down cards. (You can see your own cards, of course 😉)
Image taken from Batman The Animated Series, Episode: “Almost Got ‘Im”.
When it’s the next player’s turn, if they wish to stay in the game, they must “call” by matching the BB’s bet of 2bb.
When play returns the the SB, they need only post 1bb, since they posted the initial 1bb star started the game. After this, all players still in the game (who haven’t quit, or folded) have posted an equal amount of 2bb.
After all players have placed equal bets the betting round comes to a close, and the first three of five community cards, the flop, are dealt, face-up in the center of the table.
The round begins again with the player nearest the left of the dealer. This would be the SB if They haven’t folded. Each players has the following moves:
Check: Pass to the next player without making a bet.
Bet: Increase the current bet by posting additional money into the pot. If a player does this, all other players must either match this bet, fold, or re-raise. More on re-raise later.
Fold: Forfeit their place in the current game. Their hand is surrendered face-down. Note that they can return to play the next game.
Call: If a previous raise has been made, the player can call by matching the previous bet.
All-In: If a player does not have enough money to match the current bet, and they wish to stay in the game, they must go “all in”, betting all their remaining chips. Note that if the player does not win this game, they will lose all their money and be out of the game!
Once the flop round is complete, the fourth community card is dealt, called the turn. Betting begins again with the player left of the dealer. And the round ends once all players have posted equal amounts to the pot.
Note: It is possible to no players to make any bets during a betting round by simple calling each time. But that would make for a slow and boring game, IMO. Maybe that’s the rookie talkin’, haha! 😆
Once the turn round is complete, the fifth and final community card is dealt, called the river.
Ahem! Anyway, betting begins again with the player left of the dealer. And the round ends once all players have posted equal amounts to the pot.
After this round ends, the showdown begins!
During the showdown, all players still in the game reveal their hands, and the player with the best hand wins the pot. If you’re curious, you can learn more about the poker hands here.
Re-Raising
Back to the concept of re-raising. This is when a player raises the bet, then another player raises again after them. Depending on the type of poker being played, the rules for determining the minimum (and maximum) amounts you can raise will vary. Since I’m coding a game using the rules by No-Limit, the maximum you can bet is all your available chips. However, the minimum you can bet can be a little trick to figure out, because it’s simply not just “double what the big blinds bet”.
I’m still working on this part, but I think I’ve got it (if not close 😅). Of course, if you’re an expert on calculating the minimum amount for re-raising in No-Limit 1/2 poker, please comment and correct any of my assertions. That would be greatly appreciated. 👍🏾
When re-raising against previous raise, the minimum amount must be at least the amount raised by the previous player. Take this example below.
Pot size is 6bb. Player 1 bets 4bb. Player 2 raises to 10bb. What would be the minimum raise for Player 3?
First, let’s have a look at the wording used. Player 2 raised to 10bb. However, Player 2 actually increased the bet amount by 10 – 4 = 6bb. So, the minimum Player 3 will need to raise by is 6bb.
This would be a total raise size of: 10 (previous player’s total raise to) + 6 (minimum raise by) = 16bb.
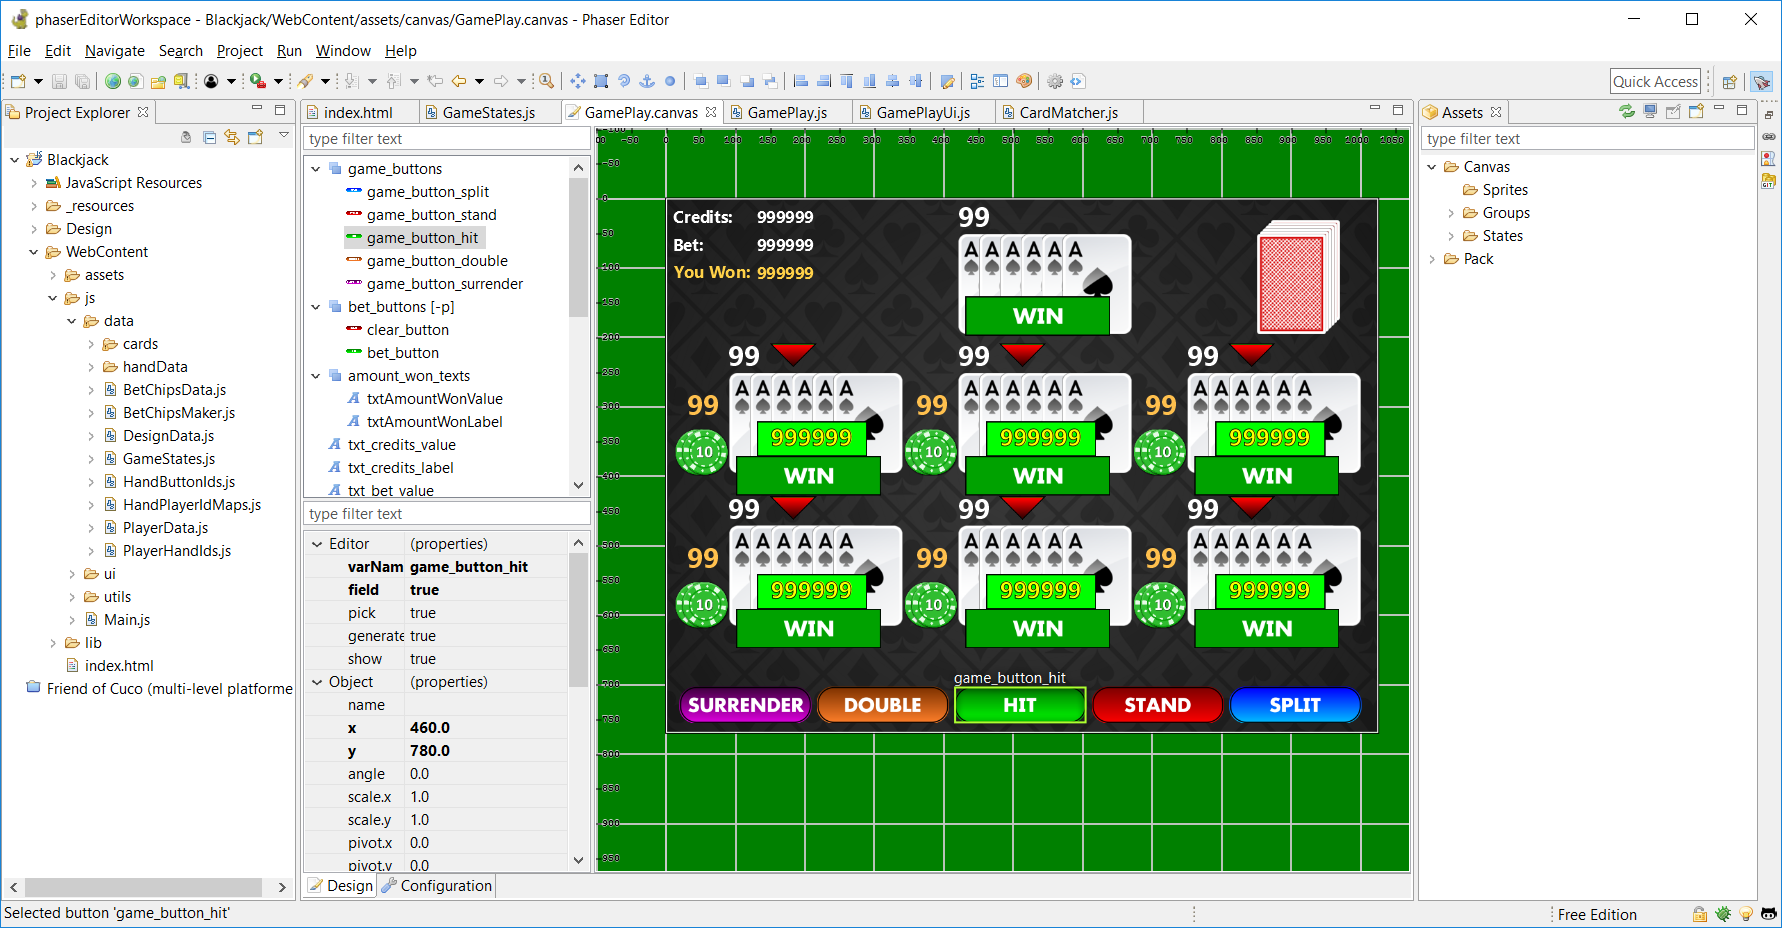
Back To The Game Dev
As I close this article, here’s a screen shot of the current progress. I’m currently working on the raise (and re-raise!) implementation, as well as a few other functions, such as folding and going all-out.
After that, I’ll move on to the showdown functions and determine the winner among the various conditions.
That’s all for now. I’ll continue to keep you updated as I make progress.
Finally, you can sign up using the form below to receive updates to playable builds (or at least interactable builds) as I make noteworthy progress.
So, if you want to preserve your Flash, you’ll have to re-build it in another platform, and if it’s to remain as a web-based game (meaning you’re NOT converting it from web to mobile), then HTML5 (Canvas/WebGL) is likely your best bet.
I previously announced that I was taking on the challenge to convert a Flash game I made for a previous client to HTML5. This will be presented in a series of articles, including this one.
Part 4 – Adding text, health, and icons to HUD (this article)
Let’s get started! The updates covered in this article are:
Adding text to the HUD
Adding power-up icons to the HUD
Adding player health bar to the HUD
Here’s a quick video of what’s done so far. This demonstrates functionality for text, health bars, and icons:
Adding Text To The HUD
First, let’s add text that shows the player’s score, level and score.
Adobe Animate uses fonts installed on the system, and can embed those fonts directly into the Flash SWF file when the project is compiled. This allows players to view the fonts, even if they don’t have the fonts installed on their system.
However, you can’t embed a font into an HTML5 game. While Phaser does allow you to use fonts that are available to the browser, you’ll either need to use CSS or a third-party font loading library, because Phaser does not handle this for you.
An alternative is to go “old-school” and put all the characters of the font into a sprite-sheet and using that to draw text onto the scene. This is the route we’ll choose, because this is supported by Phaser, it renders faster, and we don’t need to mess around with CSS, or come up with silly workarounds just to make sure our font is pre-loaded. 🙄
Phaser uses a BitmapText object to support this. BitmapText objects use two resources: a texture that has all the characters in it; and a data file (in XML or JSON) that describes how to find all the fonts in the texture.
There are a few third-party tools that you can use to create your resources:
Note: While Littera runs in the browser, it is a Flash app. Depending on which when you are reading this article, Flash may have already been disabled/no longer available in your browser. As far as I know, there is no non-Flash equivalent of this app. So, because of this, and because I’m on Windows 10, I’ll be using Bitmap Font Generator.
The only characters Blasteroids needs are the numbers 0-9, so in your font tool, you only need those.
This is Bitmap Font Generator, with only the numbers selected.
When creating your texture and data file, you’ll get two files: a texture image and data file. For the data file, select XML format if possible.
Note: You may need to rename the extension of your data file to .XML before adding to your Phaser project. For example, Bitmap Font Generator uses a .FNT extension.
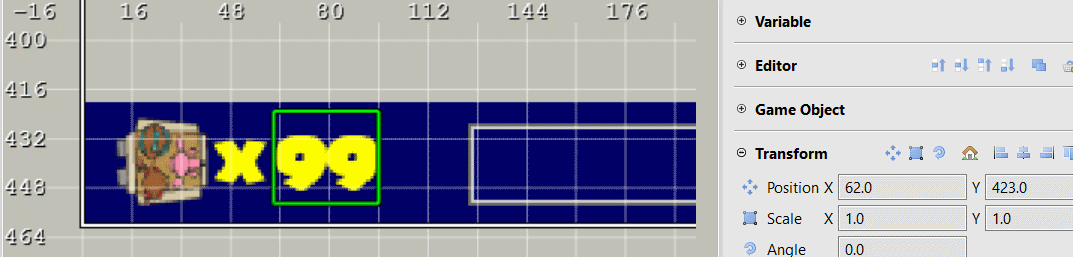
After you have your two files, you can go to Phaser Editor, and press Add Object, then select BitmapText. Note that when you position and size your text, it won’t line up at the exact same location as it did in Adobe Animate, so you’ll have to match it manually as best you can. You can add this font for all three text objects (lives, level, and score).
Notice in the image above that the text is yellow. While Littera allows you to color the font before exporting the texture, Bitmap Font Generator does not. You’ll end up with a white font by default. You’ll need to re-color the font in a bitmap editor before importing into Phaser Editor.
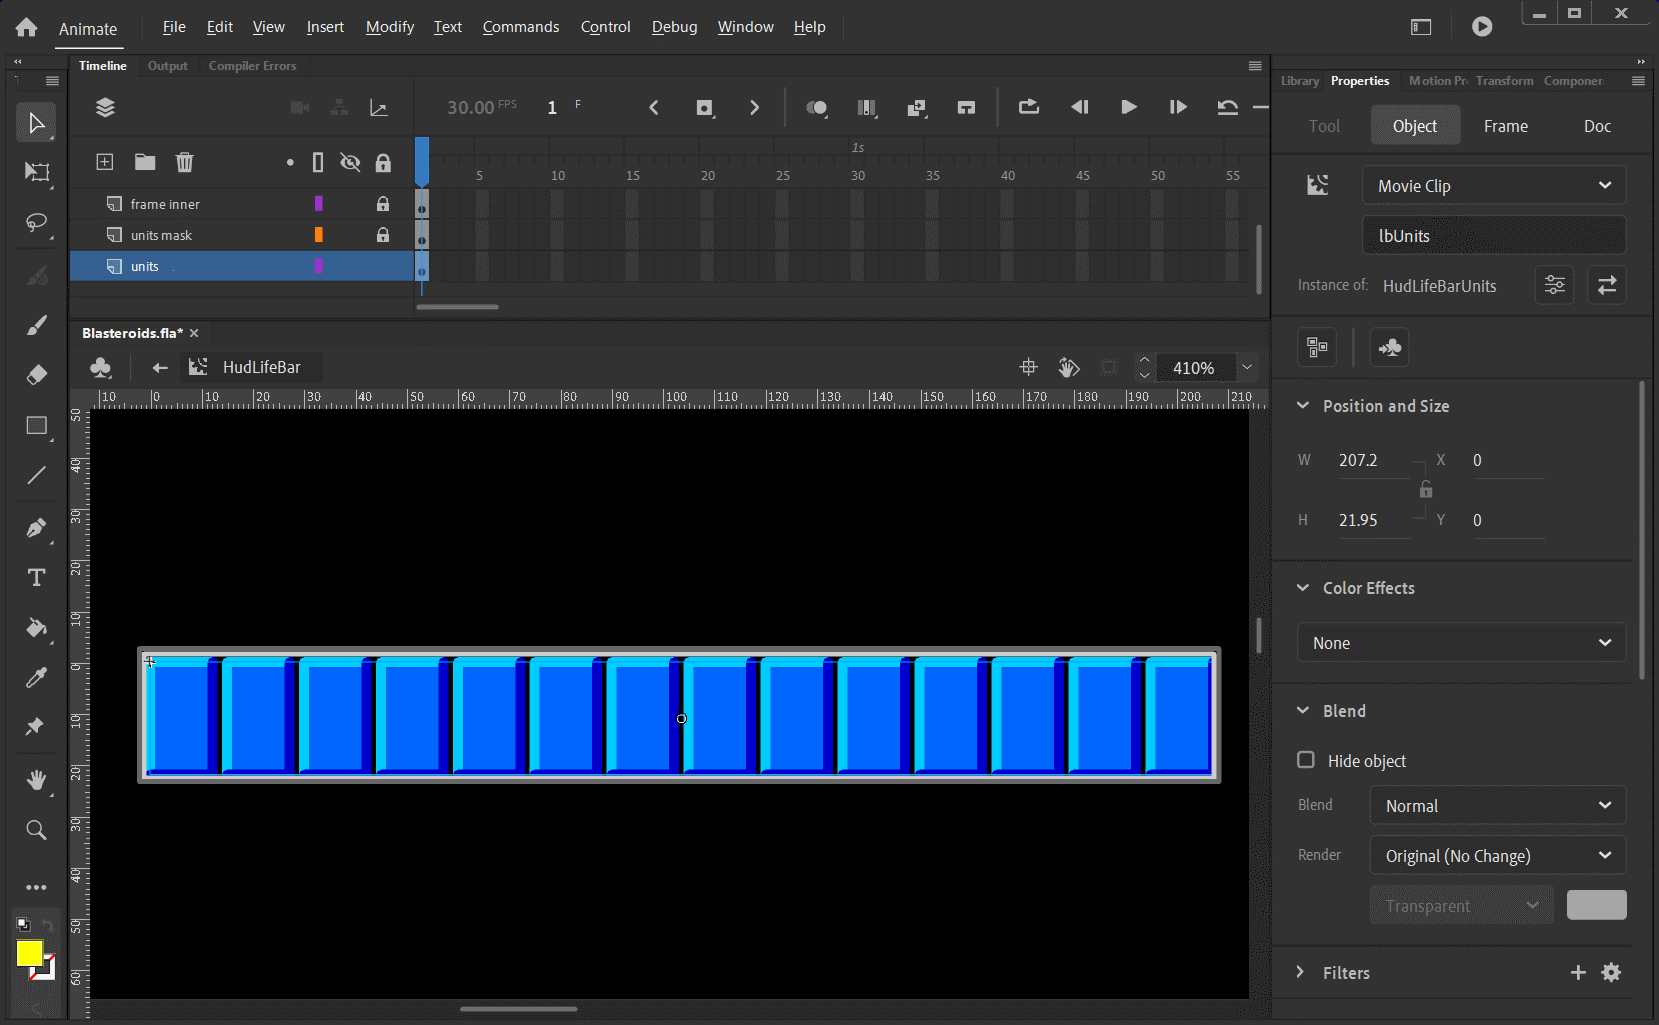
Adding Health Bars To The HUD
Next, we’ll add the player’s health bars.
It’s composed of 14 bar units, so we’ll need to export the individual bar graphic.
Also, if you recall the first video in this article, you’ll see how the health goes up and down. This is done using an image mask. A mask can be used to hide part or all of an image. The mask only shows the parts of the image where both, the mask and the image intersect.
When the player’s health is full, we don’t want to show mask. This makes it so the mask wont intersect the health bars, thus showing all of them. As the player’s health decreases, we show more of the mask. The lower the player’s health, the bigger the the size of the mask, this intersecting with more health bars, ultimately, hiding more of them.
We can create a mask that is rectangular in shape and will overlap all 14 health bars.
This white box is not the actual mask, but illustrate how the mask would be placed over the health bars.
We can adjust the size of this mask by changing its scaleX property. At full health, scaleX would be 1.0 (showing 100% of the health bars). Say the player has only 25% health. The scaleX of the mask would be set to 0.25.
To create the actual mask, we need two objects. First, we can create a rectangle that assumes the size and position of the white box in Phaser using a Graphics object. Second, in order to make this rectangle into a mask, we can create a GeometryMask object, then attach the Graphics rectangle to it.
This code snipped can accomplish that:
var rectangle = new Phaser.GameObjects.Graphics(gameScene);
rectangle.x = whiteMaskBox.x;
rectangle.y = whiteMaskBox.y;
rectangle.fillRect(0, 0, whiteMaskBox.width, whiteMaskBox.height);
var mask = new Phaser.Display.Masks.GeometryMask(gameScene, rectangle);
To modify the size of the mask (which in turns, affects how many health bars are visible), something like this can be used:
var ratio = player.health / player.maxHealth;
mask.geometryMask.scaleX = ratio;
The geometryMask property of the mask refers to the rectangle Graphics object created and assigned to it.
Changing Health Bar Colors
One more functionality for health bars we need to convert from Flash to HTML5 is changing the health bar colors.
The starting color for the health bars is blue, and the ending color is red. In Adobe Animate, the color change is done by creating a Color Filter and adjusting the hue starting from (0, blue) to (150, red).
My first idea was to use the tint property of a Phaser Image and apply that as needed. However, setting the tint didn’t re-create the same blue-to-red appearance as demonstrated in the above video.
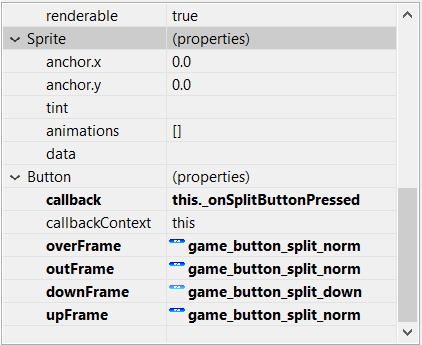
In Adobe Animate, we can create a timeline animation where the health bars change from blue to red using our desired color filter settings. I decided to make the transition from blue to red a duration of 16 frames, which produced a decent resolution.
The result of exporting the 16-frame animation.
You can then change the texture of each health bar unit using the Phaser.GameObjects.Image.setTexture method.
Adding The Weapons Retainer Icon To The HUD
The final functionality is adding the icons to the HUD.
For the dual-icons, these are very simple, consisting of exporting the icon images, then creating images from them, so I won’t go into detail on those.
However, there is one icon that animates as it appears and disappears, the “weapons retainer icon”.
(Normally, when your ship is destroyed in Blasteroids, you’ll lose all your power-up items – as with most action/shooter games from back in the day. However, if you have this weapons retainer, it will allow you to keep your other power-up items once per usage.)
This icon uses color filters, like the health bars, so we’ll need to export it as individual frames as well. However, this time, it was originally done in Flash using code via a third-party library called the Greensock Animation Platform (GSAP).
When the icon first appears, it starts at twice its size, and is completely white, then quickly scales down to its original size, and the white fades away, revealing the original icon appearance.
Note: While Phaser has its own built-in tweening support, I decided to switch from Greensock’s AS3 version of their tweening library (which has already been discontinued) to their JS version. For the most part, you can copy Greensock’s tweening code over from AS3 to JS with little modifications for basic tweening operations.
Consider the following code for making the weapons retainer icon appear.
var timeline:TimelineLite = new TimelineLite(o_tlVars);

var ctVars:ColorTransformVars = new ColorTransformVars();
ctVars.brightness = 2;

var vars = new TweenLiteVars();
vars.colorTransform = ctVars;
vars.scaleX = 2.0;
vars.scaleY = 2.0;
timeline.append(TweenLite.from(icon, 0.25, vars));
timeline.play();
Note: The classes of TimelineLite, ColorTransformVarsTweenLite, and TweenLiteVars all come from Greensock’s library.
A couple things happening here. First, the icon starts completely white (brightness set to 2), and twice its original size (scales set to 2.0).
To make the icon completely white, a color transformation is applied, with the brightness gradually decreasing. As mentioned before, there are no color transformation effects in Phaser, but this tween animation is simple enough to recreate as a sprite animation in Adobe Animate.
From the timeline code above, the tween animation has a duration of 0.25 seconds (Greensock uses seconds for its time durations, instead of milliseconds). We need to figure out how many frames 0.25 seconds so we can create a timeline animation on the stage with that many frames. We can use the following formula:
This gives us 7.5 frames. However, we can only use whole numbers for frames. So, let’s go ahead and round that up to eight frames (or you could use seven if you want 🙂 ).
When re-creating the animation in Phaser Editor, specifying the duration, you can use this equation to convert frames to milliseconds. The short of it is:
That’s it for this article! With every update, I’m really excited about the progress made and what I’m learning about Phaser, the editor, and the conversion process in general. As I continue to make more noteworthy progress, I’ll keep you updated!
Happy New Year, guys! ⭐ I wish you a very fun, and happy 2019, complete with experiences that’ll challenge you and allow you to grow and become a stronger version of yourself.
In this article, we’ll be handling the final two moves you can perform in the game: splitting and surrendering.
If you have a pair in your opening hand, you have the option to split the cards into two hands. Each new will automatically be dealt another card. This gives you an additional hand to try and beat the dealer.
Like doubling down, you must place an addition bet equal to the original wager of the hand in order to split.
There are a few things to be aware of with splitting:
Split hands cannot win via a Thunderjack or Blackjack
Split hands may double down
Split hands may not surrender (will be covered in surrender functionality)
If splitting a pair of aces, both hands must stand after being dealt another card (can’t have more than two cards)
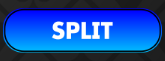
We’ll need a button that will allow the player to splir when pressed. Using the same steps as in previous articles, create the button (using Phaser Editor):
Right-click on the main game canvas, then select Add, then Button.
From the Add Sprite dialog, select the image you want to use as the main button sprite, then press OK.
This will add a button to your canvas. You can drag it to position it where ever you want.
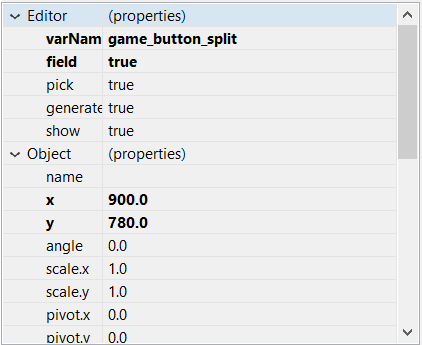
In the button’s properties, set the field property to true. This will create a reference to the button in the code that the canvas compiler generates, allowing you to reference it as well.
Set a varName for the button. I decided to use the game_button_split.
Set the callback to this._onSplitButtonPressed, and set the callbackContext to this.
Set the four “Frame” properties to the appropriate sprite images, so that the button appears responsive when the it is moused over, pressed, and released.
When the canvas is saved, it’ll add the code that creates and positions the button. We also want to ensure there is the callback function, onSplitButtonPressed. We’ll write it like:
GamePlay.prototype._beginTurnPlayerSplit = function() {
  var splitPlayerId = this._insertUpperPlayerIdIntoTurnPlayerIds();
  this._setSplitStatusForPlayers(splitPlayerId);
  this._paySplitCostForSplitPlayer(splitPlayerId);

  var turnPlayerId = this._getTurnPlayerId();
  this._moveCardFromPlayerToPlayer(turnPlayerId, splitPlayerId);

  this._dealCardTo(turnPlayerId);
  this._dealCardTo(splitPlayerId);
};
The beginTurnPlayerSplit function is where the actual splitting functionality takes place.
First, we’re adding a new player into the game: the player that is created from the split. This is what insertUpperPlayerIdIntoTurnPlayerIds does, as well as return the player ID of the new player.
Player IDs
Each player is assigned a unique “player ID”. We use these to reference the PlayerHandData for the player we want. From there, we can access the cards in the player’s hand, as well as other information about that player.
So far, we’ve only used the “lower” IDs, not the “upper” ones. Here are all six player hand IDs:
A split is always initiated from one of the three “lower” hands. The new had that is created is its “upper” counterpart.
We split the original hand into two by moving its top card to the new hand. In the beginTurnPlayerSplit function, the turnPlayerId represents the original player’s (the player’s whose turn it is), and splitPlayerId presents the new hand.
We want to insert the new player ID into the array of turn player IDs, (this._turnPlayerIds) after the current turn player’s ID. The insertUpperPlayerIdIntoTurnPlayerIds function does this, and the pseudo code for it looks like:
insertUpperPlayerIdIntoTurnPlayerIds
insertUpperPlayerIdIntoTurnPlayerIds() {
  get the splitPlayerId, which is the corresponding "upper" ID of the turn player
  get the array index of the turn player ID within the turnPlayerIDs array
  insert the splitPlayerId into the turnPlayerIDs array after the turn player ID
};
We can use the JavaScript function, Array.prototype.splice to insert the split player ID directly after the current turn player ID, so that when the turn player is finished, the next turn will be the split player. After the split player’s turn, game play normally resumes.
When getting the splitPlayerId, which is the corresponding “upper” ID of the turn player, the mapping is:
It’s currently the “lower left” player’s turn. They split their hand, creating the “upper left” hand. The turnPlayerIds would then look like:
[
  Thunderjack.PlayerHandIds.LOWER_LEFT,
  Thunderjack.PlayerHandIds.UPPER_LEFT,    //<-- new player ID inserted via splice
  Thunderjack.PlayerHandIds.LOWER_RIGHT,
  Thunderjack.PlayerHandIds.DEALER
]
You can see that Thunderjack.PlayerHandIds.UPPER_LEFT was inserted directly after the current turn player’s ID, Thunderjack.PlayerHandIds.LOWER_LEFT. And when the “lower left” player’s turn is done, the next turn is the “upper left”. After that, play resumes with “lower right” (same is it would, had the “lower left” player never split).
Now that we have created the new split player, we’re going to set the split status of both players. We’ll set up the rule that player hands that have been involved in a split during the round cannot split again. The setSplitStatusForPlayers will accomplish this.
In order to set the split status, the function could look like:
There is a new property on the PlayerHandData object that we’ve not seen yet, hasSplit. We’ll add that to the constructor function so it now looks like:
One of the rules of splitting is that we don’t want to split a hand that was already involved in a split. That means, for the current turn player, and the new hand that was created, you want to set their hasSplit property to true.
After splitting, when resuming the current player’s turn, or on the split player’s turn, that player can’t split, even if they have a pair. And of course, splitting isn’t free; it costs an additional wager equal to that placed on the hand that is splitting.
Note: Optionally, if you want to make it so that both players must automatically stand if aces are split, you can check if the turn player’s hand is a pair of aces. Then, when the split functionality is down, you can stand twice (once for the turn player, and again for the split hand).
Now that we have all the functionality for splitting done, we can update our showGameButtonsForPlayer function to include eligibility for splitting for the current turn player. If the player is allowed to split, we’ll show the split button. Otherwise, we’ll hide it.
We also want to make sure that the opening two cards are a pair, meaning, they have the same value. For face cards, they both must be the same face. For example, you can split two jacks or two queens, but not a jack and a queen.
areCardsPair
GamePlay.prototype._areCardsPair = function(playerHandData) {
  if (!playerHandData || playerHandData.getNumCards() != 2) {
    return(false);
  }

  var cardData0 = playerHandData.getCardAt(0);
  var cardData1 = playerHandData.getCardAt(1);
  return(cardData0 && cardData1 && cardData0.value == cardData1.value);
};
That’s it for splitting! That was quite a bit to go through. If you have any questions on anything, please ask in the comments section below. Now, let’s move onto the final player move: surrendering.
Surrender
You can do this if your opening hand does not look good against the dealer’s revealed card, and you’re not feeling confident. If a player surrenders, they:
forfeit half their bet (they’re immediately paid)
automatically end their turn
will not play against the dealer
Also, a split hand may not surrender.
First, we create the surrender button. Follow the same steps as creating the split button, except:
Set the varName for the button to game_button_surrender.
Set the callback to this._onSurrenderButtonPressed, and set the callbackContext to this.
Set the four “Frame” properties to the appropriate sprite images, so that the button appears responsive when the it is moused over, pressed, and released.
Write the code for the onSurrenderButtonPressed, so it looks like:
Here, we present the player as surrendering. This will include forfeiting half the bet, updating the player hand status, and moving onto the next turn player.
presentPlayerSurrender
GamePlay.prototype._presentPlayerSurrender = function(playerHandData) {
  var n_betValue = playerHandData.betValue;
  var WIN_RATIO_SURRENDER = -1 / 2;
  var n_amountWon = this._calcWinAmount(n_betValue, WIN_RATIO_SURRENDER);

  playerHandData.hasSurrendered = true;

  this._playerData.credits += n_amountWon;
};
The presentPlayerSurrender function is very similar to the presentPlayerWon function discussed here. There is also another use of the calcWinAmount function. Except this time, we’re passing a different win ratio, WIN_RATIO_SURRENDER, defined as -1 / 2. When this ratio is passed into calcWinAmount, it will return only half of the original bet value.
We also set the hasSurrendered property of the PlayerHandData object to true.
Remember that a player has surrendered won’t play against the dealer. We previously defined a function isPlayingVsDealer, that determines if a player plays against a dealer. We’ll update that function to exclude players who’ve surrendered from playing against the dealer:
That’s it for the surrender functionality! It’s one of the shorter moves to implement, and most of the code that builds it has already been discussed in earlier articles.
We’re now finished with all five moves hit, stand, double down, split, and surrender… woot! 👍🏿
Now that most of the core gameplay is complete, we can finish off the game. Here’s what’s to come in the near future:
Recycling the deck (so the deck never runs out of cards)
Adding sound effects (yeah!)
Adding the Thunderjack effect (HELL YEAH!! 😠)
That’s it for this post, guys. Thanks, and talk to you later.
Hey guys. We’re into getting into some of the updates mentioned from my past post – mainly checking if an opening hand has a Blackjack, and eventually other specific combinations of cards in the hand. And there’s just one little problem… it can take all day to get the cards we need in order to test.
So, we’ll need a way to control the order in which cards are drawn. Otherwise, we may waiting a long time before we’re dealt the cards we want. So, we’ll have to cheat and pull a fast one here.
But before we get into that, let’s take a look at how the game sets up the cards and the deck.
Card Suits And Values
As you know, there are four suits and we have values from 2 to Ace. Let’s start with the suits first.
In Thunderjack!, we have a class called CardValues that acts like an enumeration, similar to what you might see in C# or Java. Except, we’ll be storing strings instead of integral values.
The ALL array is useful in iterating through all of the suits, which we’ll do later.
When storing the card values, you may think we’d use a number. However, we’ll going to use both string and number. The strings for suits and values will be used when creating unique IDs. We’ll get into these later, but for now, let’s have a look at the values.
We also have another ALL array for iterating through all of the values.
The CardPoints object stores the values, indexed by the string values defined above.
You may also notice that Ace only stores the value of 1 not 11. We’ll be using the 11 at another time, when we calculate how many points are in a player’s hand than contains an Ace. We won’t be using the CardPoints in this post, but we’ll need it soon.
Card Data Structure
Now that we have suites and values defined, we want a card data object that can store these. In Blackjack, more than one deck is commonly used, and Thunderjack! is no exception. This introduces the problem of having multiple cards with the same suit and value, and we want to be able to uniquely identify every card in each deck.
This is where the card ID that I mentioned earlier comes into play. We’ll be storing that in our data object, as well as the zero-based array index that identifies which deck the card represented by the card data object comes from.
This is what our card data object class looks like:
As you can see, we’re forming our card ID as a string using the following format: [card value] _ [card suit] _ [deck index]
For example, the seven of clubs from the third deck would look like this: "7_c_2"
Deck Structure
Every card is represented by a card data object, and a deck is simply an array of 52 of these card data objects. We have a simple class for “dealing” and shuffling cards, as well as a few other utility functions.
Starting out, the deck data class looks like this:
You can see in the _init method is where we create the CardData objects for each card in every deck. This is where we use the ALL arrays from CardSuits and CardValues.
Note that, instead of using those ALL properties, we could have also iterated through them using a for…in statement, but the arrays are useful in other parts of the game, which we won’t get into right now.
The method we’re interested in when dealing cards is DeckData.popCardData(). This will remove the last CardData object from the _cards array and return it to us. This is the basic structure of the DeckData class. There are other methods in this class as well, and they’ll be added as we need them.
You’ll also notice a shuffle method. Phaser already provides for us an ArrayUtils class, and so happens to have a shuffle method that randomizes the order of items in an array. We don’t have to write one ourselves. Remember, coders are lazy. (:
Get off yo ass and write some code!
Dealing Cards to Each Player
With the deck and cards set up, we can now begin to deal cards to the players and dealer. Some psuedocode looks like this:
function dealCardsToPlayers() {
  while (numberOfCardsDealtToEachPlayer < 2) {
    for each player in the game {
      dealCardToPlayer (player);
    }

    dealCardToPlayer (dealer);
    numberOfCardsDealtToEachPlayer++;
  }
}
When a card is dealt in dealCardToPlayer, it looks something like this:
function dealCardToPlayer (playerData) {
  var cardData = deckData.popCardData();
  playerData.cardsData.push(cardData);
}
Controlling the Order in Which Cards are Drawn (To Cheat!)
Now, if we’re trying to test out certain combinations of cards in a player’s hand, such as a Blackjack on the opening hand, we can be waiting a long ass time before we get what we’re looking for. This is where che~~~ ahem, controlling the order of the cards comes in.
The plan is like this:
Setup an array of card ID strings that will specify the order in which we want the cards to be drawn.
Shuffle the deck (if necessary)
After the cards have been shuffled, set the order of the cards in the deck according to the array of card Ids in step one.
Let’s setup each of these steps.
1). Setup an array of card ID strings that will specify the order in which we want the cards to be drawn.
We can set the array up that will hold the card IDs we want to use in the following:
debugCardIds = [
  "4_h_0",  //first card that will be dealt to the player
  "a_d_0",  //first card that will be dealt to the dealer
  "5_c_0",  //second card that will be dealt to the player
  "10_s_0"  // second card that will be dealt to the dealer
];
Say we have only one player and the dealer. From the card dealing snipped above, all players are dealt a card, then the dealer. Then this process continues until each player and the dealer has two cards.
2). Shuffle the deck (if necessary)
If we’re just starting the game, we’ll want to shuffle the deck. We can do that using the shuffle method of the DeckData class mentioned earlier.
deckData.shuffle();
3). After the cards have been shuffled, set the order of the cards in the deck according to the array of card Ids in step one.
function aceUpSleeve() {
  var s_cardId = _debugCardIds.shift();
  var i_swapIndex = _deckData.getLength();
  while (s_cardId) {
    _deckData.swap(s_cardId, --i_swapIndex);
    s_cardId = _debugCardIds.shift();
  }
}
What we’re doing here is using the shift method of JavaScript’s Array class to retrieve and remove the first card ID.
When dealing cards, remember that we retrieve and remove the lastCardData object from the deck. So when setting up the deck in the order we want, we swap out the last card data object in the deck with debug card ID. Then, we work our way backwards, towards the beginning of the deck, until our debugCardsId array is empty.
The i_swapIndex variable represents the array index within the DeckData where we will place the CardData represented by our debug card ID. This is where a new method for DeckData, swap(), comes in:
Thunderjack.DeckData.prototype.swap = function(s_cardId, i_indexToSwapAt) {
  if (i_indexToSwapAt < 0 || i_indexToSwapAt >= this.getLength()) {
    return;
  }

  var i_indexOf = this.indexOfId(s_cardId);
  if (i_indexOf > -1) {
    var cardData = this._cardsData[i_indexToSwapAt];
    this._cardsData[i_indexToSwapAt] = this._cardsData[i_indexOf];
    this._cardsData[i_indexOf] = cardData;
  }
};
What this method does is first, locate the index within the _cardsData array of the CardData represented by our card debug ID, Then, it will swap the elements of the _cardsData array; the card data found at our requested swap index with the card data at the located index.
So now, our dealCardsToPlayers() method looks like this:
function dealCardsToPlayers() {
  //do this first – assume cards have been shuffled already in some other function
  aceUpSleeve();

  while (numberOfCardsDealtToEachPlayer < 2) {
    for each player in the game {
      dealCardToPlayer (player);
    }

    dealCardToPlayer (dealer);
    numberOfCardsDealtToEachPlayer++;
  }
}
Also, if we don’t want to control the order of dealing cards, we can set debugCardIds to an empty array.
The problem with this is, we have to keep editing the code when we want to control the order. Later on in development, I’ll build a user interface that allows us to manipulate the debug card Ids. Adding a debug/diagnostic interface like this is not something you’d put in a release version of your game, but they are invaluable when debugging, testing, and demoing your game.
Yes, they are a little bit of a detour, but it’s worth it. If you’re testing the game with someone else, they’ll be able to easily control the order of the deck without having to change the code. For my clients, they wouldn’t want to anyway – they just want something that’s easy for them to use without having to poke around in the code. That’s my job. 😉
Finally, you can watch this video of the *cough*cheat’n’*cough* in action. You may want to view the video at full-screen so you can see the edits I’m making in code. Also, after the opening cards are drawn each time, feel free to pause the video to check that the order of the cards drawn does indeed match with the _debugCardIds array (they do):
So that’s it for now. This was a long one, and thanks for reading all the way to the end. I can’t wait until this game is finished for you all to play!
Hey there, and welcome back for another update on the HTML5 Phaser version of Thunderjack!.
The project is starting to get interesting, because most of the UI is done, and I have begun working on the game mechanics and logic.
Updates include:
Hit and Stand functions are complete.
The dealer now plays (dealer AI) if there are any eligible players remaining.
At the end of the round, winners are determined by comparing hands.
A new round can now be played.
Let’s go over each of these in a little more detail.
1. Hit and Stand functions are complete
When taking a hit, the bust functionality is now complete. If a player’s score exceeds 21, the player will bust, and the Bust indicator will appear. The game then moves to the next available player.
Likewise, the player can stand. If they do so, the game then moves to the next available player.
A few notes on available players.
Thunderjack! Will allow you to place bets on one to three players. Since splitting is supported in this game, it is possible for you to split the hands to play a total of six hands in a round.
I assigned a “player ID” to each of the six players. This ID is a string that is used when referencing any of the player data, such as:
cards in hand
score
status (bust, blackjack, Thunderjack, etc.)
bet amount
The player ID is also used to reference the graphical UI for each player. Things like:
The ID, PlayerHandIds.DEALER, is very similar to the six players, except that it does not use betting information, and it cannot split or double-down.
The ID, PlayerHandIds.DECK, is used when moving cards back into the deck (for reshuffling)
The ID, PlayerHandIds.DISCARD_DECK, is used at the end of each round when all players place all the cards in the hand into the discarded deck.
2. The dealer now plays (dealer AI) if there are any eligible players remaining
The logic for the dealer is simple. If if has less than seventeen points, it will take a Hit. Otherwise, it will stay. Also, the dealer does not double-down or surrender.
The dealer will play its hand only if there are any eligible players remaining to play against it.
An eligible player is a player who:
did not bust
did not get a blackjack, Thunderjack, or blitz
did not surrender
If there are no eligible players, the round ends, and the dealer does not play.
3. At the end of the round, eligible players now play against the dealer
When all players and the dealer have completed their turns, the hands of eligible players are compared against the dealer’s to determine winners.
4. A new round can now be played
After the round has ended, you can play a new round with the same bets, or you can set new bets on your hands. When you start a new game, all cards in the players’ and dealer’s hands are moved to the discard deck, then players are dealt new hands from the deck.
Have a look at this video to see the current progress:
Following Updates
As you can see, the game is coming along nicely. You may have noticed a few other details I didn’t mention, such as showing how much player’s won, or the credits in the upper-left corner of the screen are now being deducted when starting a game. Or, maybe you noticed that the credits didn’t increase when players win!
Ha! No, I’m not trying to put the shit on anybody; I just haven’t gotten to that part yet.
But let me go ahead and state some of the updates to come in the game:
Credits increase when players win.
Finish showing all the result indicators. Bust and Win show, but the others, like Blackjack or Push, show. Which brings me to the next to-do items.
Complete logic for Blackjack for player. If a player gets a Blackjack, that player’s turn immediately ends, he/she receives an immediate payout, and it becomes the next eligible player’s turn. A player who gets a blackjack becomes ineligible to play against the dealer.
Complete logic Blackjack for dealer. If the dealer gets a Blackjack, the game immediately ends and and player hands are compared against the dealer. Any player who has a blackjack results in a push. Players who get a Thunderjack! Will actually beat the dealer (this will be implement a bit later on). Otherwise, all other players don’t win the round.
If a player’s hand results in a push, they get their original bet back.
As cards are added to or removed from the deck, visually update it’s deck accordingly.
As cards are added to or removed from the discard pile, visually update it’s deck accordingly.
If too many cards have been used from the deck, before dealing the next wave of cards to the player and dealer, all discarded cards will be returned to the deck, the deck will be shuffled.
If you like where this is going, please leave me a comment saying what you like. Of course, if you don’t like it, that’s cool, too. (:
If you want be to build a Blackjack-style type of game for you (or a breakout style game like this or that), then please contact me here, contact me directly at cartrell@gameplaycoder.com, or look me up on LinkedIn.
That’s all I have for you for now. Thanks, and stay tuned for the next update.
Welcome back to Gameplay Coder. Quite a bit of progress has been made on the HTML5 version of Thunderjack! using Phaser and the Phaser Editor. I’m getting the hang of basic usage of the editor. And it’s great to have a visual editor at your disposal – so you don’t have to place sprites using hard-coded x/y coordinates via trial and error, or reply on some external graphics tool then have to copy/paste those coordinates.
Updates to this game include:
Being able to place bets.
Dealing the cards to the players and dealer.
Updating points for the players.
Hit functionality is currently in the works, as is determining when a player or dealer has a blackjack, and when a player has a Thunderjack.
Use of Fonts
One issue I encountered is with using fonts. In the browser, they don’t appear exactly as the do in the editor. Some features such as stroke, aren’t rendered. So I’ll likely end up using Phaser bitmap fonts instead of fonts, which, on my machine, is a small set of Windows fonts that the editor has access to. Furthermore, there is no guarantee that the fonts used in the project will be installed on the machine of someone playing the game.
There is an online Flash tool (at the time of this post), called Littera. This can be used to create bitmap fonts from fonts installed on your machine. What’s also cool about it is, Phaser supports the format, as shown in this example.
Prototypal Inheritance
While I’m no stranger to OOP (object-oriented programming) and classical inheritance in languages like ActionScript 3, C# or Java, I’m fairly new as to prototypal inheritance in JavaScript, so I’m giving it a try in this project. Hell yeah! 💪🏾
I’m using prototypal inheritance with the data that stores the player hands and the dealer hand. There is a ‘base class’ called HandData, whose function constructor looks like this:
This is basic data that both types of hands, player and dealer, will contain.
However, player hands will need to store additional data, such as the bet amount, and can perform other moves such as split, double, and surrender. Players can also win via Blitz (6-card Charlie in this game). The dealer does not use any of these functions, and thus doesn’t need access to them.
The player hand data, PlayerHandData, will inherit from the HandData, and looks like this:
That call() function is like calling the constructor of the parent class. In this case, it sends the parameters that were sent when it was created onto its parent constructor. Also, the this keyword is supplied first, so that the context in which the parent constructor function is being called is set to the inheriting function constructor.
However, PlayerHandData still needs to have its constructor inherit the methods of the parent prototype. This creates a new object based on the parent prototype:
And finally, the constructor of our new PlayerHandData prototype needs to point to PlayerHandData instead of HandData. That can be fixed with this line: PlayerHandData.prototype.constructor = PlayerHandData;
Now when we create data for each the dealer hand, we can write: var dealerHand = new HandData(s_dealerId);
And for each of the six player hands, we can write something like: var somePlayerHand = new PlayerHandData(s_playerId);
The player hand will have all the properties of the dealer hand, plus the extras that are required to support the additional game play available to the players.
So when inheriting one “class” from another (I put “class” in quotes because, JavaScript doesn’t have classes. They can be simulated using prototypes.), it’s basically three steps:
1). Within the inheriting function constructor, call the parent constructor function using the call(). Be sure to set this as the first parameter, succeeded by any function constructor parameters. 2). Create a copy of the parent function’s prototype, and assign it to the inheriting constructor function’s prototype. 3). Assign the constructor of the inheriting prototype to the inheriting constructor function itself.
This can be a little confusing, but typing this out can help reinforce learning (though writing it out is better, studies have shown, but I digress (:
But doing is the best way to learn, in my opinion, of course. So, I’ll definitely take more opportunities to apply this so it becomes easier.
Whew!
Well!… Lemme get a sippa water… * Ahhhhh! *
Moving on, here is a short video of what I have so far. It’s what was mentioned in the updates mentioned near the start of this article.
It’s not much, but under the hood, a lot has been accomplished, and with most of the lower-level code now out of the way, I can start getting into the fun stuff!
Thanks for stick with me guys, and stay tuned for more.
Block Breaker is one of the games you build in this course. One challenge in the course was to do what they call “extreme tuning”, meaning tinker with the project and explore around what you’ve been learning.
However, I decided to go rogue with this concept, and produced the following version of Block Breaker, with lots of changes audible, visual, and of course, gameplay changes (see what I did there?) (:
Of course, I can make games like this for you too. If you’re interested, please get in touch with me by clicking here or e-mailing me directly at: cartrell@gameplaycoder.com.