Creating A Multiplayer Poker Game For HTML5 Using Phaser, Part 5

Hello!

I hope you and yours are having a happy, safe, and fun, holiday season! ๐ŸŽ„

This article continues the series of developing a multi-player poker game using Node, Express, SocketIO, and Phaser 3.

If you’d like to see the series of articles thus far, please check out below:

When I first started, I was only going to build just the multi-player aspect of the game. You start the game, join a lobby, and join a room already in play, or create your own room for others to join.

However, this wouldn’t really be too much involved (even for a simple multi-player game), if I don’t flex my muscles, and include user accounts + authentication.

As a player, you’ll be able to create an account by signing up using an e-mail and password. You can also setup your own user avatar icon for display. Should you forget password or want to change it, you’ll be able to reset or modify it as well. The game will also use an emailing system to aid you in the process of resetting or changing your password. Finally, you will also be able to delete your account altogether.

This means a database will be used on the back-end to store user accounts. The back-end will then effectively use the four basic operations of data persistence, or CRUD.

CRUD stands for create, read, update, and delete. Think of it this way:

Create – Creating a new account and signing up; a new user is added to the database.
Read – When a user logs in, their credentials are checked against the existing users in the database.
Update – A user changes their e-mail, password, or avatar image, or the number of credits they hold changes as they play poker, updating their entry in the database.
Delete – A user deletes their account, also deleting their entry from the database altogether.

If interested, you can learn more about CRUD here.

In addition to the technologies listed from the prelude article of this series, I’ve decided to use the following technologies:

MongoDB

This is what I’ll be using as the back-end database.

Mongoose

Um, no. Nobody called ‘ju. kthxbye ๐Ÿ™ƒ

Ahem, actually, the Mongoose I’m talkin’ ’bout is an Object Data Modeling (ODM) library that allows Node.js and MongoDB to talk to each other. Long story short, with Mongoose, you easily define how your data is structured in your database, and write code that correctly manipulates that data so that the structure is maintained (and thus, the integrity of your data).

MongoDB stores data as JSON objects, and the formatting is arbitrary. One of the things Mongoose does is allow you to define a structure of how the data will be stored, and it will enforce the rules of that structure to the code you write.

If you like, you can learn more about Mongoose from this article.

Passport

This Node.js middleware is used for authenticating your users when they log into your system, as well as performing other tasks that you want to to secure. You can use this along with JSON Web Tokens (JWTs) to validate the user when they make requests to your Express app.

JWT.IO

This library allows you to manage your JWTs. When a user logs in, the server will generate a JWT and return to the client. The server then acknowledges the user as “being logged in”, and the user’s client must send this token back to the server for each subsequent request.

A token is a credential that is digitally signed using a secret key (though you can use public / private keys also, but I’m using the secret key here). The signature is performed behind the scenes using an HMAC algorithm.

Although these details go beyond the scope of this article, you can learn more about JSON Web Tokens here and here.

bcrypt

This library is used for securely hashing passwords. Even in the database, the actual plaintext password is not stored in the database. Instead, an encrypted version of the password is stored instead.

So, even if you forgot your password, I cannot look up your user in the database and tell you what it is, because, I don’t know, either! ๐Ÿ™ƒ

Cookies are small pieces of data that the server sends to the client. When the user performs certain actions (usually requiring authentication or validating data sent back to the server in our case), this cookie is sent with the request.

You can get a quick overview on how to use cookie-parser here.

Nodemailer

You can use this Node.js module for sending e-mails from your server to your users. You can use this to send plain text or HTML messages, include attachments, along with many other features.

For this poker game, I’m using it to send e-mails when the user forgets their password, as well as notifications if they changed their e-mail address password (to make it was them who requested the change!), as a few other account-based notifications.

Pug

It would be a pain to have to manually setup your e-mail messaging system for the various types of messages you want to send to your users (as well as litter your code with lots of string interpolation). This is where Pug comes to the rescue.

This is an e-mail templates system, and it allows you to define templates. While it has it’s own scripting language, you can set up your templates and preview how they will look when sent to the user.

You can have a look at Pug2HTML, an online conversion and previewer. Of course, you’d still need to learn the Pug syntax itself.

dotenv

When using sensitive data like your JWT secrets and e-mail credentials for Nodemailer, you’ll want to store these in some place that’s not hard-coded in any of your files. That’s where dotenv comes into play.

You can use this to store this type of data in a separate file (often called .env), and Node will load these as environment variables. A good practice is to not share this .env file, but instead, each person on your team generates their own .env file.

That’s a lot more added onto this tech stack!

It took quite a while to implement all of these and get them to play nice together. Of course, the client side also has to be able to respond, but all of these tools are used on the server side.

And I’ll admit – at first, I didn’t want to do any back-end user authentication. But then I realized that the value of an app that can perform user authentication is much more valuable than one that can’t. So I went through all the steps.

But I didn’t do it alone… hell no! I had help. Mainly help from this amazing course over on Zenva called called the MMORPG Academy.

With Scott Westover as your instructor, this course is a conglomerate of smaller courses to build a (relatively) simple multi-player MMORPG type game using all the techs mentioned above, as well as Phaser 3 on the client side.

I found this course invaluable on getting me started.

And I’m not quite done with it yet! Still to come is deploying the poker game onto a live web server (or in this case, onto the cloud using Heroku). Excited, and looking forward to finally getting this game done, hopefully within first quarter of 2022!

As I work on the game, Iโ€™ll post noteworthy updates in future articles. And you can play the work-in-progress versions of the game as I make playable updates, before the game is released to the public!

Sign up using this form to get on my mailing list:

Thanks for reading, and I hope you continue to stay tuned!

– C. out.

Creating A Multiplayer Poker Game For HTML5 Using Phaser, Part 4

Hey guys,

It’s been a minute since I’ve posted an update on the multiplayer poker game I’m working on, but it’s still on. While client work has kept me preoccupied for the most part, a lot of progress – and learning has been underway! ๐Ÿ˜Ž

Yeah, it’s been quiet around here… a little too quiet…

Ahem, without further ado, have a look at this video, which shows the WIP running in two different browser windows.

An interesting situation happened in this video. OF COURSE, the game would present it while I’m recording, haha! ๐Ÿ˜…

First off, there were four Straights. But that’s not even the most interesting part.

When more than one player wins, they all split the pot. Here, the pot was split four ways. It just happens to result in a fraction – each player winning (30 / 4 = 7.5) – which shouldn’t happen, because the lowest denominator I’m designing for is 1 chip – not partial chip. So I’ll need to correct that…

๐Ÿค”

Hmm… well, I could leave it, but that might give the impressions that you can do something with a partial chip value – which you can’t. Or, I could distribute the chips like this:

  • (2) players win 8
  • (2) players win 7

I might want to look this one up to see how real poker games handle this situation!

What are your thoughts on how this should be handled?

Primary Tools Used For The Project

The front end is powered by Phaser 3, the layouts and assets management by Phaser Editor 2D v3, and the back by Socket.IO v4.

Other technologies the project uses are:

The current state of the game’s progress

The poker rules logic is mostly done, so I’ve been spending a lot of time on the back-end logic.

In between rounds, you’ll be able to:

  • Join a game if you were watching as a spectator (if there are any open slots – max players is six).
  • Watch a game if you were playing (there is no limit to the number of spectators, but there is currently nothing that shows how many people are watching. I might make an ๐Ÿ‘ icon with a number next to it, and stick it in a corner or something.
  • Leave the game room and return to the lobby.

What I’m currently working on is handling those untimely situations of a player leaving a game mid-game, either because their connection died, or they closed their browser tab.

Leaving a game mid-game messes up the state, because the server and all the players need to be updated on who just left, so I’ll need to improvise here.

My original strategy was to treat it as the player folding, then when the round ends, automatically remove said player from the game. But this caused a problem, because if a player’s connection is lost, their socket is also gone. So, I decided to abruptly remove them from the game, forfeiting their hand.

Leaving mid-game also causes problems if it also happens to be the turn of the player who left. The decision here was to simply move to the next player’s turn.

Every game needs to have a dealer (D), a small blinds (SB), a big blinds (BB), and a host.

Note: The host is not part of poker – that’s a design for this particular game. By default, the host is the person who originally create the game room. The host is also responsible for starting each game when all the players are ready. The host is indicated by the โญ icon. When playing offline (yes, there is a single-player mode as well), there is no host.

So, if the D, SB, or BB leaves, then the next person (to their left) automatically assumes that role. It’s also perfectly normal for one player to have more than one role.

There’s also a lobby where players will go once they’ve connected to the server. Here you’ll be able to chat with other players, host your own game, or join an exiting game. Both hosting and joining are demonstrated in the video.

You can learn more about the project here:

Finally, if you’d like to get in when the first playable beta is ready before the game is released, sign up on my mailing lest here. You’ll also receive updates on other projects as I work on them.

The form you have selected does not exist.

I can’t wait to have this one finished. Definitely a challenge worth completing!

And I don’t care what anyone says. Coding a multi-player game is a LOT harder than it’s single-player counterpart. ๐Ÿคจ

– C. out.

Using Sothink SWF Decompiler To Convert Flash Games To HTML5

Hey guys,

If you’ve been following me for a while, you’re aware that one of the services I offer is to convert Flash games to HTML5 canvas. I’ve done this with the game Blasteroids, which was originally a Flash game I coded for a client.

Now, when doing the conversion, if you have the all the original code and assets, including any Flash FLA files that Adobe Animate use, that’s the best option. Some smaller Flash projects (and I mean very small) may use a single FLA file with all the code and assets built into it. Usually, that will not be the case…

But for the sake of this article, let’s assume that is the case. But!… You do not have this FLA file or any of its assets! And without that FLA file, you’re f*cked right? Well, maybe not! That’s where a tool called Sothink SWF Decompiler may come to the rescue!

This tool is designed to extract code and assets from Flash files so you can use them to rebuild the game in HTML5 canvas. The tool can even extract any FLA files it finds, and there is even a function to export to HTML5 format (more on this later).

Remember: When converting a Flash game to HTML5, you will need to rebuild the game from scratch, particularly, the coding and functionality.

I’ve been working with a client who has several Flash games that needed to be converted. He does not have the FLA files for most of them. And the only way for me to even get SWF files was to download them by accessing the developer console within the browser.

Trying Out Sothink SWF Decompiler

Without the FLA files, I decided to give Sothink SWF Decompiler a try. I told the client that there may not be a guarantee that the decompiler might not be able to assist with converting all his SWFs (because you don’t know what you’re dealing with – it would be dumb to assume you can do the job without having seen how anything works yet).

Fortunately, the makers of the decompiler, SourceTec Software, allow you to download a trial. They even allow you to send them a SWF file, and they will decompile the SWF and inform you the test result (albeit they keep the resultant FLA file).

I opted to try the latter option, and to my surprise, they were able to successfully extract assets from the SWF!

Deciding to take a risk, I went ahead and bought the full version of the decompiler, and took on the client’s request to convert all his requested games (or to let him know of any that could not be converted).

And so far, the decompiler has delivered! I’ve been able to extract the main FLA file, as well as all the necessary code and assets from the every SWF encountered.

You can extract pretty much any element from the SWF file to your computer to reuse it when you build the game as HTML5 from the ground up.

Exporting the FLA File from the SWF

When you open a SWF with the decompiler, it will attempt to run the SWF and display the output in the main window. The Export panel to the right will allow view and extract individual elements found within. You can press the Export FLA/FLEX button to attempt to extract an FLA file it finds.

The only issue I’ve encountered so far is how it handles text. The text inside TextField objects may not display properly you export them has TextFields. You can export them as graphics and they’ll appear correctly, but you won’t be able to edit the text should you need to.

Exporting Code And Assets From The SWF

When you open the the FLA file using Adobe Animate, it will contain all assets inside. However, you can still all the extract individual assets to separate files (many will be contained inside smaller FLAs) using the Export Resources button.

For some resources, you can specify the format you want them to export to. I find FLA useful for things like buttons and actions.

This method can be useful if you want to export graphics and button images, because the FLA files that they are contained within will already have the stage size to match the graphic you’re exporting.

As for the ActionScript code, if there was any code placed inside timelines of the FLA, they will be preserved in the conversion process, which is super. Your task here – and this is the most laborious part of the process – would be to rewrite all the ActionScript code to JavaScript (or TypeScript in my case). But at least you don’t have to reinvent the wheel, with designing the game’s logic, as the previous programmer has already done that for you. ๐Ÿ˜

Rebuilding The Game Into HTML5

After you’ve exported all the assets, next begins the process of transferring graphics to your new HTML5 project. Raster graphics such as bitmaps, PNGs, and JPEGs can simply be copied over if exported in their native formats. However, for vector graphics, you’ll need to export them as rasters, so they can be loaded onto the HTML5 canvas. Adobe Animate can do this conversion for you.

You can package up all the extracted graphics into one or more spritesheets using TexturePacker. And if you’re using an HTML5 canvas engine like Phaser, it has built-in support for the TexturePacker spritesheets.

If there were animations – hopefully simple ones – you’ll need to extract each frame as a separate raster graphic, then rebuild the animation for use with canvas. Again, Phaser, if you’re using it, can rebuild the animations.

As a super bonus โญ… If you’re using Phaser, you can use Phaser Editor to rebuild the layouts exactly as they were (or as close to it as possible) in the original Flash. I’ve demonstrated this before, and you can use the Editor along with the newly extracted graphics to convert your Flash stage to a Phaser scene.

Export to HTML5

I previously mentioned that the decompiler can export to HTML5. If your Flash is simple enough, I suspect this can convert your Flash game without incident. I say suspect, because, unfortunately, when I tried it, it didn’t work out too well for me.

When I tried it, it produced two files: one HTML file, and once JavaScript file. However, when I ran it, it didn’t behave as intended. The stage content was transitioning from one frame to the next, but it was leaving behind the previous frame’s content. Furthermore, the game logic wasn’t running as expected. Here’s a screenshot of the result:

The text from the previous frames wasn’t removed, and they’re jumbled behind the current frame’s text.

So, let’s have a look inside the HTML and JavaScript files:

What the…! ๐Ÿ˜ต

Good luck trying to edit that! Even with a code formatter like this one, you’ll still be hardpressed with fixing the game to make it work. As I’ve said before, best to rebuild the codebase from scratch, converting the ActionScript code to JavaScript/TypeScript.

Closing

Even if you don’t have the original FLA and assets, there may be a way to still convert the Flash game to HTML5 with a tool like Sothing SWF Decompiler. Overall, I’ve not had much trouble using this tool, and I would recommended giving the trial a try if you’re working to convert your Flash content.

And if you can’t (or don’t want to ) be bothered with the conversion process, reach out to me. I could take a look at your SWF. Or even if you have all the original code and assets, and are looking for a programmer to convert it for you, contact me directly at
cartrell @ gameplaycoder dot com, or you can use this contact form.

And if you’d like to get on my e-mailing list, you can sign up using the form below. There, you’ll get first access to projects that I’m working one as I make noteworthy process. You’ll see the games I work on come to life as I continually work on them.

Thanks for reading! Talk to you next time,

– C. out.

Creating A Multiplayer Poker Game For HTML5 Using Phaser, Part 3

Continuing the series of building a multiplayer poker game, some progress has been made on the game. Development is coming along great using Phaser Editor v3!

A Bit More Technical Setup

I’m using several technologies, as mentioned in the first article of this series, and as I’m moving forward, I’m continuing to make adjustments to my development environment.

Since the game will perform as both a single-player and multiplayer game, I’m working on the single-player aspect first.

The game will be split into two primary projects: one for the client-side, and the other for the server-side.

Both will use common logic for running the game, and to avoid having to duplicate code across both projects. I made a secondary project, which is acts as a “common” repo for sharing code that will be used by both projects.

Since the common folder is outside of the client project root folder, I made come adjustments to VSCode to allow it to “see” this external folder and add it to the workspace.

The common folder is in the same folder as the client project (and server project). In order for Webpack to add the common files and folders to the build process, I made some adjustments to the webpack.config.js file. The alias inside of the resolve also makes the import statements look cleaner in VSCode.

module: {
  ...
  rules: [
    ...
    {
      include: [
        ...
        path.resolve(__dirname, '../common/src'),
      ],
      ...
    }
  ]
};
...
resolve: {
  ...
  alias: {
    common: path.resolve(__dirname, '../common/'),
  }
};

Learning Poker

I’m learning the rules of poker as I build this game, and the journey has been quite interesting. ๐Ÿ™‚

The order in which the players take their turns was fairly straightforward. Play starts with player left of the dealer, small blind (SB). The player left of the SB is the big blind (BB). Play goes clockwise around the poker table.

The object of poker is to win all the money in the pot. You do this by having the best poker hand at the end of the game. Your hand must be built from any combination of two cards that you’ll eventually be dealt (the “hole” cards), plus the five community cards that will eventually be dealt. As players make their turns, they can place bets by adding money to the pot. The player who wins the game (by having the best poker hand) at the end of the game wins all the money in the pot.

The game is split up into rounds and each round doesn’t end until every player has contributed an equal amount of money to the pot.

Note: I’ll be using 1/2 no-limit (NL) rules.

To start the game off, the SB posts a forced bet bet of 1bb, and the BB posts another forced bet of 2bb, twice the SB’s.

After both blinds make their bets, each player is dealt two face-down cards. (You can see your own cards, of course ๐Ÿ˜‰)

Image taken from Batman The Animated Series, Episode: “Almost Got ‘Im”.

When it’s the next player’s turn, if they wish to stay in the game, they must “call” by matching the BB’s bet of 2bb.

When play returns the the SB, they need only post 1bb, since they posted the initial 1bb star started the game. After this, all players still in the game (who haven’t quit, or folded) have posted an equal amount of 2bb.

After all players have placed equal bets the betting round comes to a close, and the first three of five community cards, the flop, are dealt, face-up in the center of the table.

The round begins again with the player nearest the left of the dealer. This would be the SB if They haven’t folded. Each players has the following moves:

  • Check: Pass to the next player without making a bet.
  • Bet: Increase the current bet by posting additional money into the pot. If a player does this, all other players must either match this bet, fold, or re-raise. More on re-raise later.
  • Fold: Forfeit their place in the current game. Their hand is surrendered face-down. Note that they can return to play the next game.
  • Call: If a previous raise has been made, the player can call by matching the previous bet.
  • All-In: If a player does not have enough money to match the current bet, and they wish to stay in the game, they must go “all in”, betting all their remaining chips. Note that if the player does not win this game, they will lose all their money and be out of the game!

Once the flop round is complete, the fourth community card is dealt, called the turn. Betting begins again with the player left of the dealer. And the round ends once all players have posted equal amounts to the pot.

Note: It is possible to no players to make any bets during a betting round by simple calling each time. But that would make for a slow and boring game, IMO. Maybe that’s the rookie talkin’, haha! ๐Ÿ˜†

Once the turn round is complete, the fifth and final community card is dealt, called the river.

(Image owned by Activision.)

Couldn’t resist.

Ahem! Anyway, betting begins again with the player left of the dealer. And the round ends once all players have posted equal amounts to the pot.

After this round ends, the showdown begins!

During the showdown, all players still in the game reveal their hands, and the player with the best hand wins the pot. If you’re curious, you can learn more about the poker hands here.

Re-Raising

Back to the concept of re-raising. This is when a player raises the bet, then another player raises again after them. Depending on the type of poker being played, the rules for determining the minimum (and maximum) amounts you can raise will vary. Since I’m coding a game using the rules by No-Limit, the maximum you can bet is all your available chips. However, the minimum you can bet can be a little trick to figure out, because it’s simply not just “double what the big blinds bet”.

I’m still working on this part, but I think I’ve got it (if not close ๐Ÿ˜…). Of course, if you’re an expert on calculating the minimum amount for re-raising in No-Limit 1/2 poker, please comment and correct any of my assertions. That would be greatly appreciated. ๐Ÿ‘๐Ÿพ

When re-raising against previous raise, the minimum amount must be at least the amount raised by the previous player. Take this example below.

Pot size is 6bb.
Player 1 bets 4bb.
Player 2 raises to 10bb.
What would be the minimum raise for Player 3?

First, let’s have a look at the wording used. Player 2 raised to 10bb. However, Player 2 actually increased the bet amount by 10 – 4 = 6bb. So, the minimum Player 3 will need to raise by is 6bb.

This would be a total raise size of:
10 (previous player’s total raise to) + 6 (minimum raise by) = 16bb.

Back To The Game Dev

As I close this article, here’s a screen shot of the current progress. I’m currently working on the raise (and re-raise!) implementation, as well as a few other functions, such as folding and going all-out.

After that, I’ll move on to the showdown functions and determine the winner among the various conditions.

Thatโ€™s all for now. Iโ€™ll continue to keep you updated as I make progress.

Finally, you can sign up using the form below to receive updates to playable builds (or at least interactable builds) as I make noteworthy progress.

Talk to you later,

– C. out.

Creating A Multiplayer Poker Game For HTML5 Using Phaser, Part 2

Continuing the series of building a multiplayer poker game, I’ve decided to make a big turn in how the game will be built.

I’ve decided to give Arian’s latest version, Phaser Editor v3, a try.

Why? All my previous projects were deep in v1 or v2. However, I haven’t gotten very far into this Poker project, so it was easy to switch it from v2 to v3 sooner rather than later. Plus, after comparing its functionality with that of previous versions, it made sense to at least give it a try. And so far, it’s working out well!

Now, the biggest attraction, at least for me, was the fact that prefabs were back, which we haven’t seen since v1. Using factories in v2, while they took a bit of work to get them the way that I wanted, allowed me to learn a lot about how custom factories work in Phaser.

At the time of this article, v3 doesn’t yet supply an animations editor, or texture atlas editor. But that’s ok!

For animations, you can use a tool called Animator. You can learn more about animations in v3 here. I haven’t needed to use animations for my Poker game (at least not so far), so I can’t vouch for this tool. However, it is an option.

For texture atlases, you can use Texture Packer, which I’ve enjoyed using quite a bit over the years. To learn more about atlas editor usage in v3, as well as other options, check here.

Since this version now works in your browser (which also significantly reduces its download size), you start it up using your command prompt. So I made a simple batch file which starts the editor with the -desktop option since I work with a local server. My projects workspace is also in a location different than the default workspace, so I use the -ws option. For a full list of options, see this page.

As I’m learning the rules for Poker, the interactive tutorial on this page has been very helpful. Also, playing this game has also been useful. (No, I haven’t been screwing around, getting sucked into playing! Nope. Not me.)

I got a good chuckle from this scene from The Avengers.

That’s all for now. I’ll continue to keep you updated as I make progress.

Finally, sign up using the form below to receive updates to playable builds (or at least interactable builds) as I make noteworthy progress.

Talk to you later,

– C. out.

Creating A Multiplayer Poker Game For HTML5 Using Phaser, Part 1

Getting started with building a multiplayer Poker game, I’m first setting up the development environment.

After setting up webpack, ESLint, Babel, and Typescript (getting them to all work together and the way I want was a challenge), I’ve started on building a the game’s main display using Phaser Editor.

Building The Game Layout

I decided to go with allowing up to six players, and the layout will look like this:

Just a very simple layout here. Nothing fancy. #ImNotAGameDesigner

Phaser Editor supports Typescript, which is awesome. However, the code the Phaser Editor compiler generates doesn’t make ESLint happy.

As you can see here, we have some lines of code that ESLint is nit-picking us about:

There are sections in the code where you can put whatever you want, and it won’t be overwritten by the Phaser Editor compiler. In this case, I’d surround the generated code to temporarily disable ESLint.
/* eslint-disable */
and
/* eslint-enable */

NOTE: Since you cannot directly control the generated code, disabling ESLint is fine in these situations.

Since I’m using modules, at the bottom of Scene files generated by Phaser Editor, you can export the Scene class, by doing so at the bottom of the file. Code placed here will not be affected by Phaser Editor (the editor will mark the file with comments, telling you where you can write your own code). At the bottom, you can write something like this:

/* END OF COMPILED CODE */

// You can write more code here
export default [NameOfYourSceneClass];
Setting Up A Factory For The Card Images

Still building the layout, I want the card images to be set up as their own factory in Phaser. When I recently converted the Flash game Blasteroids to HTML5, I used JavaScript. However, for this project, I’m using TypeScript and the code is being linted by ESLint.

First let’s create a class that will display the card image. I won’t go into full details for this class, but the setup could look like this:

export default class CardImage extends Phaser.GameObjects.Image {
  constructor(scene: Phaser.Scene, x: number, y: number, texture: string,
    frame?: string | number) {
    super(scene, x, y, texture, frame);
    ...
  }
}

NOTE: You can then create properties to store the suit and value of the card, as well as whether or not the card is face up or face down. Note that if you change the face up/down property, you’d need to update the card’s image as well.

Next, let’s create a factory file. The name of my factory would be cardImage, and the looks something like this:

import CardImage from './CardImage';

Phaser.GameObjects.GameObjectFactory.register('cardImage',
  function foo(this: Phaser.GameObjects.GameObjectFactory,
    x: number, y: number, texture: string, frame?: string | integer): CardImage {
    const scene = this.scene;

    const sprite = new CardImage(scene, x, y, texture, frame);

    scene.sys.displayList.add(sprite);
    // scene.sys.updateList.add(sprite);

    return sprite;
  });

NOTE: The CardImage class extends Phaser.GameObjects.Image. If your class extends Phaser.GameObjects.Sprite, you’d also need to uncomment line 11 as well.

When setting card images in the scene to use cardImage as the factory, then saving the scene file, and viewing the source code, you’ll see there are some issues:

NOTE: I’ve spent a day or so trying to figure out how to resolve this issue. The scene class was originally a TypeScript, and I was originally using the TypeScript version of scenes in Phaser Editor. Unfortunately, I’ve had trouble getting namespaces and modules to work together. My research eventually led me to trying Declaration Merging, and looking at declaration files (.d.ts). And while setting up factories with TypeScript came closest (actually, this resource did work) to helping me solve my issue, I was still unable to resolve error ts(2339) by VS Code in the above image.

Long story short: I’m using JavaScript for scenes that use factories to avoid these issues.

After changing Phaser Editor to use JavaScript instead of TypeScript for this scene, VS Code no longer reports issues, and the code still compiles and runs with no issues! ๐Ÿ˜Ž

Now, I can continue to build the game’s main display, and code the functionality for dealing and flipping cards, presenting chips, and building the buttons, call, check, etc. There are still the game logic for the rules of Poker itself, as well as the multiplayer aspect of the game, which will be the game’s main draw (and an excellent experience for me in developing a turn-based, real-time multiplayer game).

That’s it for now!

If you’d like to get on my e-mail list and receive updates are the progress continues, sign up using the form below.

Talk to you later,

– C. out.

Starting On Multiplayer Poker Game For HTML5 Using Phaser

What’s up, guys. ๐Ÿคœ๐Ÿพ

Now that the Flash game Blasteroids has been converted to HTML5, the next game I’m working on is a multiplayer Poker game.

Now, this won’t be a conversion, but a game originally built using Phaser 3, JavaScript, and Phaser Editor.

Building this game will be a bit of a challenge for me for these two reasons:

One, this will be my first attempt at developing a complete multiplayer, turn-based game.

An MP game is much more challenging to build than a single-player one, believe you-me. I once tried making a real-time MP in the past using PlayerIO, butโ€ฆ let’s just say that didn’t pan out so well.

And two, I’m learning a bit about the JavaScript ecosystem. I took previous course on Zenva called MMORPG Academy. The course showed you how to make a simple multiplayer MMO game using Phaser, Express and SocketIO. It also introduced me to the following tools, which I will also be using for this game.

Technology Used

Node.js

Node.js is a server-side platform built on Google Chrome’s V8 JavaScript Engine. It can be used for developing server-side and networking applications. I’ll use it as part of the back-end for this game.

npm

npm is a very large software repository. It’s a package manager for JavaScript, and you can use it to download and install many third-party packages into your projects. It comes with Node.js, and it can be used to install most of the tools listed below.

Express

This is a web framework that allows your web application to handle requests that are sent to a specific URL. Both Node.js and Express will be used together to create the web server.

Socket.IO

This is what will allow communication between the the player client app and the server web app.

webpack

Among many other things, webpack can bundle all your modular JavaScript code and packages together into a single file that can be understood by your web browser.

Babel

It’s much more convenient to write JS code in the latest/modern version. However, older versions of web browsers can’t understand these versions. This is where Babel comes in. It can transpile your modern code to earlier versions that can be understood those older browsers, increasing the available of your web apps to more people.

ESLint

This tool examines your code for syntactical errors, or other issues where the code may not adhere to a certain standard or set of styling rules. Essentially, “linting”, helps you write cleaner code.

Some other tools not discussed in the Zenva course that I will be using in Poker are:

TypeScript

I much prefer Typescript over JavaScript. Typescript allows you extra features, and for me, that means static typing and support for interfaces. Of course, I’m sure I’ll learn more as I dive deeper into Typescript.

Note: My plan is to write the code using TypeScript (which both Phaser and Phaser Editor also support), use Babel (with Typescript support) to transpile the code, and bundle it all together in a single JavaScript file using webpack. This is for the client-side portion of the game. The back-end server-side code will not be run in a web-browser, so it will not use this process.

Poker Game Multiplayer Development Plan

First thing’s first: the game’s design, and layout will need to be created. While I’m not a game designer (my service currently only includes programming), this version of Texas Holdem Poker I’ll be making will have a relatively simple enough mechanic. Nothing fancy here. And the game is mainly to add to my portfolio.

I’ll need to find some assets (graphics and sounds). I’ll use the same assets I used from my Thunderjack! game.

Because this is a multi-player game using a client-server model, where the server has the authority and maintains the game’s state.

The client apps (what the players will use) act as visual agents, showing the state of the game server. They also accept input (keyboard, mouse, touch, etc.) from each player, send them to the server, then the server with validate that input. The validation is to make sure the state stays clean, and to prevent cheating.

Because this will be a turn-based game and not a real-time game, it doesn’t need to rely heavily on advanced concepts like client-side prediction or entity interpolation and prediction.

Next, there are the rules of Poker. Because the server maintains the stage, all the game logic will be written on the server. And of course, I’ll need to get the rules down as well. ๐Ÿ™ƒ

And finally, I want the game to be able to use bots that can fill in if no other real players are available. So building an AI will be a challenge all its own, though I’m sure I can research this for help.

Where and How will I Host the Game Server?

The final component to this game is determining where and how I’ll host the game server, so you can play this game online with other real people. The client-side app will be hosted here on my site here, but it’s the game server that needs to be hosted elsewhere.

The multi-player game that the Zenva course helps you to create uses Heroku to host the game project, so I’ll use that again. The course covers just enough for you to set up a simple game, as any more, I believe, would go beyond the scope of the project, but there’s enough there to get started.

As I work on the game, I’ll post noteworthy updates in future articles. And you can play the work-in-progress versions of the game as I make playable updates, before the game is released to the public!

Sign up using this form to get on my mailing list:


Whew! That’s it for now, and this will be quite a challenge. I’m sure this will take me a while to complete. And I hope you stick with me on this journey! I got this! ๐Ÿ’ช๐Ÿพ

– C. out.

Converting a Flash Game To HTML5

Hey guys,

I’m working on an interesting project now. A repeat client has requested that I convert a cards game I previously made for them from Flash to HTML5.

As you may be aware, Adobe is discontinuing their Flash player browser plugin by the end of 2020.

There really aren’t any true “conversion” tools out there. In other words, say you have a Flash project that consists of a few Flash FLA files with library assets in them, and maybe some exported to external classes, as well as additional external asses loaded at run-time, as well as external AS3 files. And your build process (what you use to generate your final SWF file) uses either Flash CSx/Animate or say, FlashDevelop (good tool, by the way – I highly recommend it if you’re using Adobe AIR to build mobile games).

There is no conversion tool that can just convert all that into a HTML + JavaScript files with all the assets extracted from FLA files, and present you with an HTML index file that you can simply run and be on your merry away.

That. Would. Be. Awesome.

If you want to convert a Flash game to HTML5, you pretty much have to learn JavaScript if you don’t already know it, and rebuild it from scratch).

Depending on the simplicity of your game, you may get some help from Adobe’s Flash Animate, but I’ve never tried it, and due to the complexity of the games I make, it’s likely to not work.

There are several other tools out there, your best bet may be to simple rebuild the code, but you can still use the assets.

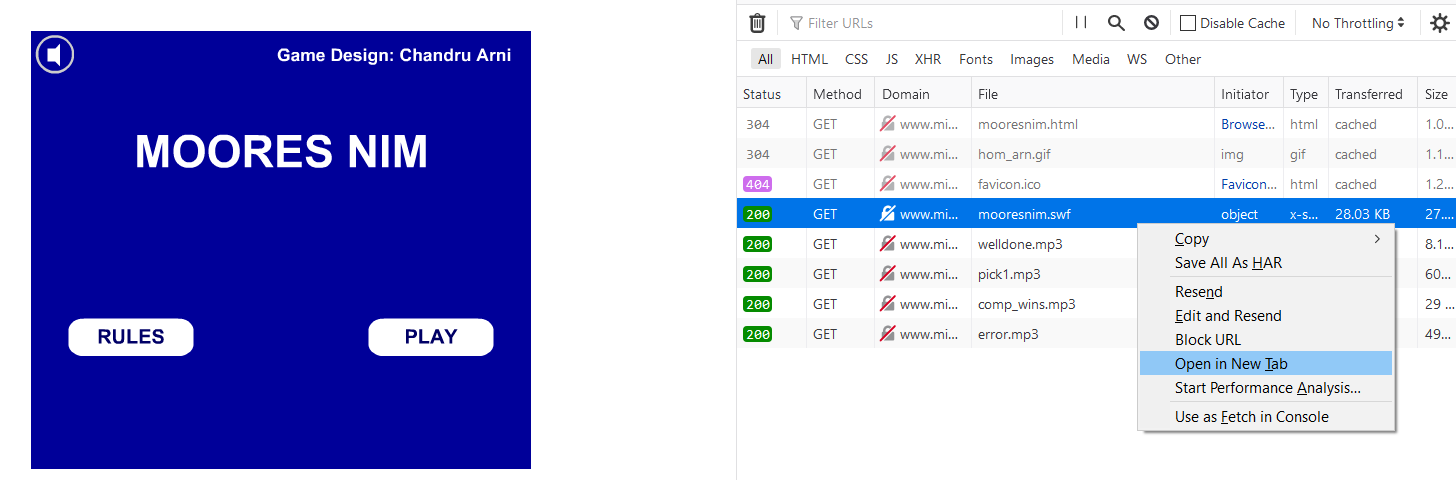
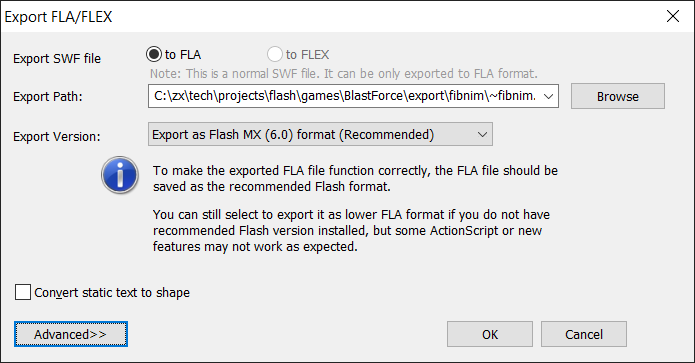
However, if you have the original source code – the ActionScript 3 .AS files, sounds, and Flash .FLA files (which I do have because I wrote the original Flash project in the first place) – you already have everything you need to do this. Meaning, you don’t need to go through the trouble of decompiling SWF files and other dubious tasks.

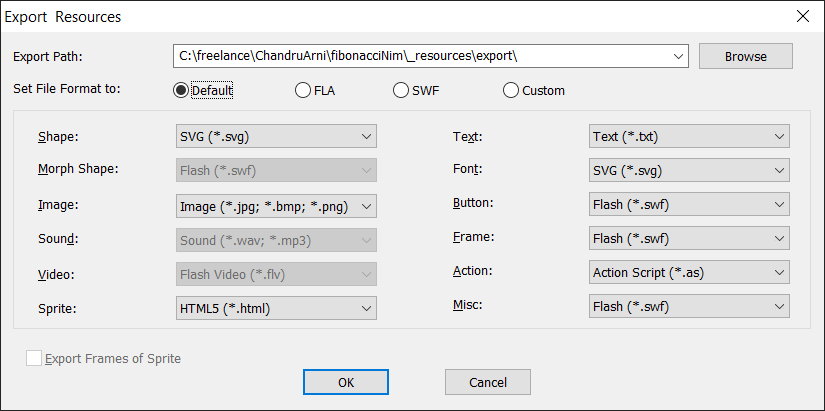
Also, fortunately, the Flash game I’m converting doesn’t do any blitting of bitmaps. All graphics are either bitmaps imported into the FLA, or vector art saves as library symbols. The library symbols can be converted to bitmaps so they can then be used in the HTML5 version.

The biggest challenge for assets and layout is no longer having a super-convenient WSYISYG (what you see is what you get) editor like Flash CS/Animate. This allows you to place and size the objects in a scene as they should look when the game is running. Without this vital tool, you have a few options:

1). Hard-code all the sizes and positions of everything, and references to what everything looks like. (OUCH! This is not the old days of game development. I’m pretty sure we can come up with something quicker and easier, right? ๐Ÿค” )

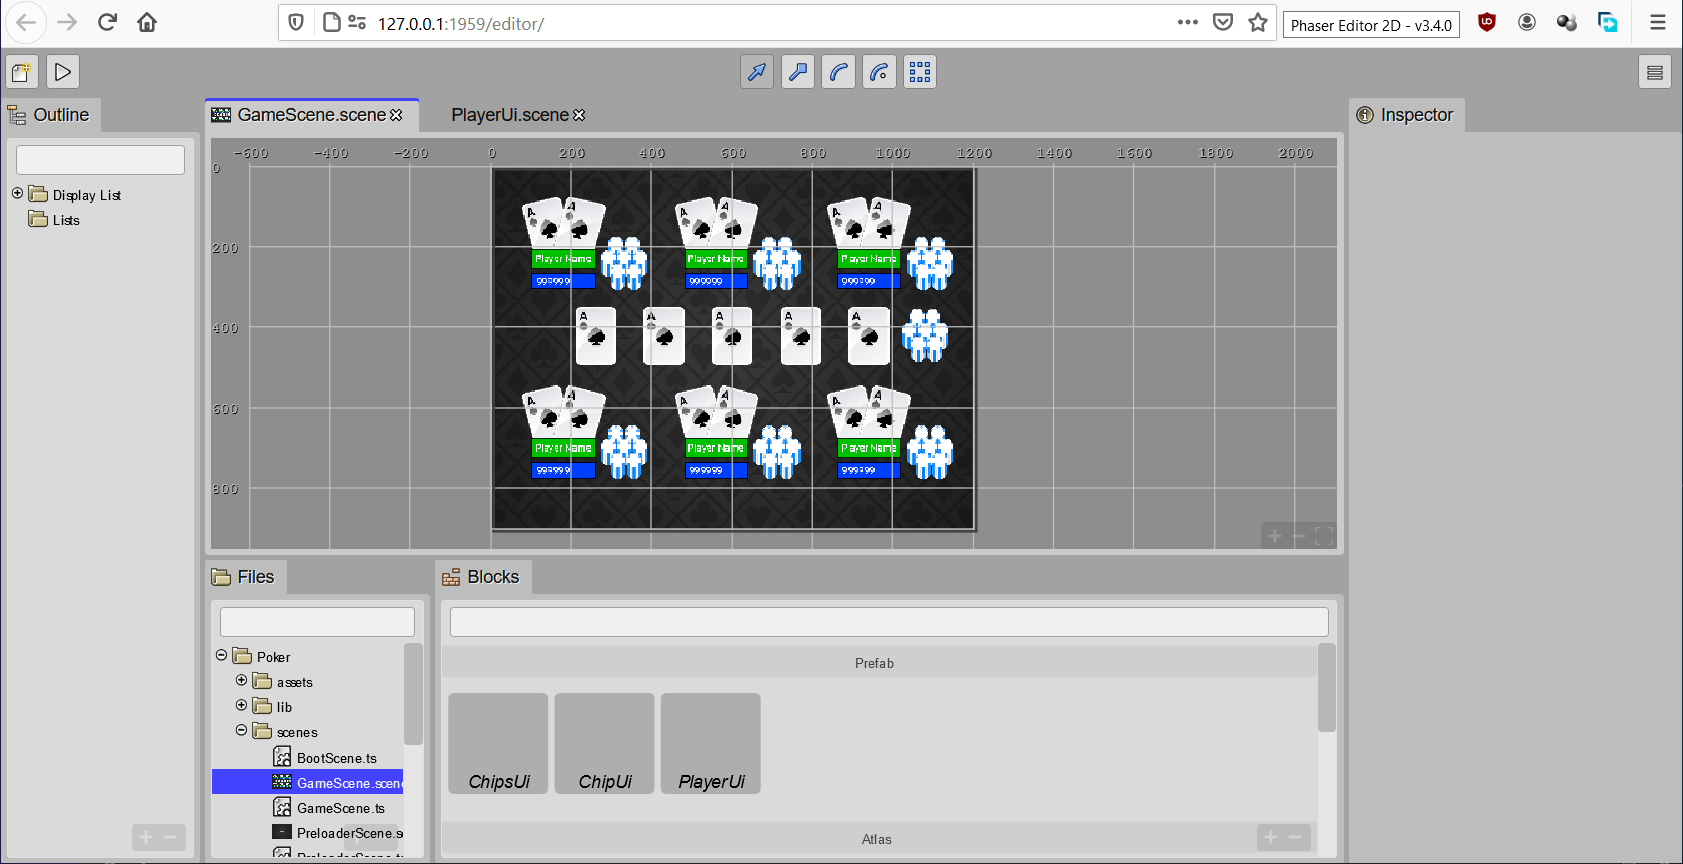
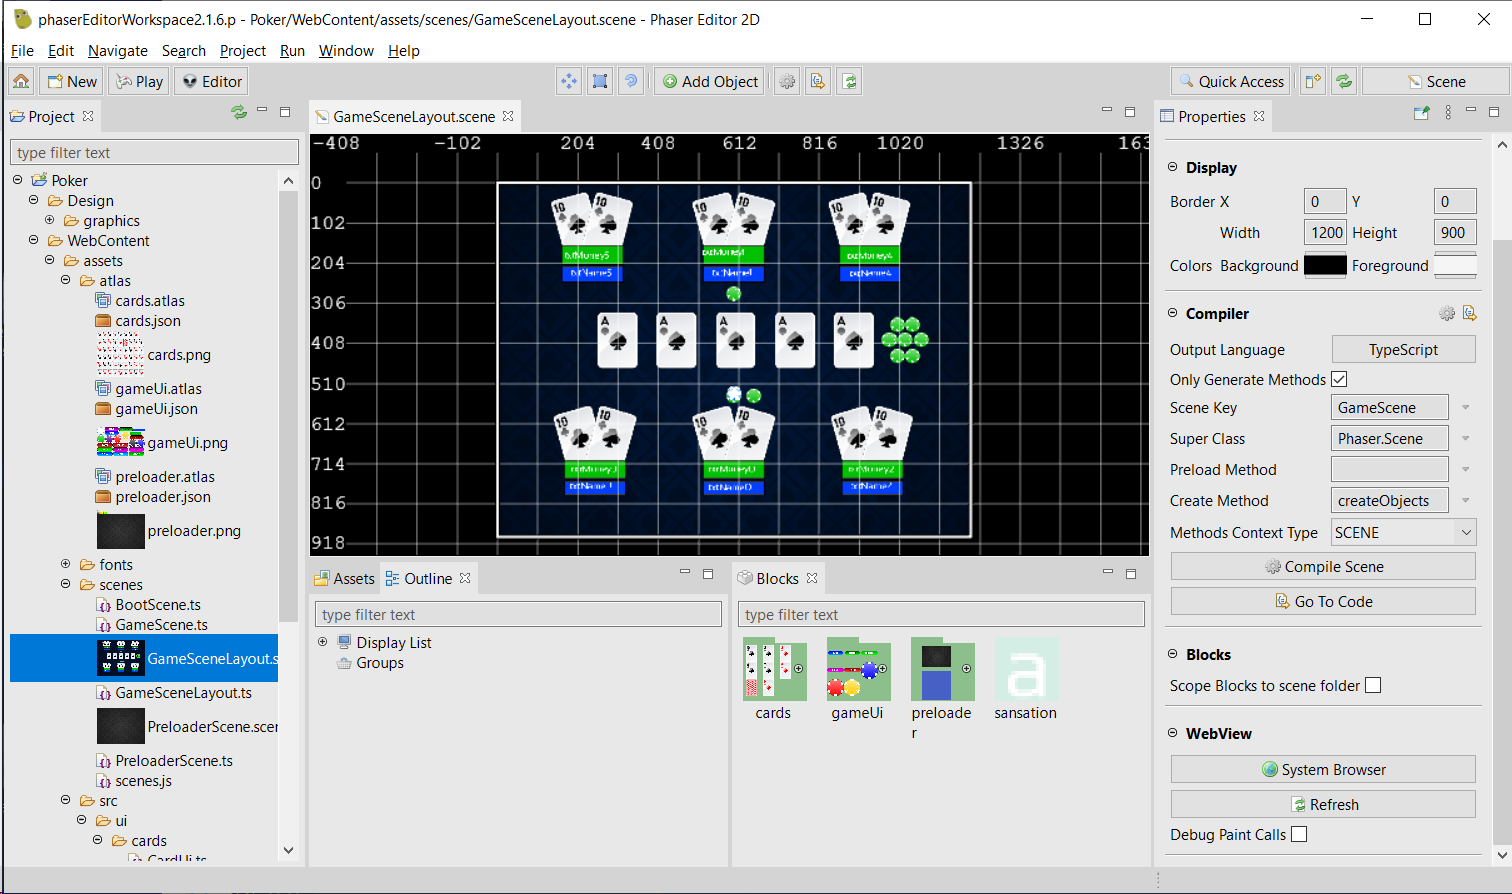
2). Use an editor, like Phaser Editor. A visual editor to build your layout, position and size objects on the scene. This editor has a built-in code Canvas Compiler that will translate your layout into JavaScript code, placing and sizing all your objects for you. You can then focus on building the layout. Now…

For the most part, converting AS3 to JavaScript files is fairly simple. Although it’s a laborious task of recoding, ActionScript 3 and JavaScript share many similarities, both having roots in the ECMAScript standards for example. Sure, you can’t just copy AS3 code, paste it into a JS file and call it a day, but if you know both languages well, the conversion process isn’t all that painful.

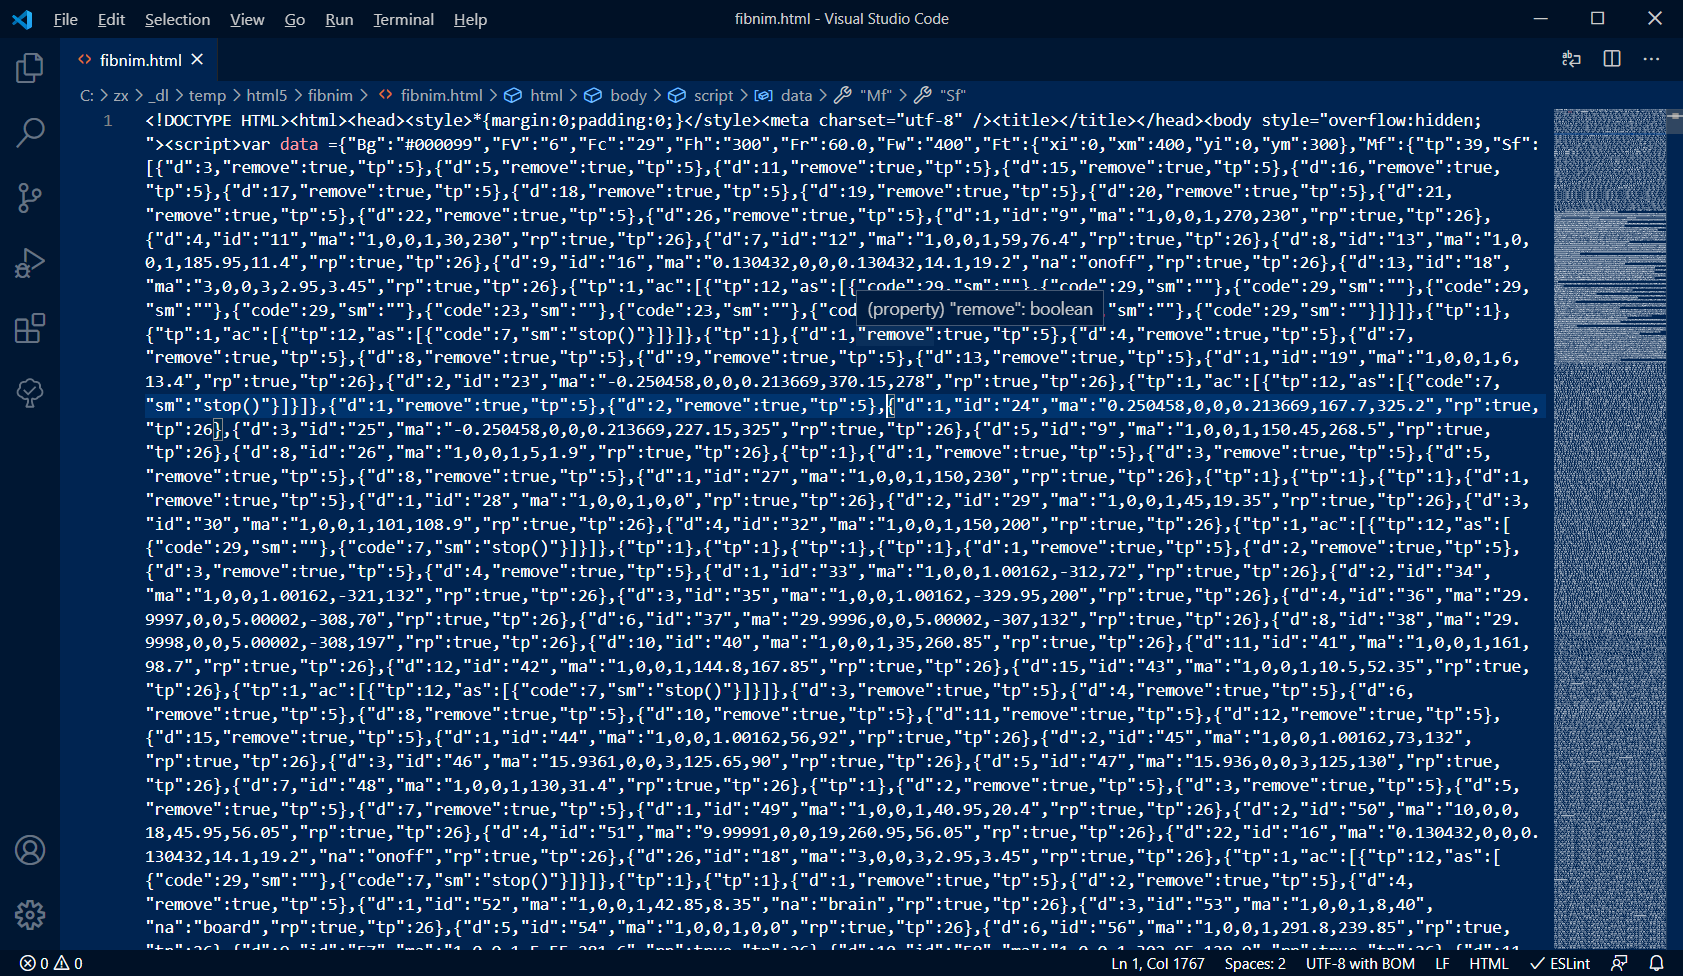
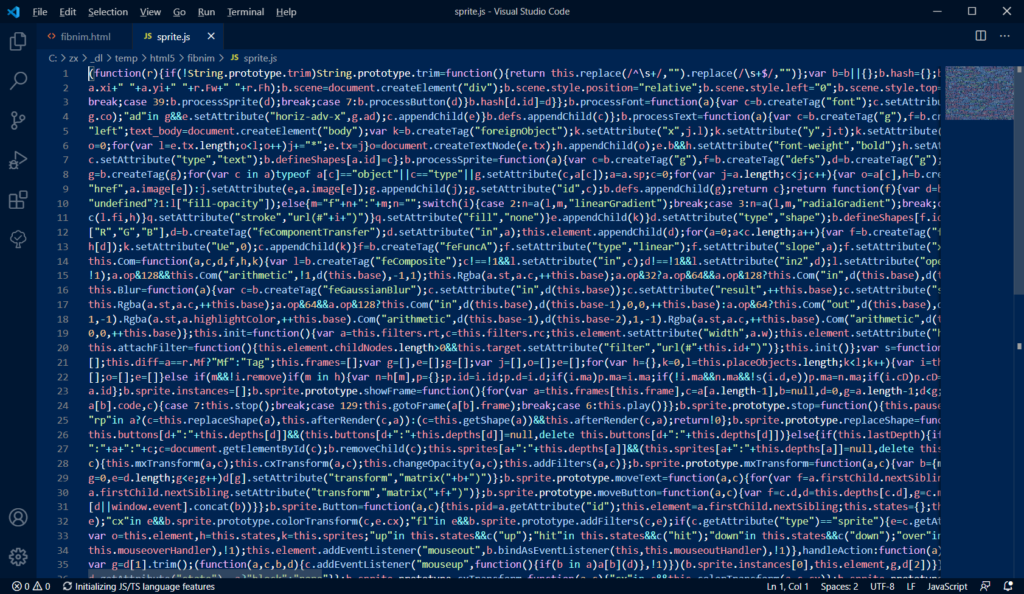
Here a quick example of an original source file written in AS3 for Flash, and below it, the JavaScript counterpart.

public final class EZ_PlayerData {
  private var mvo_dailyScores:Vector.<BJ_DailyScoresData>;
  private var mvo_cardsData:Vector.<EZ_PlayerCardsData>;
  private var mn_betValue:Number;
  private var mn_credits:Number;
  private var mu_selectedHandIndex:uint;
  private var mn_tournamentCredits:Number;
  private var mb_isTournamentEnabled:Boolean;
  
  ////////////////////////////////////////////////////////////////////
  // ctor
  public function EZ_PlayerData(u_maxHands:uint, u_maxCardsPerHand:uint) {
    super();
    
    mn_betValue = mn_credits = mn_tournamentCredits = 0;
    mvo_dailyScores = new Vector.<BJ_DailyScoresData>();
    
    mvo_cardsData = new Vector.<EZ_PlayerCardsData>(u_maxHands);
    for (var u_index:uint = 0; u_index < u_maxHands; u_index++) {
      mvo_cardsData[u_index] = new EZ_PlayerCardsData(u_index, u_maxCardsPerHand);
    }
  }
  
  ////////////////////////////////////////////////////////////////////
  // public functions
  
  //==================================================================
  // addDailyScore
  //==================================================================
  public function addDailyScore(o_score:BJ_DailyScoresData):void {
    if (!o_score) {
      return;
    }
    
    mvo_dailyScores.push(o_score);
    mvo_dailyScores.sort(onSortDailyScores);
  }
  
  //==================================================================
  // betValue (get)
  //==================================================================
  public function get betValue():Number {
    return(mn_betValue);
  }
  
  //==================================================================
  // betValue (set)
  //==================================================================
  public function set betValue(n_value:Number):void {
    if (!isNaN(n_value)) {
      mn_betValue = n_value;
    }
  }
  
  //==================================================================
  // cardsData (get)
  //==================================================================
  public function get cardsData():Vector.<EZ_PlayerCardsData> {
    return(mvo_cardsData);
  }
  
  //==================================================================
  // credits (get)
  //==================================================================
  public function get credits():Number {
    return(mn_credits);
  }
  
  //==================================================================
  // credits (set)
  //==================================================================
  public function set credits(n_value:Number):void {
    if (!isNaN(n_value)) {
      mn_credits = n_value;
    }
  }
  
  //==================================================================
  // getDailyScores
  //==================================================================
  public function getDailyScores():Vector.<BJ_DailyScoresData> {
    return(mvo_dailyScores);
  }
  
  //==================================================================
  // isTournamentEnabled (get)
  //==================================================================
  public function get isTournamentEnabled():Boolean {
    return(mb_isTournamentEnabled);
  }
  
  //==================================================================
  // isTournamentEnabled (set)
  //==================================================================
  public function set isTournamentEnabled(b_value:Boolean):void {
    mb_isTournamentEnabled = b_value;
  }
  
  //==================================================================
  // removeLastDailyScore
  //==================================================================
  public function removeLastDailyScore():BJ_DailyScoresData {
    return(mvo_dailyScores.pop());
  }
  
  //==================================================================
  // selectedHandIndex (get)
  //==================================================================
  public function get selectedHandIndex():uint {
    return(mu_selectedHandIndex);
  }
  
  //==================================================================
  // selectedHandIndex (set)
  //==================================================================
  public function set selectedHandIndex(u_value:uint):void {
    mu_selectedHandIndex = u_value;
  }
  
  //==================================================================
  // tournamentCredits (get)
  //==================================================================
  public function get tournamentCredits():Number {
    return(mn_tournamentCredits);
  }
  
  //==================================================================
  // tournamentCredits (set)
  //==================================================================
  public function set tournamentCredits(n_value:Number):void {
    if (!isNaN(n_value)) {
      mn_tournamentCredits = n_value;
    }
  }
  
  ////////////////////////////////////////////////////////////////////
  // private functions
  
  //==================================================================
  // onSortDailyScores
  //==================================================================
  private function onSortDailyScores(o_score1:BJ_DailyScoresData, o_score2:BJ_DailyScoresData):Number {
    if (o_score1.score >= o_score2.score) {
      return( -1);
    }
    
    return(1);
  }
}

And here is the corresponding JavaScript code:

(function(global) {
  global.Multiplay = global.Multiplay || {};
  Multiplay.PlayerData = Multiplay.PlayerData || {};
  
  //===========================================================================================
  //"public"
  
  //-------------------------------------------------------------------------------------------
  //ctor
  //-------------------------------------------------------------------------------------------
  Multiplay.PlayerData = function(u_maxHands, u_maxCardsPerHand) {
    this.dailyScores = [];
    this.betValue = 0;
    this.credits = 0;
    this.selectedHandIndex = 0;
    this.tournamentCredits = 0;
    this.isTournamentEnabled = false;
    
    this.cardsData = [];
    for (var u_index = 0; u_index < u_maxHands; u_index++) {
      this.cardsData.push(new Multiplay.PlayerCardsData(u_index, u_maxCardsPerHand));
    }
  };
  
  //-------------------------------------------------------------------------------------------
  //addDailyScore
  //-------------------------------------------------------------------------------------------
  Multiplay.PlayerData.prototype.addDailyScore = function(dailyScoreData) {
    if (!dailyScoreData) {
      return;
    }
    
    this.dailyScores.push(dailyScoreData);
    this.dailyScores.sort(this._onSortDailyScores);
  };
  
  //-------------------------------------------------------------------------------------------
  //removeLastDailyScore
  //-------------------------------------------------------------------------------------------
  Multiplay.PlayerData.prototype.removeLastDailyScore = function() {
    return(this.dailyScores.pop());
  };
  
  //===========================================================================================
  //"private"
  
  //-------------------------------------------------------------------------------------------
  //_onSortDailyScores
  //-------------------------------------------------------------------------------------------
  Multiplay.PlayerData.prototype._onSortDailyScores = function(score1, score2) {
    if (score1.score >= score2.score) {
      return( -1);
    }
    
    return(1);
  };
})(window);

AS3 takes the usual object oriented programming approach with classes, by defining an actual ‘class’, its constructor, and added properties and methods onto that class.

JavaScript uses protoypes, and a function of the same name as the “class” acts like a constructor. You then add functions onto the prototype which act like the class’s methods.

Due to the absence of public getter/setter properties, the JavaScript file turned out to be way shorter than the original ActionScript. However, you have to be careful when accessing members of the Multiplay.PlayerData prototype, that you don’t accidentally modify a member intended to be treated as private. In JavaScript, I precede such functions and members with an underscore ( _ ).

Throughout the conversion process, I highly recommend that you constantly test the code in small updates to ensure that the code is working as expected (much like you would when building any game, but especially here). I convert AS3 classes as few as possible at a time, then re-test for errors.

How Phaser Editor Helps

Other than the aforementioned benefits of using a WSYIWYG editor, Phaser Editor also allows you to write custom code in the same files that it creates with its canvas compiler.

In most cases, I prefer to keep the UI code separate from logic/business/implementation code, adapting some concepts from Model View Controller design pattern. This makes it easier for me to convert classes from AS3 to JS, since the UI and logic code will be implemented different in the two scripting languages.

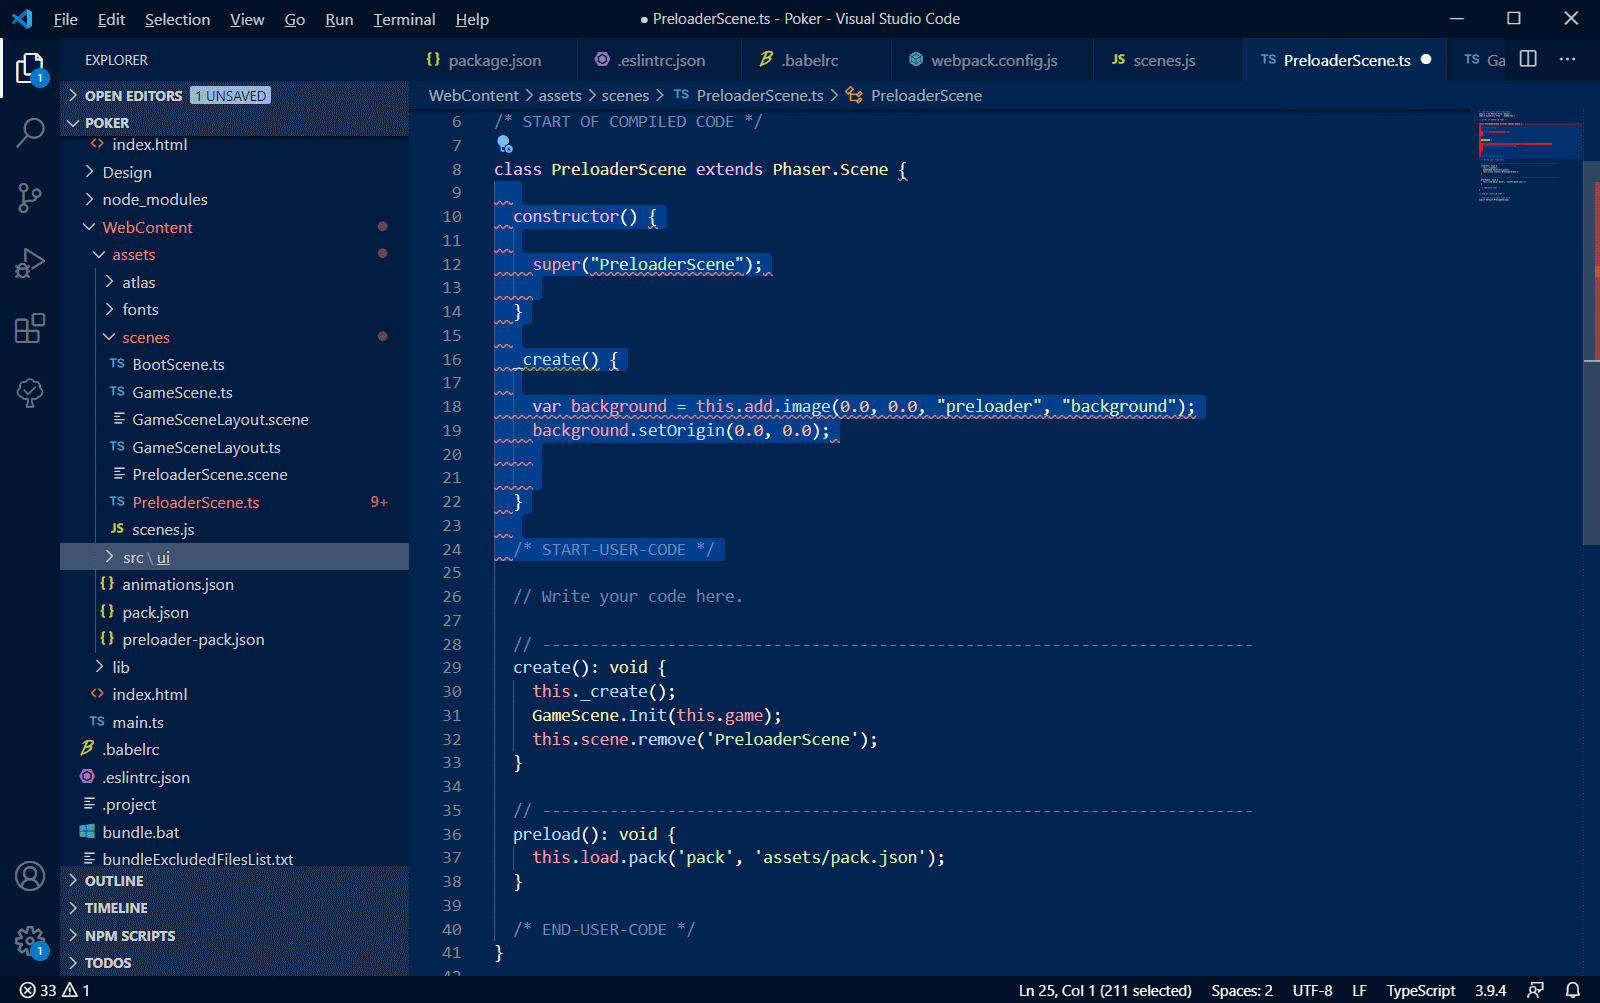
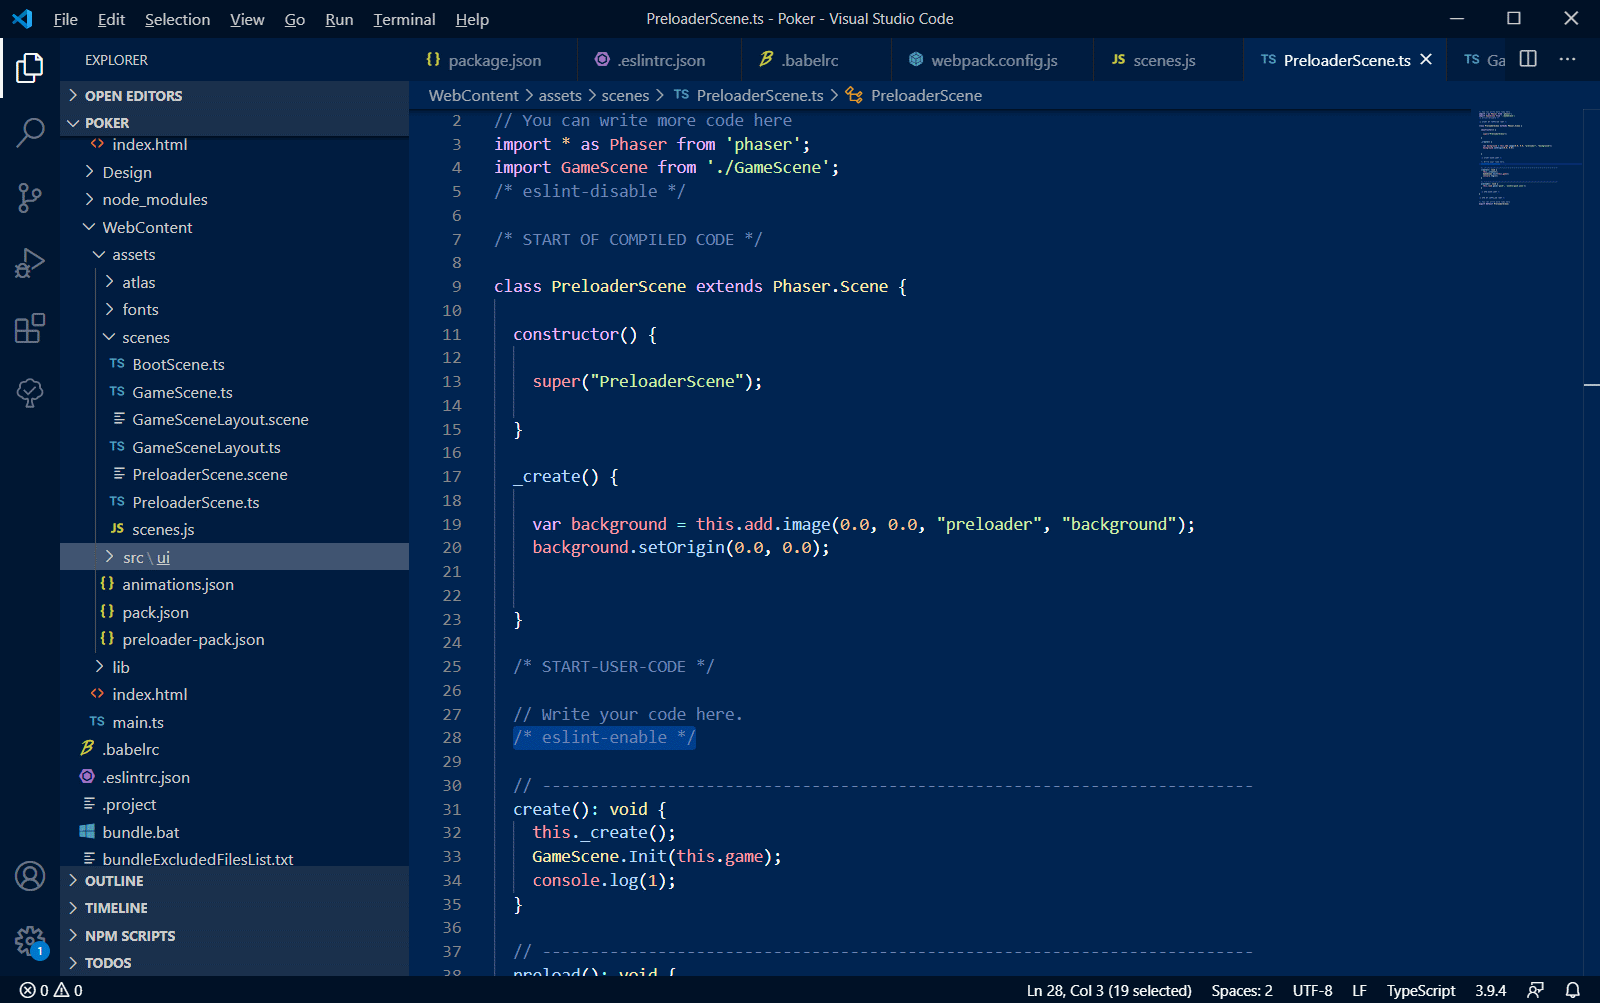
That said, in the files generated by the Phaser Editor canvas compiler, I can add an “initialization” method call the editor’s User Code section, and from there, set up all the UI objects that were created on the canvas.

This one line is the only one I write in the Create tab of the User Code dialog. I prefer to keep code in here minimal and focus on write what the _init does in the user code section of the canvas JS file. Phaser Editor will reserve areas of the JS file as user code for you, and the code there will not be overwritten the next time you save the canvas layout (which will cause the canvas compiler to update the corresponding JS file, overwriting any unsaved changes – make sure you always save your JS file first before going saving new changes in the editor’s canvas!)

In the “user code here” section of the JS file (marked by Phaser Editor in a commented at the bottom of the file), I defined an empty _init function. This is where you can custom setup any UI objects, and we’ll be revisiting this later.

GameView.prototype._init = function () {
};
Converting a Button

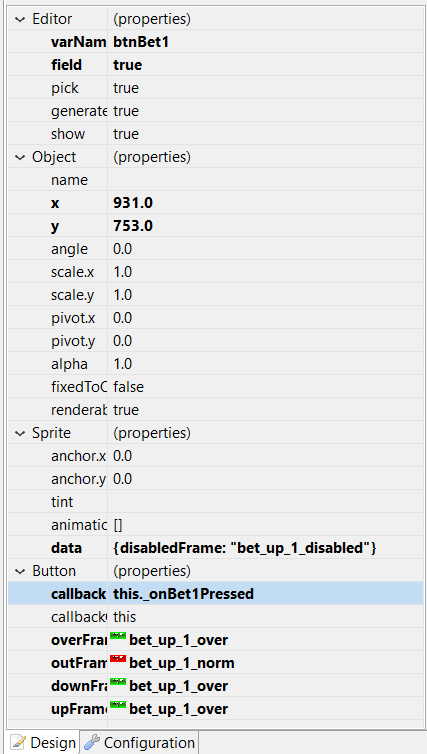
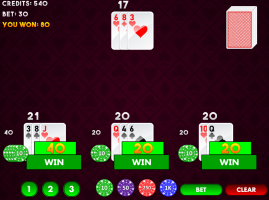
Next, say I want to create (or “re-create”, as we’re rebuilding the original Flash layout ๐Ÿ˜‰ ) a button on the canvas named btnBet1 (from the casino cards game I’m converting for my client). Because I also have the field property set to true, the canvas compiler will create a property on the JavaScript file of the corresponding canvas called fBtnBet1. I also have the callback property set to a method on this instance of the canvas object this._onBet1Pressed. In my user code, I can define the _onBet1Pressed function. You’ll also want to add the button frames for over, out, down, and up so your button can respond to the various button states.

The canvas file is actually a Phaser state, and the canvas compiler will automatically generate the following code in the state’s create method:

var _btnBet1 = this.add.button(931.0, 753.0, 'some_atlas', this._onBet1Pressed, this, 'bet_up_1_over', 'bet_up_1_norm', 'bet_up_1_over', 'bet_up_1_over', _buttons);
...
this.fBtnBet1 = _btnBet1;

In the user code section of the JS file, I can create the button pressed callback function like this:

GameView.prototype._onBet1Pressed = function () {
};

It’s similar to a MouseEvent handler from ActionScript 3 when setting up a button to respond to mouse clicks.

Keeping the UI code and implementation code separate, I won’t include what the button actually does inside this method. Instead, I’ll have it dispatch a notification, via a Phase Signal. I treat the signal is treated as a public property of the canvas object, and I define the signal in the _init method created earlier:

GameView.prototype._init = function () {
  this.onBetButtonPressed = new Phaser.Signal();
};

When the button is pressed, I want that signal to fire a notification to be handled by the implementation code. Modifying the _onBet1Pressed function, it now looks like this:

GameView.prototype._onBet1Pressed = function () {
  this.onBetButtonPressed.dispatch();
};

There is no logic code in this canvas JS file, since it’s for UI only. The implementation is handled by the code that processes the game logic. First, it assigns a function to be handled by the signal when it dispatches a notification:

var gameView;
...
gameView.onBetButtonPressed.add(function() {
  //do whatever when the button is pressed
});

Instead of inlining the function, you can also pass in a function reference:

gameView.onBetButtonPressed.add(onBetBtnPressed);
...
function onBetBtnPressed() {
  //do whatever when the button is pressed
}

That’s pretty much how all the buttons will be converted.

Converting Fonts

Fonts is a big one. In Flash, you can embed fonts directly into the SWF file to make sure that the fonts will show up, even if the fonts aren’t installed on the end users’ machines. However, you can’t do this with HTML5. Instead, you have to either use web fonts something like this, or you can use bitmap fonts. Phaser Editor can not show all the fonts installed on your system. A quick excerpt from this page about fonts in Phaser Editor:

Phaser Editor uses JavaFX to render the scenes but Phaser uses the browser for the same purpose. This means that in some cases the text object is not rendered in design-time like Phaser renders it at run-time.

Note that Phaser Editor can use the fonts installed in the OS, but the majority of them are not available in all platforms, so we recommend to use safe fonts or load the font files in the CSS of your game.

I decided to go with using Bitmap fonts. Phaser Editor also supports bitmap fonts. This means, I have to create a texture atlas and corresponding XML for all the fonts I want to use. There are a few tools out there for this task:

For this project, I went with the Generator. While it’s not as powerful as Littera in terms of customizations, because it supports font formats other than only True Type. And this game does use some True Type fonts, and I want to be as faithful to the original implementation as possible.

A quick note on using the Generator. When it creates your text image atlas, you’ll also get a .FNT data file. This is the XML file that Phaser (and Phaser Editor) uses when setting up bitmap fonts. You can simply rename the extension from FNT to XML, and you should be good.

That’s the jist of what I’ve done, and so far, I’m not running into any major hurdles. It’s just a detailed process, and you should convert and test in small increments. I may write future updates to this if I encounter anything that warrants an article. I’m thinking timeline animations, but because I didn’t use any in this game, I don’t expect any issues there.

That’s all for now guys. Thanks, and I’ll talk to you next time. Take care!

– C. out.

Added Brickout Game To GitHub

Hey guys,

The source code for one of the earlier games I created, Brickout, is now available on GitHub here. If you’re interested in looking at games under the hood, have a look!

Screenshot of Brickout.

This game is the first completed game using HTML5 + Phaser. To build the level, I used Tiled. I found level graphics on OpenGameArt from Matriax.

The bomb explosion animation was also on OpenGameArt, by Jetrel.

Meanwhile, I’m working on some new 2D games, made in either Phaser or Unity, so there’s more to come!

Like this:

The image above is a screenshot for a Unity game I’m currently working on. This is from the course on Udemy: Complete C# Unity Developer 2D: Learn to Code Making Games.

It’s the last project in the course (I’m almost done! YEAH! ๐Ÿ’ช๐Ÿฟ) , and it’s a tile-based, 2D, side-scrolling platformer, one of my favorite game genres, and I can’t wait to use all the skills I’ve learned in this course (and outside of it), to really go beyond the course material, and finish it! Though it’s gonna take me a while (AS IT SHOULD), because I have a lot planned for this game.

If I may digress for a moment: Speaking of finishing things, if you’re like me, and you find it challenging to sometimes finish your side projects, watch the following video.


John Sonmez talks about how to become a finisher and finish shit.

It’s from John Sonmez, founder of Bulldog Mindset, a company that helps people, particularly software developers, become better, stronger versions of themselves and get more out of life by improving their soft skills, mindset, philosophy, wealth, investing, and relationships. He also wrote a book called Soft Skills. It’s a great read; I invite you to give this book a read.

I’m also working on a simple RPG that will use an Active Time Battle System. I’ve always been a fan of battle systems in RPGs. I’m way more interesting the the working of battle systems than I am in the story lines. โš”

Ever since I was introduced to the ATBS in Final Fantasy IV (and it was elaborated on in Final Fantasy VI), I’ve always been fascinated by it.

There is so much involved in this type of game, such as inventory, moving around in maps, stats, and the various intricacies involved in building a battle system.

This is a very exciting project, as I’ve never worked on an RPG before. Neither as side project (until now), or a client project – though I’d LOVE to work on a client’s RPG!

By the way, if you’re looking for a coder to help you build a 2D tile-based, single-player RPG, get in touch with me through this contact form, or e-mail me directly at cartrell@gameplaycoder.com. ๐Ÿ˜‰

That’s it for now, guys. Take care,

– C. out.

P.S.: And should I survive all that, let’s not forget about card games, which I’m still considering specializing in. I want to make a battle card system (think collectible card game), that has mechanics similar to Yu-Gi-Oh!. It’s really the automation of the mechanics of this game that fascinate me. This will likely be THE most difficult game I’ve ever worked on, but I’m looking forward to the challenge.

Thunderjack! HTML5 Game Update: Done!

Hey there!

I’ve some exciting news!

Thunderjack! is finally ready for you to try out!

I’ve still some adjustments to make to it (like add the damn preloader display), but it’s 99% done at this point.

You can play the game here. Try it out and let me know your experience in the comments below.

And if you’d like me to code your next card game, please get in touch with me at cartrell@gameplaycoder.com.

Thanks guys, talk to you later. Take care.

– C. out.