Progress Update: Converting The Flash Game Blasteroids To HTML5 Using Phaser

Hey there,

As you’re probably aware by now, Adobe is discontinuing the Flash web browser plug-in by end of 2020. If you have Flash games, they will no longer work afterwards, as browsers, such as Google Chrome, will completely block Flash content.

If your game is to be preserved, you’ll have to re-build it for another platform, and if it’s to stay as a web-based game, then HTML5 (Canvas/WebGL) is likely your best bet.

In the last article, I was challenging myself to convert a previous Flash game called Blasteroids that I made for a previous client to HTML5.

Digging up the original source code, I jumped in. But first thing’s first. I’ve also been learning Phaser 3, and the latest version of Phaser Editor, (awesome tool by the way; I highly recommend it for Phaser game development) which supports Phaser 3.

Most of the time spent on the project so far has been figuring out how to convert resources over. Sure, I could just “make” a new Blasteroids game, but the challenge is for the Phaser version to maintain the play and feel as closely as possible to the original Flash game.

So I started with both editors, Phaser Editor, and Flash CS. I’m examining how the scene is set up in Flash CS and replicating it as closely as possible. Images and locations are super-easy to move over. However, the way that the code is assigned to the images and their underlying “game objects” will change, simply due to how Phaser interacts with the scene, and how Phaser Editor sets up images for you on the scene.

For example, in Flash, many game objects are actually a composition of several images, and not just one image. Flash uses a DisplayObjectContainer class to accomplish this, and images on the scene are based on the ‘Sprite’ class, which extends DisplayObjectContainer.

In Phaser 3, the closest matching class is Container class, which contains other images. However, there may be some potential caveats to using Containers, as noted below from the container’s help page:

It’s important to understand the impact of using Containers. They add additional processing overhead into every one of their children. The deeper you nest them, the more the cost escalates. This is especially true for input events. You also loose the ability to set the display depth of Container children in the same flexible manner as those not within them. In short, don’t use them for the sake of it. You pay a small cost every time you create one, try to structure your game around avoiding that where possible.

I’ll need to test this as I move forward and see what impact it might have. Fortunately, Blaseroids doesn’t use input events on any game objects using containers.

Another challenge is that, as of this writing, Phaser Editor does not use the Container class when creating game objects in the scene.

Adding The Player Game Object To The Scene

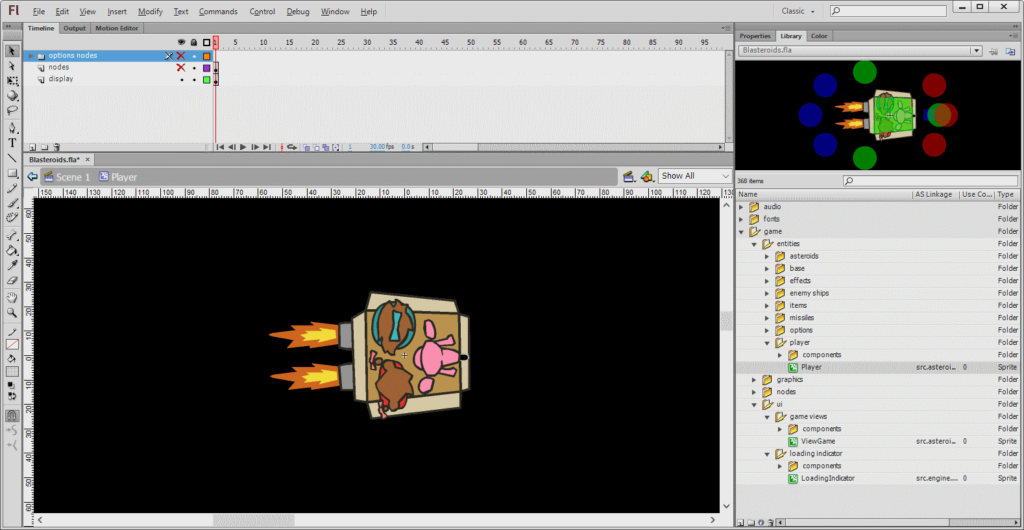
In the Flash version, the main player’s ship is composed of three visible images (the ship body, and two exhaust flame images). You can place this on Flash’s stage (similar to Phaser 3’s scene).

All three images are contained in a single sprite.

As I mentioned, Phaser 3 uses containers, but is there a way to do something like this in Phaser Editor? Not officially, but there is a workaround, which I’ll explain in two steps.

Step 1: Create The Player “Scene”

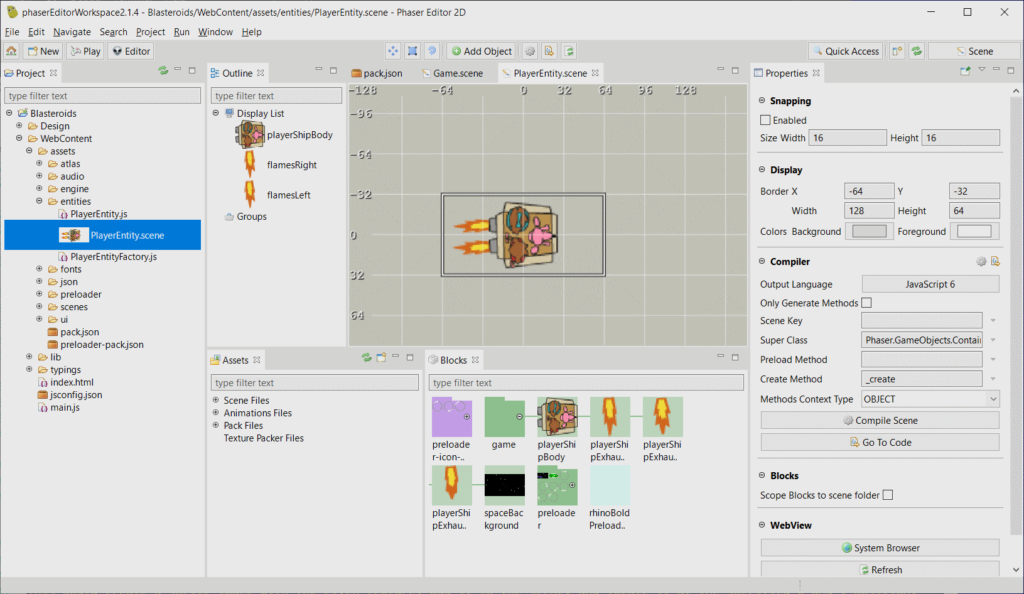
First, we need to recreate the player’s ship which is composed of the three images. The workaround is to create the player object as a scene. When you create a scene, you can add multiple images to it. The player scene would look like this:

The same three images, ship body, and two flames.

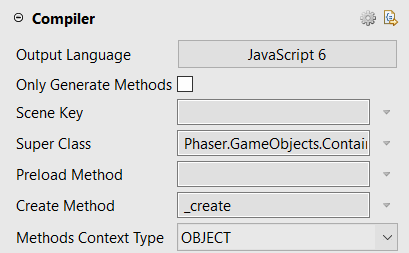
Phaser Editor automatically generates the code that will setup and position them for you. Also, there are some properties you’ll need to adjust, so that it technically won’t be a scene anymore.

  1. Name the scene PlayerEntity.scene
  2. Uncheck the Only Generate Methods box if it’s checked
  3. Clear out the Scene Key
  4. Change the Super Class to Phaser.GameObjects.Container
  5. Change the Create Method to _create
  6. Change the Methods Context Type to OBJECT

This gives us a container game object that contains all the ship images.

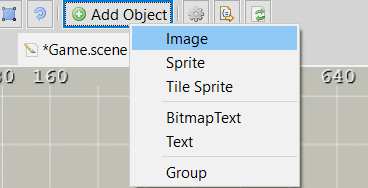
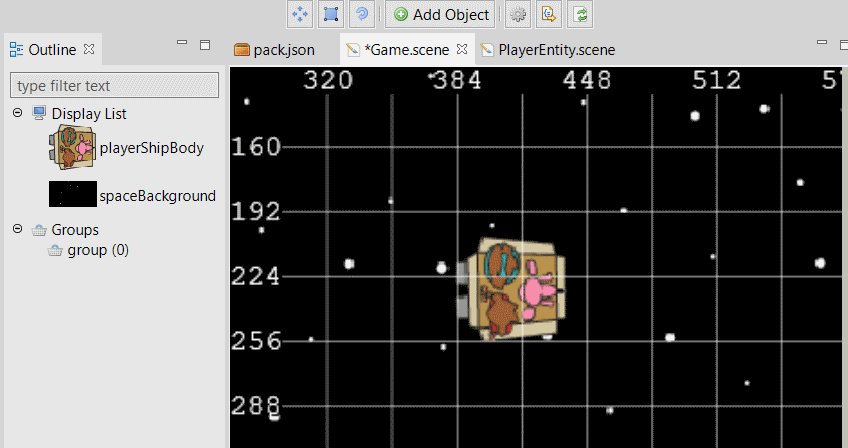
In Phaser Editor, you can’t add one scene to another (the other being whatever you;re using as your main scene to show to the player). But, you can add an image to the scene using the Add Object button located at the top of the editor.

You’d then select the ship body and add it where ever you’d like it placed.

Note: You don’t need to add the flame images, just the ship body. The ship image we’re adding here is just a visual placeholder for the container game object we created earlier.

Step 2: Create The Player Factory

In Phaser, when you create game objects, you use a “factory” which allows you to quickly create many types of game objects, and have them added to your scene. Phaser has many built-in factories, for example, ‘bitmapText’, ‘group’, ‘image’ and ‘sprite’, and you can create your own. If you wanted to create a sprite and add it to your scene, you could write something like:

this.add.sprite(x, y, texture);
The this keyword references the scene that the sprite is being added to.

This would create a sprite image with the given texture, add it to the scene, and locate it at the specified x and y position.

We want to have our player container game object added to the scene, and we’ll use the player ship we added to the scene earlier. But as is, this will create just an image, and we want our container instead. Also, instead of Phaser Editor writing this for us:

this.add.sprite(x, y, texture);

it’d be nice to have it write this instead:

this.add.player(x, y, texture, frame);

Note: Although we ultimately won’t use the texture and frame here, these are created, are we can see the image in the editor.

Note the player part of the code. That is a custom factory, and Phaser allows you to create your own factories. And what’s awesome about Phaser Editor… it supports custom factories YES! 👍🏾

If you’d like more details on how Phaser Editor uses factories, have a look here.

When you create your player factory, the code might look something like this:

Phaser.GameObjects.GameObjectFactory.register("player", function (x, y) {
    var container = new PlayerEntity(this.scene, x, y);
    this.scene.sys.displayList.add(container);
    return container;
});

You want to run this code before you load your main scene, preferably, at your earliest convenience. The PlayerEntity class will come from the player scene you created earlier.

The player string registers your factory with Phaser, so you’ll then be able to write the this.add.player... code shown earlier. It would then create that PlayerEntity object, which in turn creates the three images: our player ship, and the two exhaust flames, places them inside a container, and adds that container to the scene.

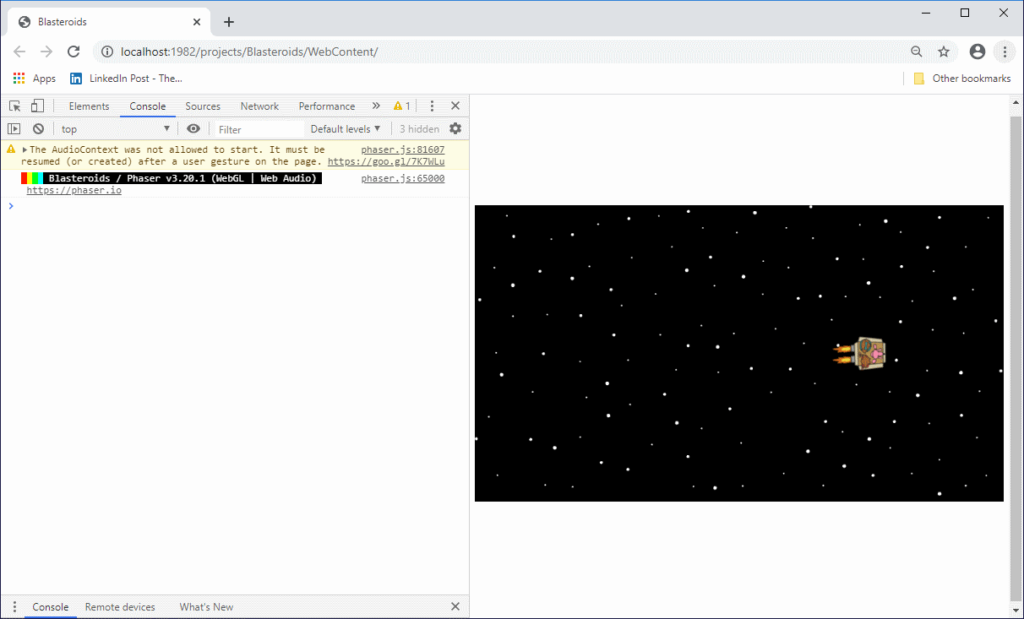
When ran in your web browser, the final output will look something like this:

I added the space background to my main scene as well.

That’s it for now! I’m really excited about the progress I’ve made so far, but there’s still lots of ActionScript 3 code and images to convert over. As I make more noteworthy progress, I’ll keep you updated.

Thanks, and talk to you later.

– C. out.

What’s Next

Hey guys,

It’s been pretty quiet lately here on GameplayCoder, but I’ve also been busy behind the scenes learning new skills for more games to add to my portfolio.

Poker Game

Having finished up the card-matching and hand-comparing techniques for poker, the next project will involve coding an actual poker (Texas Hold’em) game.

As for implementing the rules for poker itself, I found a useful article on 888poker that goes over basics, terminology, and flow of the game. There is also this game available from 24/7 Free Poker, which I’ve been playing to help further understand the game/

But I want it to be a multiplayer game (as well as single-player vs AI), and it’s the multiplayer functionality that will prove most challenging.

So, I’ve been taking a course over on Zenva called MMORPG Academy, which teaches you how to build a multiplayer game using various technologies, and middlewares, including but not limited to:

The only tool in this list I did not use was Docker, because it requires virtualization to run, and if your operating system is Windows 10 Home, you’re pretty much outta luck. Of all the suggestions I’ve tried around the net, none of them worked, and I wasn’t about to upgrade to Pro just for Docker. Besides, you don’t really need it to complete this course anyway.

Everything except Phaser and JavaScript on that list was completely new to me. 🙃 So, I’m taking in a lot of new material in this course. But as Tony Stark himself said,

Flash To HTML5 Game Conversion

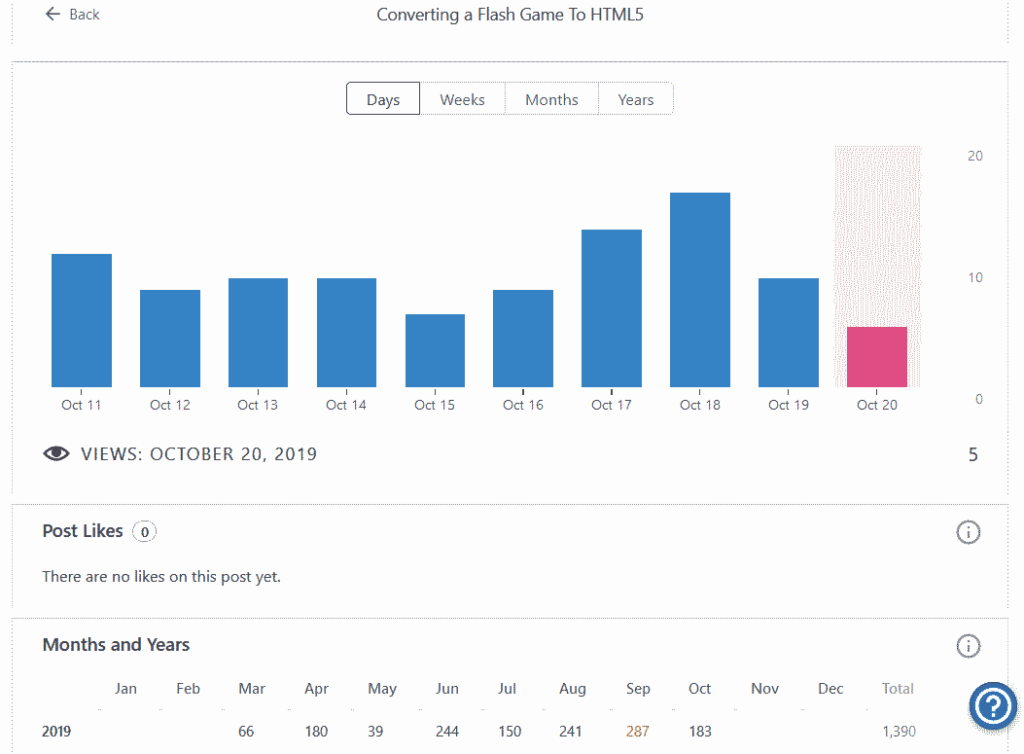
According to my data, an article I wrote, Converting a Flash Game To HTML5, by far, has received the most views.

After looking at these numbers, I’m like:

So I will be revisiting this topic by converting another Flash game I coded for a previous client, called Blasteroids. This is a remake of Atari’s Asteroids.

If you’d like to play the Flash game I coded, you can play it on my old portfolio site here. Otherwise, if you can’t (or won’t) be bothered with Flash, you can watch this video of my gameplay – and epic fails. 😅

Thanks for being a reader of this blog, and stay tuned. There’s more to come!

– C. out.

Converting a Flash Game To HTML5

Hey guys,

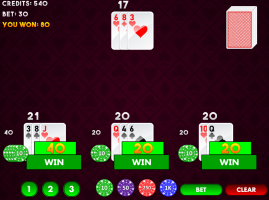
I’m working on an interesting project now. A repeat client has requested that I convert a cards game I previously made for them from Flash to HTML5.

As you may be aware, Adobe is discontinuing their Flash player browser plugin by the end of 2020.

There really aren’t any true “conversion” tools out there. In other words, say you have a Flash project that consists of a few Flash FLA files with library assets in them, and maybe some exported to external classes, as well as additional external asses loaded at run-time, as well as external AS3 files. And your build process (what you use to generate your final SWF file) uses either Flash CSx/Animate or say, FlashDevelop (good tool, by the way – I highly recommend it if you’re using Adobe AIR to build mobile games).

There is no conversion tool that can just convert all that into a HTML + JavaScript files with all the assets extracted from FLA files, and present you with an HTML index file that you can simply run and be on your merry away.

That. Would. Be. Awesome.

If you want to convert a Flash game to HTML5, you pretty much have to learn JavaScript if you don’t already know it, and rebuild it from scratch).

Depending on the simplicity of your game, you may get some help from Adobe’s Flash Animate, but I’ve never tried it, and due to the complexity of the games I make, it’s likely to not work.

There are several other tools out there, your best bet may be to simple rebuild the code, but you can still use the assets.

However, if you have the original source code – the ActionScript 3 .AS files, sounds, and Flash .FLA files (which I do have because I wrote the original Flash project in the first place) – you already have everything you need to do this. Meaning, you don’t need to go through the trouble of decompiling SWF files and other dubious tasks.

Also, fortunately, the Flash game I’m converting doesn’t do any blitting of bitmaps. All graphics are either bitmaps imported into the FLA, or vector art saves as library symbols. The library symbols can be converted to bitmaps so they can then be used in the HTML5 version.

The biggest challenge for assets and layout is no longer having a super-convenient WSYISYG (what you see is what you get) editor like Flash CS/Animate. This allows you to place and size the objects in a scene as they should look when the game is running. Without this vital tool, you have a few options:

1). Hard-code all the sizes and positions of everything, and references to what everything looks like. (OUCH! This is not the old days of game development. I’m pretty sure we can come up with something quicker and easier, right? 🤔 )

2). Use an editor, like Phaser Editor. A visual editor to build your layout, position and size objects on the scene. This editor has a built-in code Canvas Compiler that will translate your layout into JavaScript code, placing and sizing all your objects for you. You can then focus on building the layout. Now…

For the most part, converting AS3 to JavaScript files is fairly simple. Although it’s a laborious task of recoding, ActionScript 3 and JavaScript share many similarities, both having roots in the ECMAScript standards for example. Sure, you can’t just copy AS3 code, paste it into a JS file and call it a day, but if you know both languages well, the conversion process isn’t all that painful.

Here a quick example of an original source file written in AS3 for Flash, and below it, the JavaScript counterpart.

public final class EZ_PlayerData {
  private var mvo_dailyScores:Vector.<BJ_DailyScoresData>;
  private var mvo_cardsData:Vector.<EZ_PlayerCardsData>;
  private var mn_betValue:Number;
  private var mn_credits:Number;
  private var mu_selectedHandIndex:uint;
  private var mn_tournamentCredits:Number;
  private var mb_isTournamentEnabled:Boolean;
  
  ////////////////////////////////////////////////////////////////////
  // ctor
  public function EZ_PlayerData(u_maxHands:uint, u_maxCardsPerHand:uint) {
    super();
    
    mn_betValue = mn_credits = mn_tournamentCredits = 0;
    mvo_dailyScores = new Vector.<BJ_DailyScoresData>();
    
    mvo_cardsData = new Vector.<EZ_PlayerCardsData>(u_maxHands);
    for (var u_index:uint = 0; u_index < u_maxHands; u_index++) {
      mvo_cardsData[u_index] = new EZ_PlayerCardsData(u_index, u_maxCardsPerHand);
    }
  }
  
  ////////////////////////////////////////////////////////////////////
  // public functions
  
  //==================================================================
  // addDailyScore
  //==================================================================
  public function addDailyScore(o_score:BJ_DailyScoresData):void {
    if (!o_score) {
      return;
    }
    
    mvo_dailyScores.push(o_score);
    mvo_dailyScores.sort(onSortDailyScores);
  }
  
  //==================================================================
  // betValue (get)
  //==================================================================
  public function get betValue():Number {
    return(mn_betValue);
  }
  
  //==================================================================
  // betValue (set)
  //==================================================================
  public function set betValue(n_value:Number):void {
    if (!isNaN(n_value)) {
      mn_betValue = n_value;
    }
  }
  
  //==================================================================
  // cardsData (get)
  //==================================================================
  public function get cardsData():Vector.<EZ_PlayerCardsData> {
    return(mvo_cardsData);
  }
  
  //==================================================================
  // credits (get)
  //==================================================================
  public function get credits():Number {
    return(mn_credits);
  }
  
  //==================================================================
  // credits (set)
  //==================================================================
  public function set credits(n_value:Number):void {
    if (!isNaN(n_value)) {
      mn_credits = n_value;
    }
  }
  
  //==================================================================
  // getDailyScores
  //==================================================================
  public function getDailyScores():Vector.<BJ_DailyScoresData> {
    return(mvo_dailyScores);
  }
  
  //==================================================================
  // isTournamentEnabled (get)
  //==================================================================
  public function get isTournamentEnabled():Boolean {
    return(mb_isTournamentEnabled);
  }
  
  //==================================================================
  // isTournamentEnabled (set)
  //==================================================================
  public function set isTournamentEnabled(b_value:Boolean):void {
    mb_isTournamentEnabled = b_value;
  }
  
  //==================================================================
  // removeLastDailyScore
  //==================================================================
  public function removeLastDailyScore():BJ_DailyScoresData {
    return(mvo_dailyScores.pop());
  }
  
  //==================================================================
  // selectedHandIndex (get)
  //==================================================================
  public function get selectedHandIndex():uint {
    return(mu_selectedHandIndex);
  }
  
  //==================================================================
  // selectedHandIndex (set)
  //==================================================================
  public function set selectedHandIndex(u_value:uint):void {
    mu_selectedHandIndex = u_value;
  }
  
  //==================================================================
  // tournamentCredits (get)
  //==================================================================
  public function get tournamentCredits():Number {
    return(mn_tournamentCredits);
  }
  
  //==================================================================
  // tournamentCredits (set)
  //==================================================================
  public function set tournamentCredits(n_value:Number):void {
    if (!isNaN(n_value)) {
      mn_tournamentCredits = n_value;
    }
  }
  
  ////////////////////////////////////////////////////////////////////
  // private functions
  
  //==================================================================
  // onSortDailyScores
  //==================================================================
  private function onSortDailyScores(o_score1:BJ_DailyScoresData, o_score2:BJ_DailyScoresData):Number {
    if (o_score1.score >= o_score2.score) {
      return( -1);
    }
    
    return(1);
  }
}

And here is the corresponding JavaScript code:

(function(global) {
  global.Multiplay = global.Multiplay || {};
  Multiplay.PlayerData = Multiplay.PlayerData || {};
  
  //===========================================================================================
  //"public"
  
  //-------------------------------------------------------------------------------------------
  //ctor
  //-------------------------------------------------------------------------------------------
  Multiplay.PlayerData = function(u_maxHands, u_maxCardsPerHand) {
    this.dailyScores = [];
    this.betValue = 0;
    this.credits = 0;
    this.selectedHandIndex = 0;
    this.tournamentCredits = 0;
    this.isTournamentEnabled = false;
    
    this.cardsData = [];
    for (var u_index = 0; u_index < u_maxHands; u_index++) {
      this.cardsData.push(new Multiplay.PlayerCardsData(u_index, u_maxCardsPerHand));
    }
  };
  
  //-------------------------------------------------------------------------------------------
  //addDailyScore
  //-------------------------------------------------------------------------------------------
  Multiplay.PlayerData.prototype.addDailyScore = function(dailyScoreData) {
    if (!dailyScoreData) {
      return;
    }
    
    this.dailyScores.push(dailyScoreData);
    this.dailyScores.sort(this._onSortDailyScores);
  };
  
  //-------------------------------------------------------------------------------------------
  //removeLastDailyScore
  //-------------------------------------------------------------------------------------------
  Multiplay.PlayerData.prototype.removeLastDailyScore = function() {
    return(this.dailyScores.pop());
  };
  
  //===========================================================================================
  //"private"
  
  //-------------------------------------------------------------------------------------------
  //_onSortDailyScores
  //-------------------------------------------------------------------------------------------
  Multiplay.PlayerData.prototype._onSortDailyScores = function(score1, score2) {
    if (score1.score >= score2.score) {
      return( -1);
    }
    
    return(1);
  };
})(window);

AS3 takes the usual object oriented programming approach with classes, by defining an actual ‘class’, its constructor, and added properties and methods onto that class.

JavaScript uses protoypes, and a function of the same name as the “class” acts like a constructor. You then add functions onto the prototype which act like the class’s methods.

Due to the absence of public getter/setter properties, the JavaScript file turned out to be way shorter than the original ActionScript. However, you have to be careful when accessing members of the Multiplay.PlayerData prototype, that you don’t accidentally modify a member intended to be treated as private. In JavaScript, I precede such functions and members with an underscore ( _ ).

Throughout the conversion process, I highly recommend that you constantly test the code in small updates to ensure that the code is working as expected (much like you would when building any game, but especially here). I convert AS3 classes as few as possible at a time, then re-test for errors.

How Phaser Editor Helps

Other than the aforementioned benefits of using a WSYIWYG editor, Phaser Editor also allows you to write custom code in the same files that it creates with its canvas compiler.

In most cases, I prefer to keep the UI code separate from logic/business/implementation code, adapting some concepts from Model View Controller design pattern. This makes it easier for me to convert classes from AS3 to JS, since the UI and logic code will be implemented different in the two scripting languages.

That said, in the files generated by the Phaser Editor canvas compiler, I can add an “initialization” method call the editor’s User Code section, and from there, set up all the UI objects that were created on the canvas.

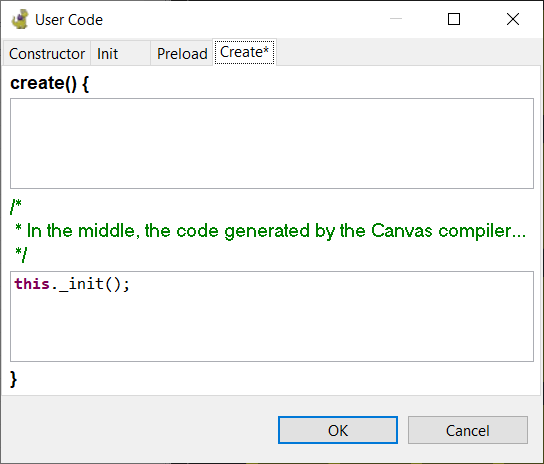
This one line is the only one I write in the Create tab of the User Code dialog. I prefer to keep code in here minimal and focus on write what the _init does in the user code section of the canvas JS file. Phaser Editor will reserve areas of the JS file as user code for you, and the code there will not be overwritten the next time you save the canvas layout (which will cause the canvas compiler to update the corresponding JS file, overwriting any unsaved changes – make sure you always save your JS file first before going saving new changes in the editor’s canvas!)

In the “user code here” section of the JS file (marked by Phaser Editor in a commented at the bottom of the file), I defined an empty _init function. This is where you can custom setup any UI objects, and we’ll be revisiting this later.

GameView.prototype._init = function () {
};
Converting a Button

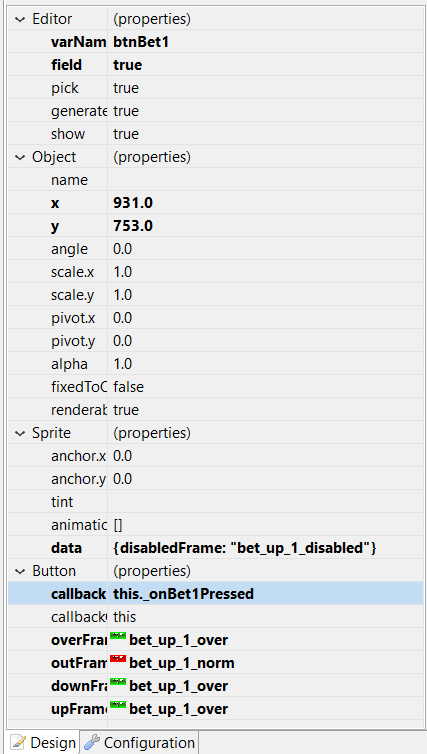
Next, say I want to create (or “re-create”, as we’re rebuilding the original Flash layout 😉 ) a button on the canvas named btnBet1 (from the casino cards game I’m converting for my client). Because I also have the field property set to true, the canvas compiler will create a property on the JavaScript file of the corresponding canvas called fBtnBet1. I also have the callback property set to a method on this instance of the canvas object this._onBet1Pressed. In my user code, I can define the _onBet1Pressed function. You’ll also want to add the button frames for over, out, down, and up so your button can respond to the various button states.

The canvas file is actually a Phaser state, and the canvas compiler will automatically generate the following code in the state’s create method:

var _btnBet1 = this.add.button(931.0, 753.0, 'some_atlas', this._onBet1Pressed, this, 'bet_up_1_over', 'bet_up_1_norm', 'bet_up_1_over', 'bet_up_1_over', _buttons);
...
this.fBtnBet1 = _btnBet1;

In the user code section of the JS file, I can create the button pressed callback function like this:

GameView.prototype._onBet1Pressed = function () {
};

It’s similar to a MouseEvent handler from ActionScript 3 when setting up a button to respond to mouse clicks.

Keeping the UI code and implementation code separate, I won’t include what the button actually does inside this method. Instead, I’ll have it dispatch a notification, via a Phase Signal. I treat the signal is treated as a public property of the canvas object, and I define the signal in the _init method created earlier:

GameView.prototype._init = function () {
  this.onBetButtonPressed = new Phaser.Signal();
};

When the button is pressed, I want that signal to fire a notification to be handled by the implementation code. Modifying the _onBet1Pressed function, it now looks like this:

GameView.prototype._onBet1Pressed = function () {
  this.onBetButtonPressed.dispatch();
};

There is no logic code in this canvas JS file, since it’s for UI only. The implementation is handled by the code that processes the game logic. First, it assigns a function to be handled by the signal when it dispatches a notification:

var gameView;
...
gameView.onBetButtonPressed.add(function() {
  //do whatever when the button is pressed
});

Instead of inlining the function, you can also pass in a function reference:

gameView.onBetButtonPressed.add(onBetBtnPressed);
...
function onBetBtnPressed() {
  //do whatever when the button is pressed
}

That’s pretty much how all the buttons will be converted.

Converting Fonts

Fonts is a big one. In Flash, you can embed fonts directly into the SWF file to make sure that the fonts will show up, even if the fonts aren’t installed on the end users’ machines. However, you can’t do this with HTML5. Instead, you have to either use web fonts something like this, or you can use bitmap fonts. Phaser Editor can not show all the fonts installed on your system. A quick excerpt from this page about fonts in Phaser Editor:

Phaser Editor uses JavaFX to render the scenes but Phaser uses the browser for the same purpose. This means that in some cases the text object is not rendered in design-time like Phaser renders it at run-time.

Note that Phaser Editor can use the fonts installed in the OS, but the majority of them are not available in all platforms, so we recommend to use safe fonts or load the font files in the CSS of your game.

I decided to go with using Bitmap fonts. Phaser Editor also supports bitmap fonts. This means, I have to create a texture atlas and corresponding XML for all the fonts I want to use. There are a few tools out there for this task:

For this project, I went with the Generator. While it’s not as powerful as Littera in terms of customizations, because it supports font formats other than only True Type. And this game does use some True Type fonts, and I want to be as faithful to the original implementation as possible.

A quick note on using the Generator. When it creates your text image atlas, you’ll also get a .FNT data file. This is the XML file that Phaser (and Phaser Editor) uses when setting up bitmap fonts. You can simply rename the extension from FNT to XML, and you should be good.

That’s the jist of what I’ve done, and so far, I’m not running into any major hurdles. It’s just a detailed process, and you should convert and test in small increments. I may write future updates to this if I encounter anything that warrants an article. I’m thinking timeline animations, but because I didn’t use any in this game, I don’t expect any issues there.

That’s all for now guys. Thanks, and I’ll talk to you next time. Take care!

– C. out.
Added Brickout Game To GitHub

Hey guys,

The source code for one of the earlier games I created, Brickout, is now available on GitHub here. If you’re interested in looking at games under the hood, have a look!

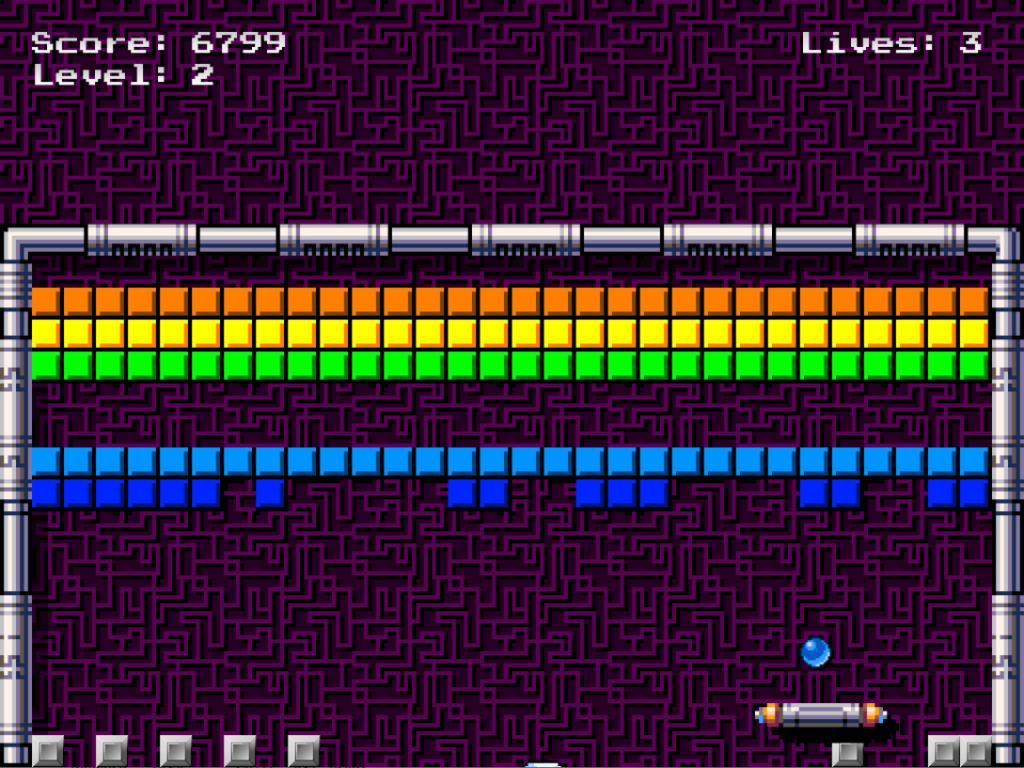
Screenshot of Brickout.

This game is the first completed game using HTML5 + Phaser. To build the level, I used Tiled. I found level graphics on OpenGameArt from Matriax.

The bomb explosion animation was also on OpenGameArt, by Jetrel.

Meanwhile, I’m working on some new 2D games, made in either Phaser or Unity, so there’s more to come!

Like this:

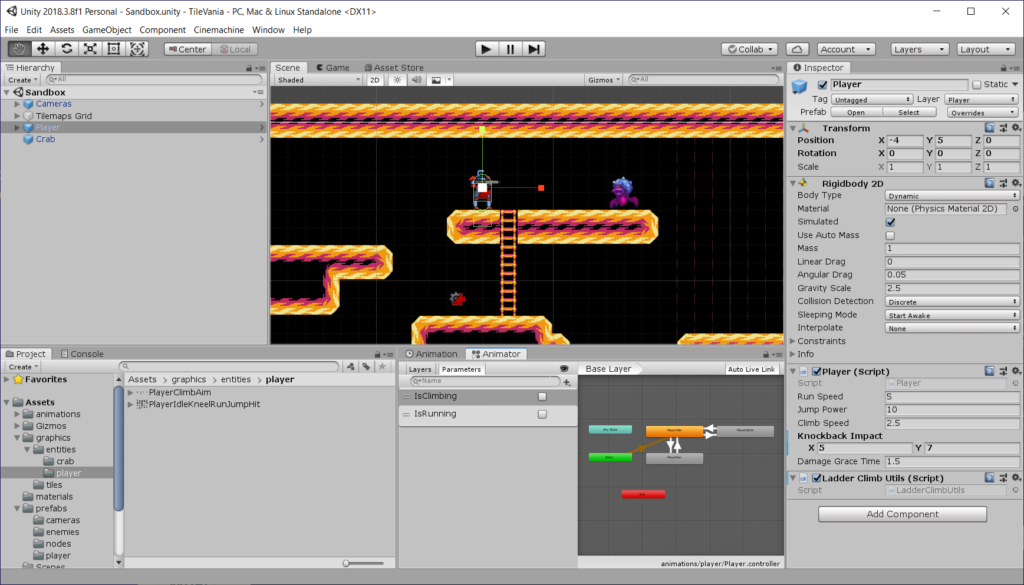
The image above is a screenshot for a Unity game I’m currently working on. This is from the course on Udemy: Complete C# Unity Developer 2D: Learn to Code Making Games.

It’s the last project in the course (I’m almost done! YEAH! 💪🏿) , and it’s a tile-based, 2D, side-scrolling platformer, one of my favorite game genres, and I can’t wait to use all the skills I’ve learned in this course (and outside of it), to really go beyond the course material, and finish it! Though it’s gonna take me a while (AS IT SHOULD), because I have a lot planned for this game.

If I may digress for a moment: Speaking of finishing things, if you’re like me, and you find it challenging to sometimes finish your side projects, watch the following video.


John Sonmez talks about how to become a finisher and finish shit.

It’s from John Sonmez, founder of Bulldog Mindset, a company that helps people, particularly software developers, become better, stronger versions of themselves and get more out of life by improving their soft skills, mindset, philosophy, wealth, investing, and relationships. He also wrote a book called Soft Skills. It’s a great read; I invite you to give this book a read.

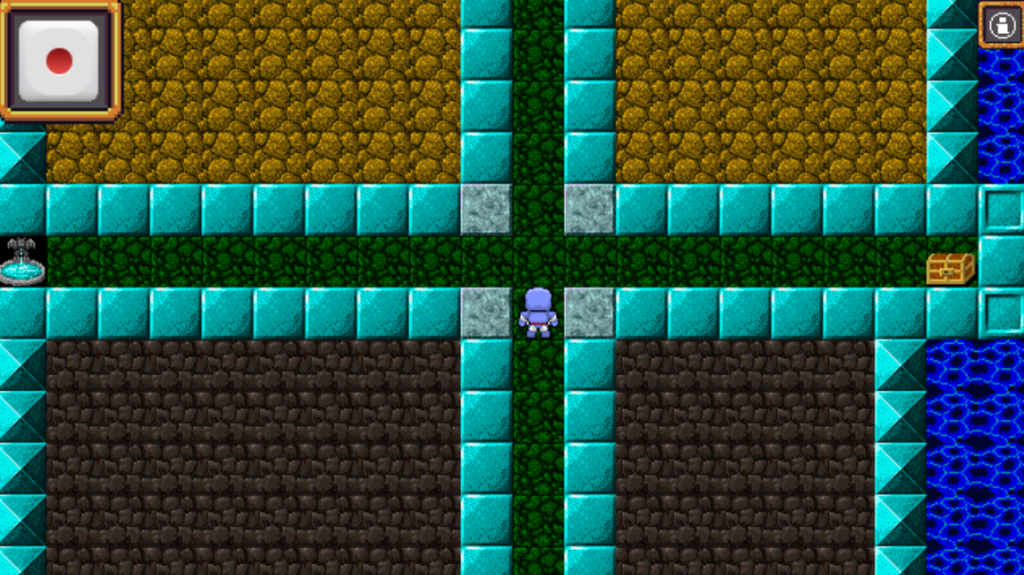
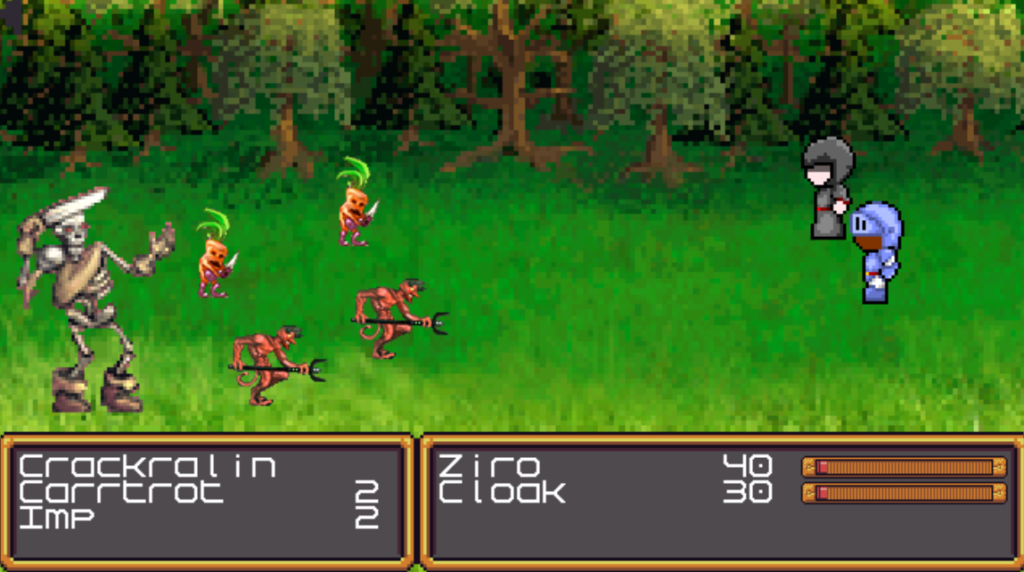
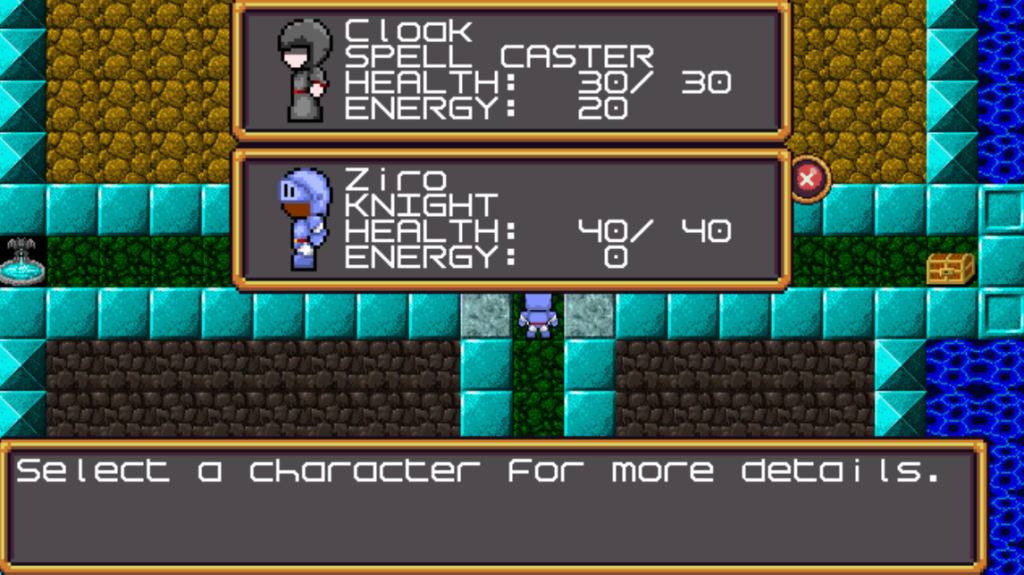
I’m also working on a simple RPG that will use an Active Time Battle System. I’ve always been a fan of battle systems in RPGs. I’m way more interesting the the working of battle systems than I am in the story lines. ⚔

Ever since I was introduced to the ATBS in Final Fantasy IV (and it was elaborated on in Final Fantasy VI), I’ve always been fascinated by it.

There is so much involved in this type of game, such as inventory, moving around in maps, stats, and the various intricacies involved in building a battle system.

This is a very exciting project, as I’ve never worked on an RPG before. Neither as side project (until now), or a client project – though I’d LOVE to work on a client’s RPG!

By the way, if you’re looking for a coder to help you build a 2D tile-based, single-player RPG, get in touch with me through this contact form, or e-mail me directly at cartrell@gameplaycoder.com. 😉

That’s it for now, guys. Take care,

– C. out.

P.S.: And should I survive all that, let’s not forget about card games, which I’m still considering specializing in. I want to make a battle card system (think collectible card game), that has mechanics similar to Yu-Gi-Oh!. It’s really the automation of the mechanics of this game that fascinate me. This will likely be THE most difficult game I’ve ever worked on, but I’m looking forward to the challenge.

Thunderjack! HTML5 Game Update: A Few More Adjustments

Hey, what’s up!

Ok, I can’t believe I uploaded the game without addressing these few functions! Ha! I guess I was so excited (:
Anyway, here’s what’s “new”:

  • You can no longer start a round without placing a bet (doh!)
  • Dealer’s second card is hidden until it’s the dealer’s turn (I had his hand fully revealed while testing and forgot to hide its second card)
  • Added self-promotion on intro screen (of course!)

I’ve also been exploring minifiying JavaScript files and combining them into one file, and found UglifyJS.

UglifyJS can be run as a command-line tool, and it can accept a list of all the files you want to combine. I tried combining the Phaser JS file, but was having problems. So I ended up combining only my own source files, as well as the files generated by the Phaser Editor canvas compiler.

On the page that hosts the game, it no longer loads a bunch of JS files (currently 44 files), but just two files: the Phaser source file, and a minified Thunderjack! source file.

You can play the game here.

That’s all for now guys. Take care.

– C. out.

Thunderjack! HTML5 Game Update: Done!

Hey there!

I’ve some exciting news!

Thunderjack! is finally ready for you to try out!

I’ve still some adjustments to make to it (like add the damn preloader display), but it’s 99% done at this point.

You can play the game here. Try it out and let me know your experience in the comments below.

And if you’d like me to code your next card game, please get in touch with me at cartrell@gameplaycoder.com.

Thanks guys, talk to you later. Take care.

– C. out.

Thunderjack! HTML5 Game Update: Adding Sound Effects (Yeah!)

Hey there.

Well! At this point, the game play is all done. Woot! 👍🏿

Now, you’ll add sound effects to your game. You should add some sound effects to the game to make it more engaging. In this game, sound effects do not affect the game play itself, which is why we’ve deferred adding them until now. However, this does not mean that the sound effects should be an afterthought. When designing your game, you should have an idea of which events that happen in the game will produce sounds, and what those sounds should be.

That said, we’re going to do a little bit of design work here. First, we want to determine which events will produce sounds. Based on the elements in this game, here are some events that could make sense for adding to this game:

  • Button clicks
  • Player wins (at the end of each round, player won more credits than they spent)
  • Player bust
  • Player gets a Blackjack
  • Player gets a Blitz
  • Player gets a Thunderjack
  • Player doubles down
  • Player splits
  • Player surrenders
  • Dealer busts
  • Player or dealer hits
  • Player or dealer stands
  • Shuffling cards
  • Card is dealt
  • Player adds bet
  • Player clears bet

Note: You can use any sound effects you like for these events. You can also come up with your own events to add sound effects for. This article will not cover adding an event for every single event mentioned above. Once you know who to do it for a few events, you’ll have plenty of opportunities to practice adding sounds for the other events.

In this article, I’ll be assigning sounds only to the following events:

  • Player wins
  • Player busts
  • Player gets a Blackjack
  • Player gets a Thunderjack
  • Dealer busts

After adding a few sounds, you’ll get the gist of how to add sounds to your game.

Well, let’s get started!

Adding Sound Effects To Your Project

After you’ve decided which events that will play sounds, you need to add the sound files to your project. Phaser Editor can handle this. ⭐

Phaser Editor uses an asset pack manifest file that defines all the assets and the keys that Phaser uses to reference them. Instead of writing the code to load each asset, only this asset pack file needs to be loaded. It is a JSON file, and if you’d like to know more about assets management, visit this topic.

For this project, I have a manifest file called pack.json. After you have a pack file added to your project, this line of code is how Phaser loads the pack file:

phaserGame.load.pack('preload', 'assets/pack.json');

You’ll probably want to add that line to the preload function of your preloading game state.

Next, let’s add the sounds to the pack file using the following steps:

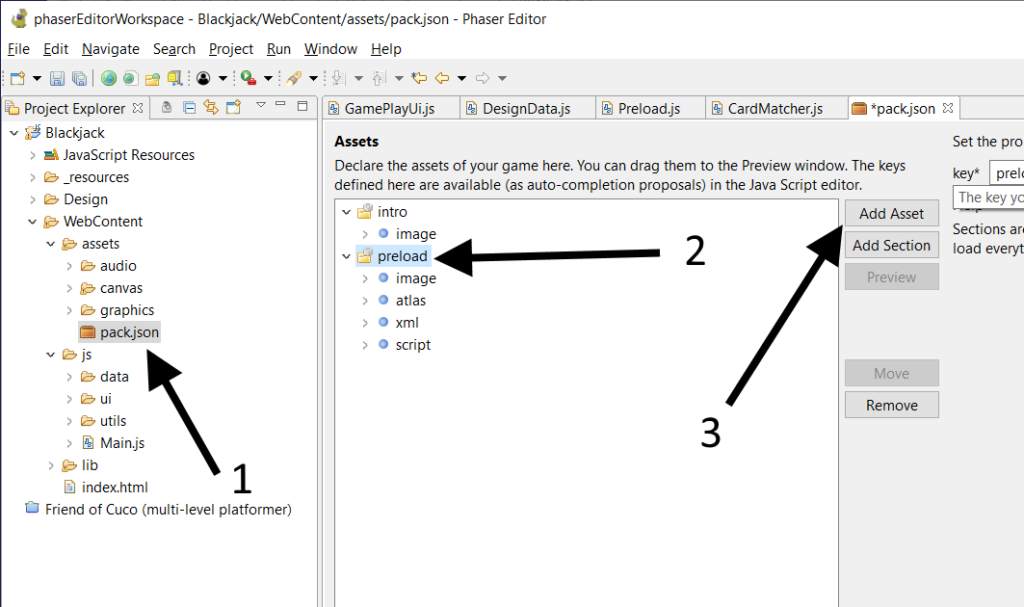
  1. Open the pack file in the project explorer by double-clicking on it.
  2. From the Assets window, select the preload folder (or a different section if you’d like to add the assets under a different one).
  3. Press the Add Asset button.
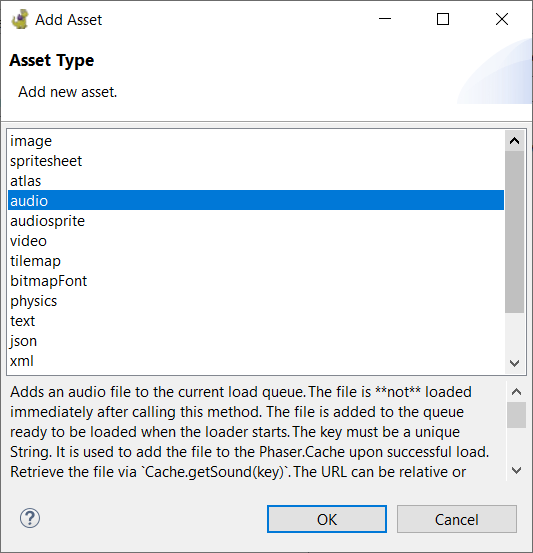
  4. On the Asset Type dialog, button, select audio from the list, then press OK.
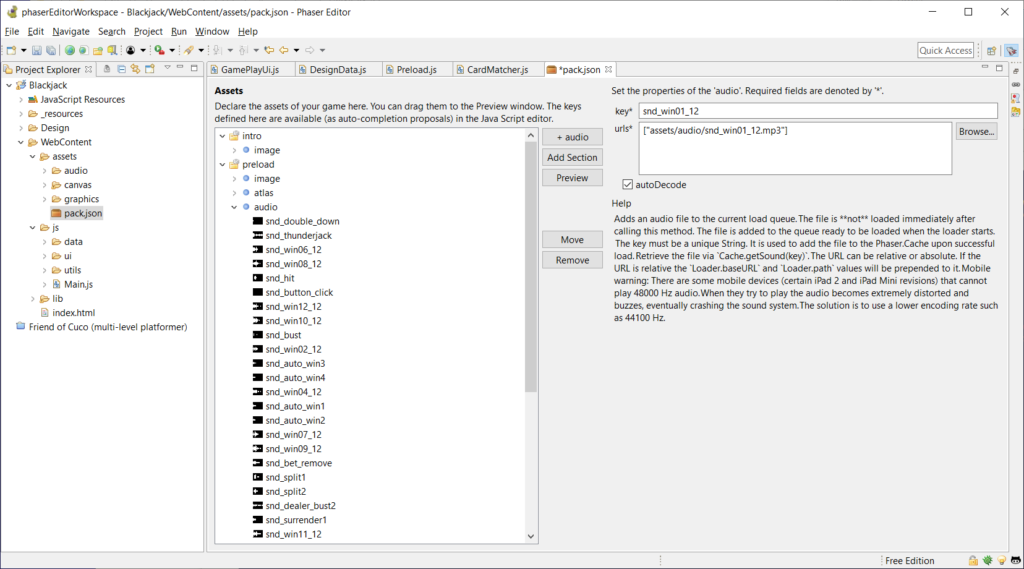
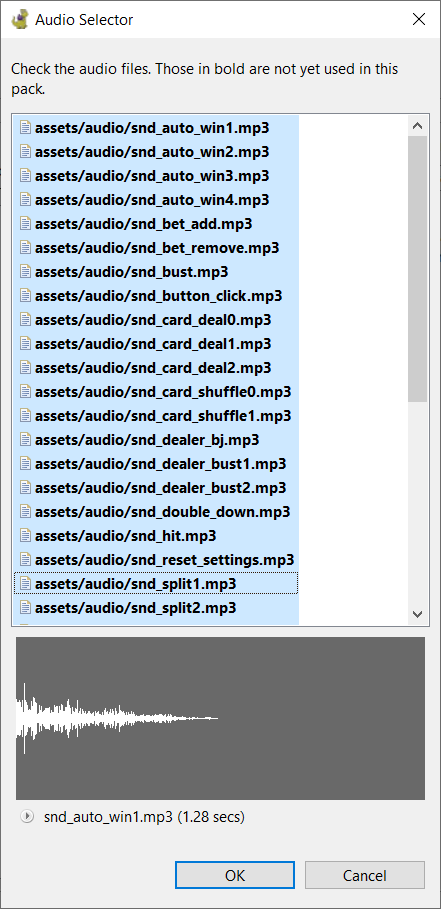
  5. In the Audio Selected dialog, select the sounds you want to add to the pack file under the section you selected, then press OK.
  6. Save the pack file.

Note: After adding sounds by default, the key that Phaser Editor assigns to each sound is the name of the sound file. The key is how you will reference the sound in your code so you can play it. If you want, you can change the key of any sound by editing the key text field. If you do, make sure the key is unique to all the other keys.

Finally, if you need to later, you can add more sounds to the audio group later on, or remove sounds that you will not be using.

Now that the sound files have been added to the asset pack file, let’s start using them for some events in the game.

Add the Player Wins Sound

First, we’ll add a sound that plays when you win. “Winning” is defined as winning more credits that you spent during the round.

We’ll return to the endRound function that we last saw here. Make the following edits to it:

endRound
GamePlay.prototype._endRound = function() {
  if (this._dealerData.isBust) {
    this._presentPlayersWinViaDealerBust();
  } else {
    this._compareCards();
  }
  
  this._showBetUi();
  this._playWinSound();
};
playWinSound
GamePlay.prototype._playWinSound = function() {
  if (this._playerData.credits > this._startingCredits) {
    this.game.sound.play("snd_win01_12");
  }
};

The Phaser game object contains a sound property, which is a reference to SoundManager object. The SoundManager has a play function on it, and the first parameter is the asset key for the sound that was loaded.

Note: The snd_win01_12 string is the key of the win sound I used when loading the win sound in to the asset pack file. The key of your win sound will likely be different.

We’ve seen PlayerData.getTotalBet before, but what’s this this._startingCredits property? Hmm… 🤔

Well, we want to compare the number of credits the player has at the end of the round to the number of credits they had at the beginning of the round. The this._startingCredits property will track how many credits they had, just before they started the round (before having their credits deducted).

So, we can define this._startingCredits in our onBetButtonPressed function with this modification:

onBetButtonPressed
GamePlay.prototype._onBetButtonPressed = function() {
  if (!this._canAffordBet()) {
    //can't afford the bet - cancel the bet placing method, and don't start the game.
    return;
  }
  
  this._startingCredits = this._playerData.credits;
  this._payRoundCost();
  this._hideBetUi();
  this._beginRound();
};

That should do it for the win sound. Let’s see how it looks (and sounds like!) so far. The win sound should only play when you’ve won more credits than you spent:

Add The Player And Dealer Busts Sounds

Next, we’ll add a sound that plays each time a player or the dealer busts.

We’ll revisit the beginPlayerBust function, and make the following mods:

GamePlay.prototype._beginPlayerBust(player) {
  player.isBust = true;
  if (this._isPlayerId(s_playerId)) {
    this.game.sound.play("snd_bust");
  } else {
    var as_dealerBustSoundKeys = [ "snd_dealer_bust1", "snd_dealer_bust2" ];
    var s_dealerBustSoundKey = Phaser.ArrayUtils.getRandomItem(as_dealerBustSoundKeys);
    var dealerBustSound = this.game.sound.play(s_dealerBustSoundKey);
    if (dealerBustSound) {
      var f_onSoundStop = function(sound, marker) {
        this._setNextTurnPlayer();
      };
      
      dealerBustSound.onStop.addOnce(f_onSoundStop, this);
      return;
    } else {
      this._setNextTurnPlayer();
    }
  }
};

Added quite a bit to this one! 😅 If the player busts, we just play one sound. But if the DEEEEELUR busts, well, let’s get just a little fancy here. 😎

We’re doing two things here:

First, we’re choosing one of two sounds to play randomly (the dealer will have different busts sounds, just for the hell of it, and we want to stick it to the dealer when they lose).

Second, we want to wait until the sound has finish playing before we continue. Say the dealer busts, and the dealer bust sound plays. Also, say the player also won this game. What would happen is both sounds would be playing together – the dealer bust sound, and the player won sound. This isn’t what we want. So, we’ll wait until the dealer bust sound has completed playing before proceeding.

It’s worth pointing out that the f_onSoundStop variable is a function setup as a callback for the bust sound’s onStop Signal. We register the callback by calling the signal’s addOnce function, and specifying the callback as the first parameter. When the sound finishes playing, the Phaser will automatically call the f_onSoundStop function.

And here are the player and dealer bust sounds in action:

Add Blackjack and Thunderjack Sounds

Next, we’re adding sound effects that play every time a player wins with a Blackjack or a Thunderjack.

Let’s start with the Blackjack first.

Once again, we’ll be revisiting some code. In particular this pseudo code from this article will now be updated to:

var playerWithThunderjack = checkIfPlayerHasThunderjack();
var playersWithBlackjack = checkIfPlayersHaveBlackjacks();
var doesDealerHaveBlackjack = hasBlackjack(dealer);
if playerWithThunderjack {
  handleThunderjack(playerWithThunderjack);
  endRound();
} else {
  if doesDealerHaveBlackjack {
    handleDealerBlackjack();
    endRound();
  } else {
    if at least one player has blackjack {
      //play the blackjack sound here
    }
    setFirstTurnPlayer();
  }
}

The checkIfPlayersHaveBlackjacks will function return an array of all the players who have blackjack, so if this array has at least one player in it, we’re good.

Next, we’ll tackle playing a sound if a player has a Thunderjack.

Coming from the code above, we’ll modify the handleThunderjack function:

handleThunderjack
function handleThunderjack(player) {
  player.handData.hasThunderjack = true;
  //play the thunderjack sound here
}

That’s it for adding the Thunderjack sound! 👍🏿 And here are the sounds in play:

Most of the events are just finding the place in your code where it would seem most appropriate to add a playing sound. Only in special cases would you need to wait for a sound to complete playing before proceeding.

We’ll finish this article here. If you have any questions for me about anything I’ve discussed so far, feel free to ask in the comments below. If you’d like to add more sounds to more events, by all means have at it.

Or, if you’re looking to hire a coder to build your next card game (and add all your desired sounds into the game as well!), get in touch with me by e-mailing me at cartrell@gameplaycoder.com, or filling out my contact form.

Thanks guys, talk to you later. Take care,

– C. out.

Thunderjack! HTML5 Game Update: Added Logic for Blitz

There is one more type of hand the player can win: getting a Blitz. So we’re going to code that functionality into the game in this article.

If you’re familiar with Blackjack, you might also know what a Charlie is. If not, don’t worry about it. I gotcha. 👊🏿

A Charlie is when a hand has acquired so many cards – usually five, six, or seven – without busting. When a player gets a Charlie, they are paid immediately, just like when getting a Blackjack or a Thunderjack.Also, the player does not play against the dealer. The next player’s turn immediately begins afterwards.

Thunderjack! will adopt a six-card Charlie, and I’m calling it a Blitz. Why? Because Blitz just sounds cooler. 😎

Ha! But no, taking the definition of the word (currently defined by Merrima-Webster, which is being “a fast intensive nonmilitary campaign or attack”.

So, if you’re taking hit after hit after hit, and still haven’t busted, I’d say that’s a pretty “intensive attack” – on attempting to beat the dealer. Would you agree? 😉

Determining if the player has a Blitz can be checked each time the player takes a hit and has not busted. You can modify the the beginTurnPlayerHit function which was defined in the article that introduced the hit functionality. The updated function is shown below:

beginTurnPlayerHit
GamePlay.prototype._beginTurnPlayerHit = function() {
  //get the playerData of the current turn player. we'll be using this as a paramater to the other functions
  var turnPlayer = this._getTurnPlayer();
  
  this._dealCardToPlayer(turnPlayer);
  this.updateScores();
  if (this.didPlayerBust(turnPlayer)) {
    this._beginPlayerBust(turnPlayer);
    this._setNextTurnPlayer();
  } else {
    if (this._doesPlayerHaveBlitz(turnPlayer)) {
      this._beginPlayerBlitz(turnPlayer);
      this._setNextTurnPlayer();
    }
  }
};

doesPlayerHaveBlitz
GamePlay.prototype._doesPlayerHaveBlitz = function(playerData) {
  var playerHand = playerData.getHandData();
  var NUM_CARDS_FOR_BLITZ = 6;
  return(playerHand.getNumCards() === NUM_CARDS_FOR_BLITZ &&
    playerHand.score <= Thunderjack.DesignData.BLACKJACK_POINTS);        
};

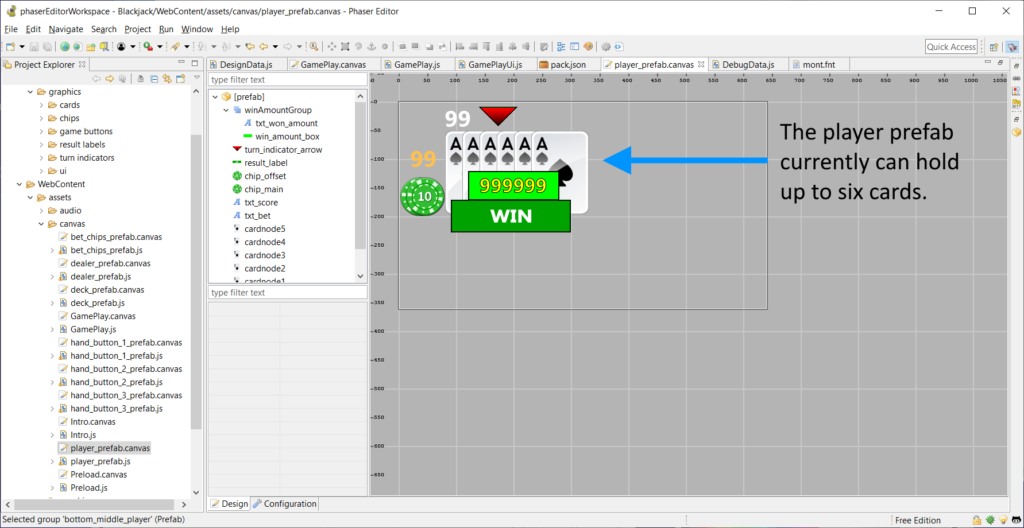
This function checks that the player’s hand has exactly six cards, and that the score does not exceed 21 (the number of Blackjack points).

Note: Note: You can change NUM_CARDS_FOR_BLITZ to a different value if you like. If you do, make sure your player hand user interface can handle that number of cards. With the current setup of the player_prefab canvas defined in Phaser Editor.

beginPlayerBlitz
GamePlay.prototype._beginPlayerBlitz = function(playerData) {
  playerData.hasBlitz = true;
  //player is paid immediately here as well
};

A player who gets a Blitz does not play against the dealer. To start this off, the hasBlitz property is set to true in the beginPlayerBlitz function. Next, we’ll need this to update the isPlayingVsDealer function.

The isPlayingVsDealer function determines if a player is playing against the dealer. Our last implementation of the function looked like this:

function isPlayingVsDealer(handData) {
  return(
    !(playerHandData.hasBlackjack ||
    playerHandData.isPush ||
    playerHandData.isBust ||
    playerHandData.hasThunderjack));
}

We’ll update that so that to include players who have not Blitzed are eligible to play against the dealer:

isPlayingVsDealer
function isPlayingVsDealer(handData) {
  return(
    !(playerHandData.hasBlackjack ||
    playerHandData.isPush ||
    playerHandData.isBust ||
    playerHandData.hasBlitz ||
    playerHandData.hasThunderjack));
}

Finally, in the beginTurnPlayerHit function, after the player has Blitzed, the next player’s turn begins, with a call to the setNextTurnPlayer.

That does it for adding Blitz functionality in the game! This function required mostly a few modifications to the existing code.

Thanks for reading this article. We’ll talk to you next time. Take care.

– C. out.

Thunderjack! HTML5 Game Update: Placing Bets, Setup the Bet Chip Buttons

Hey what’s up!

We’re continuing working on the bet placing functionality. Looking at our four-step process, we’re now on step two, setting up the bet chip buttons:

  • Setup the hand buttons
  • Setup the bet chip buttons
  • Setup the bet button
  • Setup the clear button

We recently finished the hand buttons. You can view part 1 and part 2 of this function.

The bet chip buttons work like this: When a bet chip is pressed, it applies its bet value to all the selected hands.

For example, say we:

  1. Select hand #2
  2. Press the 10 bet chip. This will add 10 credits onto hand #2
  3. Select hand #1 (both hands #1 and #2 are now selected)
  4. Press the 50 bet chip. This will add 50 credits onto hand #1, and hand #2. The total credits of hand #2 is now 10 + 50 = 60.

Building the bet chip buttons and functionality put into four parts, explained below.

First, let’s add the chip buttons to the canvas.

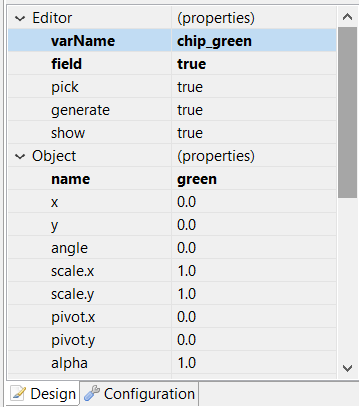
  1. Right-click on the canvas, then select Add…, then Button.
  2. From the Add Sprite dialog, select the image you want to use as the main button sprite, then press OK.
  3. This will add a button to your canvas. You can drag it to position it where you want.
    In the button’s properties, set the field property to true . This will create a reference to the button in the code that the canvas compiler generates, allowing you to reference it as well (which we’ll do later).
  4. Set a name for the bet chip button. I decided to use the name that matches the color of the bet chip.
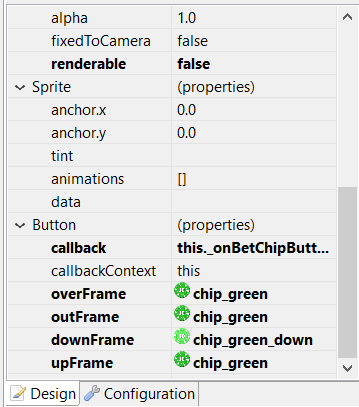
  5. Set the callback to this._onBetChipButtonPressed, and set the callbackContext to this.
  6. Set the four “Frame” properties to the appropriate sprite images, so that the button appears responsive when the it is moused over, pressed, and released.
  7. Follow these steps for the other bet chip buttons.

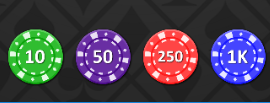
Second, once you have all the bet chip buttons made, we’ll turn them into a single prefab. You can select all the chip buttons, convert them to a group, then create a group prefab from the group. When creating my prefab, I named it bet_chips_prefab. The editor then created bet_chips_prefab.canvas, and the bet_chips_prefab.js source file. My bet chips prefab canvas looks like this:

Once you have the prefab added to your main canvas, set a varName for the prefab (I used bet_chips), and set the field property to true. In the main canvas, the canvas compiler will create a reference to this prefab as this.fBet_chips (which we’ll use later).

Third, we need to add some custom code to the bet_chips_prefab JS class file. We want to be able to fire a notification each time a chip button is pressed. A Phaser signal will be added as a property of this class to be referenced from other functions. The following code is added under the -- user code here -- comment:

bet_chips_prefab.prototype.init = function(buttonClickCallback, context) {
  this.buttonClickSignal = new Phaser.Signal();
  this.buttonClickSignal.add(buttonClickCallback, context);
};

This code is meant to be called once from the outside – from the code that sets up the UI. Supply the callback function that is called each time the signal fires, and the context in which that callback is used.

bet_chips_prefab.prototype._onBetChipButtonPressed = function(button) {
  this.buttonClickSignal.dispatch(button.name);
};

This function is the callback function we assigned to each button as their callback property in the editor. Each time a bet chip button is pressed, this function is called. It then dispatches the signal, which in turn, fires the buttonClickCallback function that was passed into the init function.

We need to identify which button was pressed. So, the buttonClickCallback function accepts one parameter of type string, which is the name of the button. This is the same as the name property used when creating each button.

This finishes the setup of the bet chip buttons. The fourth and final step is initializing the bet_chips_prefab and handling what happens when a bet chip button is pressed.

When setting up your main canvas, you can initialize the bet chips prefab class. In the user code (under the -- user code here -- comment), add this:

this.fBet_chips.init(this.onBetChipPressed, this);

This is the init function we created earlier on the bet_chips_prefab class earlier. The onBetChipPressed function, which we’ll create next, will be called by the bet_chips_prefab signal each time a bet chip button is pressed.

function onBetChipPressed(s_betKey) {
  var selectedPlayerIds = this.handButtons.getSelectedHands();
  for (var s_playerId in selectedPlayerIds) {
    this.addToPlayerBet(s_playerId, s_betKey);
  }
}

The s_betKey is the name of the bet chip button that was pressed. This is the parameter we pass onto the buttonClickSignal of the bet_chips_prefab._onBetChipButtonPressed when the signal is dispatched.

There is a new function on the handButtons object called getSelectedHands. From this previous article, we defined a HandButtons class that manages the three hand buttons for selecting which player hands that we want to apply bets to.

The getSelectedHands function will return an array of string IDs of all the player hand buttons that have been selected. Let’s add the getSelectedHands to the HandButtons class, which looks like this:

HandButtons.prototype.getSelectedHands = function() {
  var ids = [ ];
  
  for (var s_id in this._handButtonsById) {
    var button = this._handButtonsById[s_id];
    if (button.getIsOn()) {
      ids.push(s_id);
    }
  }
  
  return(ids);
};

Back to the onBetChipPressed function, we now know which player hands have been selected at the time the bet chip button was pressed. We can now add the bet value of the selected bet chip to these selected hands with this function:

GamePlay.prototype.addToPlayerBet = function(s_playerId, s_betKey) {
  var i_betValue = BetChipValues[s_betKey];
  this.playerData.addBet(s_playerId, i_betValue);
  this.updateTotalBet();
};

There is a BetChipValues object which we’ll define as a key/values pairs, where we’ll map the bet chip ID (which we’ll define as the name of the bet chip) to its bet value:

BetChipValues = {
  green: 10,
  purple: 50,
  red: 250,
  blue: 1000
};
The PlayerData class

There is also this.playerData.addBet method. This function adds the value of the bet to each selected hand. The playerData is an object that we’ll create from a PlayerData prototype:

PlayerData = function() {
  //key: string (player id)
  //data: PlayerHandData
  this._hands = this._initPlayerHands(); 
};

PlayerData.prototype._initPlayerHand = function (playerHands, s_handId) {
  playerHands[s_handId] = new PlayerHandData(s_handId);
};

PlayerData.prototype._initPlayerHands = function () {
  var playerHands = {};
  
  this._initPlayerHand(playerHands, PlayerHandIds.LOWER_RIGHT);
  this._initPlayerHand(playerHands, PlayerHandIds.LOWER_MIDDLE);
  this._initPlayerHand(playerHands, PlayerHandIds.LOWER_LEFT);
  this._initPlayerHand(playerHands, PlayerHandIds.UPPER_RIGHT);
  this._initPlayerHand(playerHands, PlayerHandIds.UPPER_MIDDLE);
  this._initPlayerHand(playerHands, PlayerHandIds.UPPER_LEFT);
  
  return(playerHands);
};

Inside the user code of the game play canvas (in this project, we’re using  GamePlay, you can add playerData as a property of that prefab class like this:
this._playerData = new PlayerData();

We are using values from the PlayerHandIds object we set up earlier, as well as the PlayerHandData, which stores data about each individual hand.

With the this.playerData.addBet(s_playerId, i_betValue); function, we want to first retrieve the PlayerHandData that matches the player ID, then add the specified bet amount to its betValue property.

You can eventually go on to update the UI with bet chips. This is what the updateTotalBet() function is reserved for. Your bet interface can include elements, such as:

  • the player’s credits
  • the player’s total bet value
  • the bet amount for each hand

I’ll leave that as an exercise to you, but if there is enough demand for it, I’ll post an article on it.

The final result here does include the updated UI. In the next update, we’ll set up the bet and clear buttons.

Thanks for reading, and stay tuned!

– C. out.
Thunderjack! HTML5 Game Update: Placing Bets, Let’s Finish the Hand Buttons

In the last article, we discussed the first part of step one of allowing the player to place bets. We broke the process into four steps, which I’ll reiterate here:

  • Setup the hand buttons (we are finishing up this one in this article)
  • Setup the bet chip buttons
  • Setup the bet button
  • Setup the clear button

We left off with being able to toggle the hand button 1 on and off. So that it does this:

Next, we’ll create toggle buttons to represent hand buttons 2 and 3.

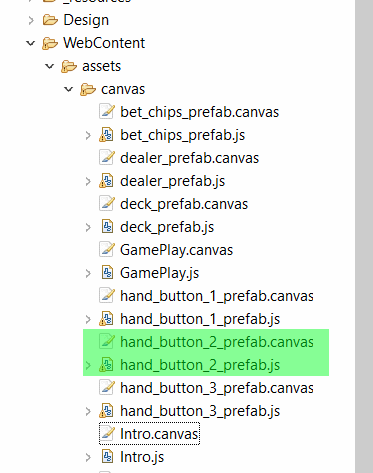
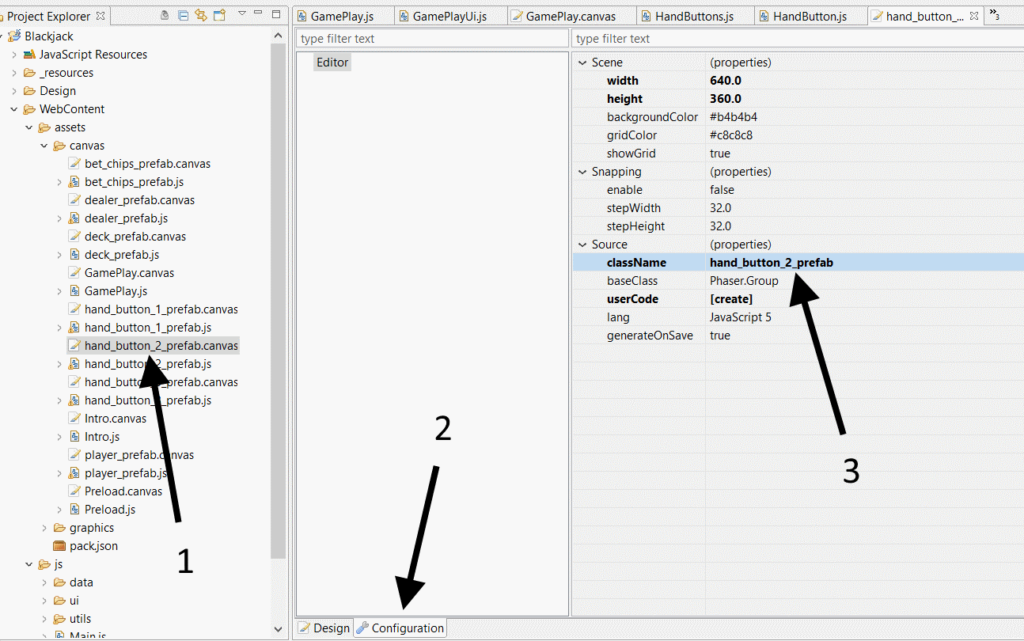
For hand button 2, first in the Project Explorer of Phaser Editor, copy and paste the file hand_button_1_prefab.canvas, renaming it to hand_button_2_prefab.canvas. Then copy and paste hand_button_1_prefab.js, renaming it to hand_button_2_prefab.js.

Next, open the hand_button_2_prefab.canvas file in the editor. Click on the Configuration tab at the bottom. Under the Source section, look for a className property. Change it’s value to hand_button_2_prefab, then Save the file.

What this does is allow the proper class name (which is hand_button_2_prefab) in the corresponding hand_button_2_prefab.js file to be to be written when the canvas compiler automatically generates the code.

Next, click the Generate Code icon in the top toolbar of the editor. It looks like a gear. When you are changing configurations and update the canvas file, it may not automatically update the corresponding JavaScript file. Clicking this button forces it to do so.

Remember, however, our user code is not touched by the canvas compiler, so we’ll need to update part manually. If you look inside hand_button_2_prefab.js, it has updated generated code to use hand_button_2_prefab, but hand_button_1_prefab in our _onButtonPressed user code. So, you’ll want to update all occurrences of hand_button_1_prefab with hand_button_2_prefab in your user code. Then save the JavaScript file.

hand_button_2_prefab.prototype._onButtonPressed = function() {
  if (this.clickCallback !== null) {
    this.clickCallback.dispatch(this);
  }
};

For hand button 3, follow the same steps for hand button 2 above, except you’d use the class name, hand_button_2_prefab.

Once you have all three hand button toggle button prefabs set up, you can add them to your game’s main canvas. Here are two quick ways to add a prefab to your canvas.

The first is:

  1. Right-click on the canvas
  2. Mouse over Prefab from the context menu
  3. Choose Add… from the secondary menu
  4. Select one of the hand button prefabs from the list, and click OK.

Alternatively, you can use a very similar method:

  1. Right-click on the canvas
  2. Mouse over Add… from the context menu
  3. Choose Prefab from the secondary menu
  4. Select one of the hand button prefabs from the list, and click OK.

Once you’ve done that, the prefab should appear on your canvas. You can then drag it to position it wherever you like.

Managing the Hand Buttons

Now that we have all the hand buttons created, we need a way to manage them.

As mentioned in the last article, we place a bet by selecting one or more hands, then pressing a bet chip button to place bets on those hands. But what happens if none of the hand buttons are selected when you press one of the bet chip buttons?

Well, we could provide some kind of “error” feedback, or simply not place the bet. But this might create a slight frustration for your end users. In my opinion, it would be better to prevent all three buttons from being turned off. So this implies two things:
  1. One of the buttons must always be on by default (it can be any button you want, but for our purpose, let’s have hand button 2 on by default; or
  2. If only one hand button is on, disable that button, so that it cannot be turned off. If another button is then turned on, that button can then be re-enabled.

Yes, this is little more work on our part, but it creates a smoother user experience, in my opinion, of course.

Having a “manager” class that works with all the hand buttons would be very helpful here, so let’s create that class:

HandButtons = function(gameCanvas) {
  //this is the game canvas that you pass in when you construct your `HandButtons` object
  this.gameCanvas = gameCanvas;
  
  //here's another key-value object that references all three hand buttons by their id
  //key: string (button id)
  //data: HandButton
  this._handButtonsById = { };
  
  this._init();
};

There is an _init function that sets up all three hand buttons, and it looks like this:

HandButtons.prototype._init = function() {
  //setup the three hand buttons
  this._initHandButton(Thunderjack.PlayerHandIds.LOWER_LEFT, this.gameCanvas.fHand_button_1);
  this._initHandButton(Thunderjack.PlayerHandIds.LOWER_MIDDLE, this.gameCanvas.fHand_button_2, true);
  this._initHandButton(Thunderjack.PlayerHandIds.LOWER_RIGHT, this.gameCanvas.fHand_button_3);
  
  //enable/disable buttons as necessary
  this._updateButtons();
};

Each hand button is setup in an _initHandButton function, as in:

HandButtons.prototype._initHandButton = function(s_playerHandId, handButtonPrefab, b_isOn) {
  var handButton = new HandButton(s_playerHandId, handButtonPrefab);
  handButton.setIsOn(b_isOn === true);
  handButton.callbackSignal.add(this._onHandButtonPressed, this);
  
  this._handButtonsById[s_playerHandId] = handButton; 
};

We’re creating a HandButton object from the class we created here. The toggle button will will be turned on if b_isOn is true.

The click callback, which is a Phaser Signal, is assigned the method, this._onHandButtonPressed, which we’ll look at later in this article. Finally, the button is added to the collection of buttons, indexed by the player hand ID.

There’s another function being called in the _init function, and that’s _updateButtons:

HandButtons.prototype._updateButtons = function() {
  var button = this._getLoneOnButton();
  if (button !== null) {
    button.setEnabled(false);
  } else {
    this._enableAllButtons();
  }
};

Earlier in this article, we discussed disabling a button if it’s the only one on. After the buttons are first set up, and every time the state of the buttons changes, we want to call _updateButtons. In this function, there is  a_getLoneOnButton function. I won’t go into details on it, but returns a button if that button is the only one selected. Otherwise, it function returns null.

Finally, from this setup of the buttons, there is the click callback function, _onHandButtonPressed:

HandButtons.prototype._onHandButtonPressed = function(s_id) {
  this._updateButtons();
};

You’ll see that _onHandButtonPressed accepts a single parameter, a string ID. This is the button ID, the same as the property that is being dispatched in the HandButton.prototype._onButtonCallback function we defined in the earlier article. Each time a toggle button is pressed (either turned on or off), we want to update all the buttons. If only one button is left on, that button will be disabled. This prevents the player from turning off all the buttons, which would create a problem when we set up the bet chip buttons in a later article.

That completes adding the functionality of the hand buttons. We can now select which hand (or hands) on which we want to place bets. Also, we made sure that at least one of these hand buttons is on at all times.

In the next article, we’ll set up the bet chip buttons, so we can place bets on our selected hands. Thanks, and talk to you soon.

– C. out.