Thunderjack! HTML5 Game Update: Adding Sound Effects (Yeah!)

Hey there.

Well! At this point, the game play is all done. Woot! 👍🏿

Now, you’ll add sound effects to your game. You should add some sound effects to the game to make it more engaging. In this game, sound effects do not affect the game play itself, which is why we’ve deferred adding them until now. However, this does not mean that the sound effects should be an afterthought. When designing your game, you should have an idea of which events that happen in the game will produce sounds, and what those sounds should be.

That said, we’re going to do a little bit of design work here. First, we want to determine which events will produce sounds. Based on the elements in this game, here are some events that could make sense for adding to this game:

  • Button clicks
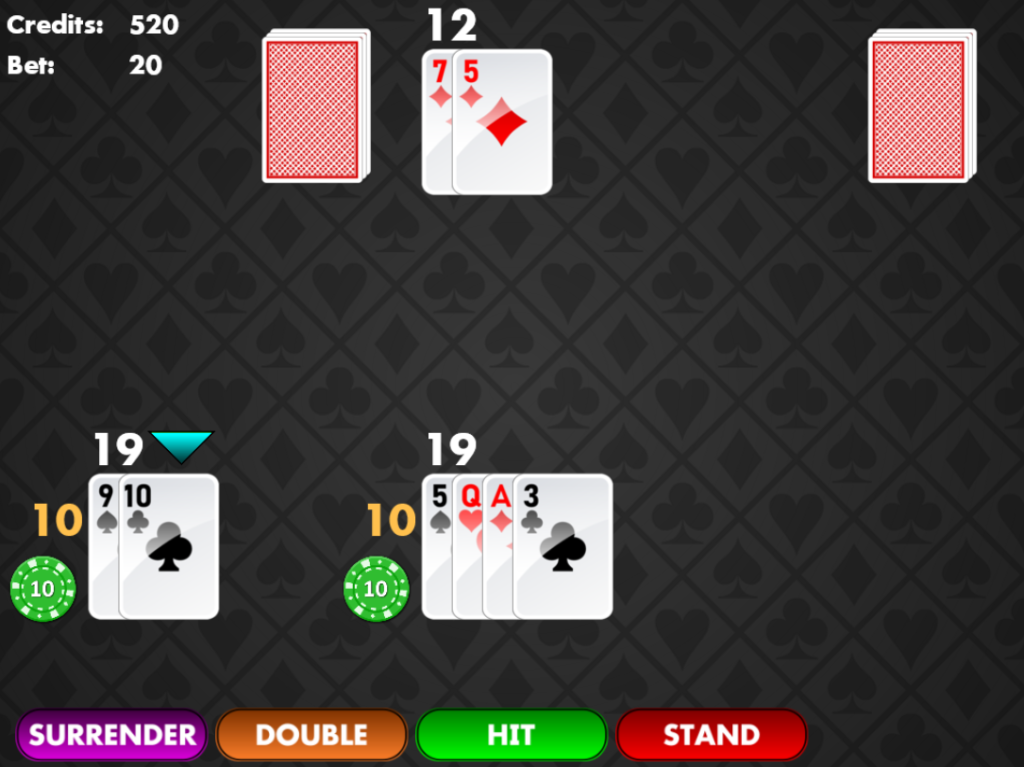
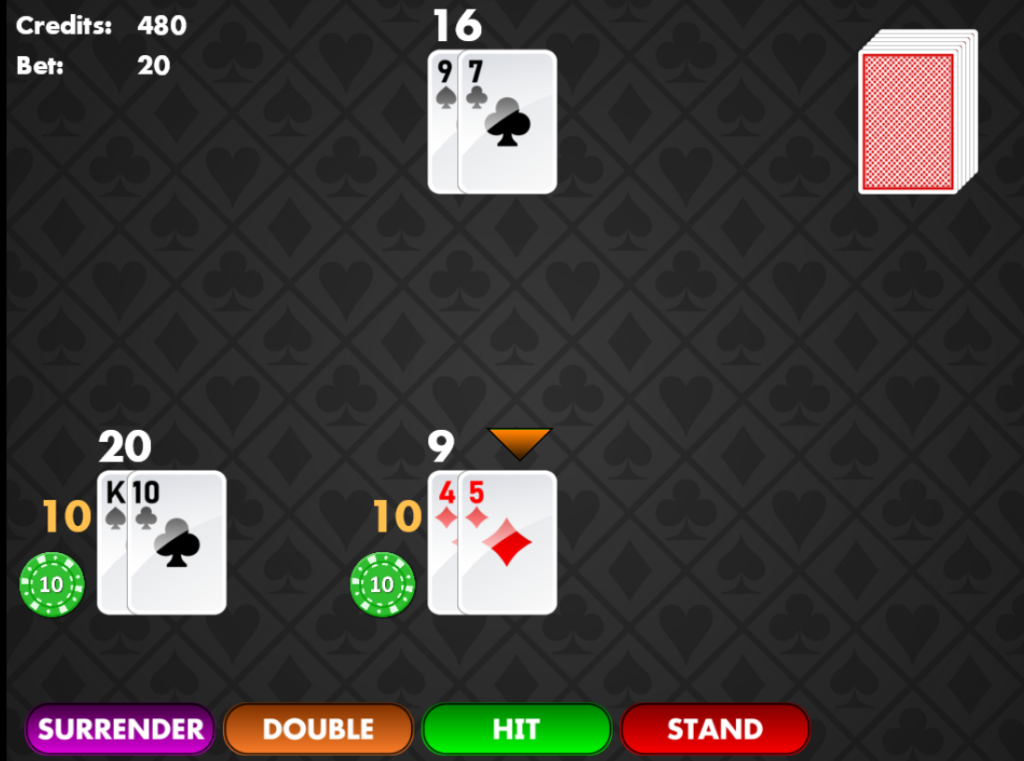
  • Player wins (at the end of each round, player won more credits than they spent)
  • Player bust
  • Player gets a Blackjack
  • Player gets a Blitz
  • Player gets a Thunderjack
  • Player doubles down
  • Player splits
  • Player surrenders
  • Dealer busts
  • Player or dealer hits
  • Player or dealer stands
  • Shuffling cards
  • Card is dealt
  • Player adds bet
  • Player clears bet

Note: You can use any sound effects you like for these events. You can also come up with your own events to add sound effects for. This article will not cover adding an event for every single event mentioned above. Once you know who to do it for a few events, you’ll have plenty of opportunities to practice adding sounds for the other events.

In this article, I’ll be assigning sounds only to the following events:

  • Player wins
  • Player busts
  • Player gets a Blackjack
  • Player gets a Thunderjack
  • Dealer busts

After adding a few sounds, you’ll get the gist of how to add sounds to your game.

Well, let’s get started!

Adding Sound Effects To Your Project

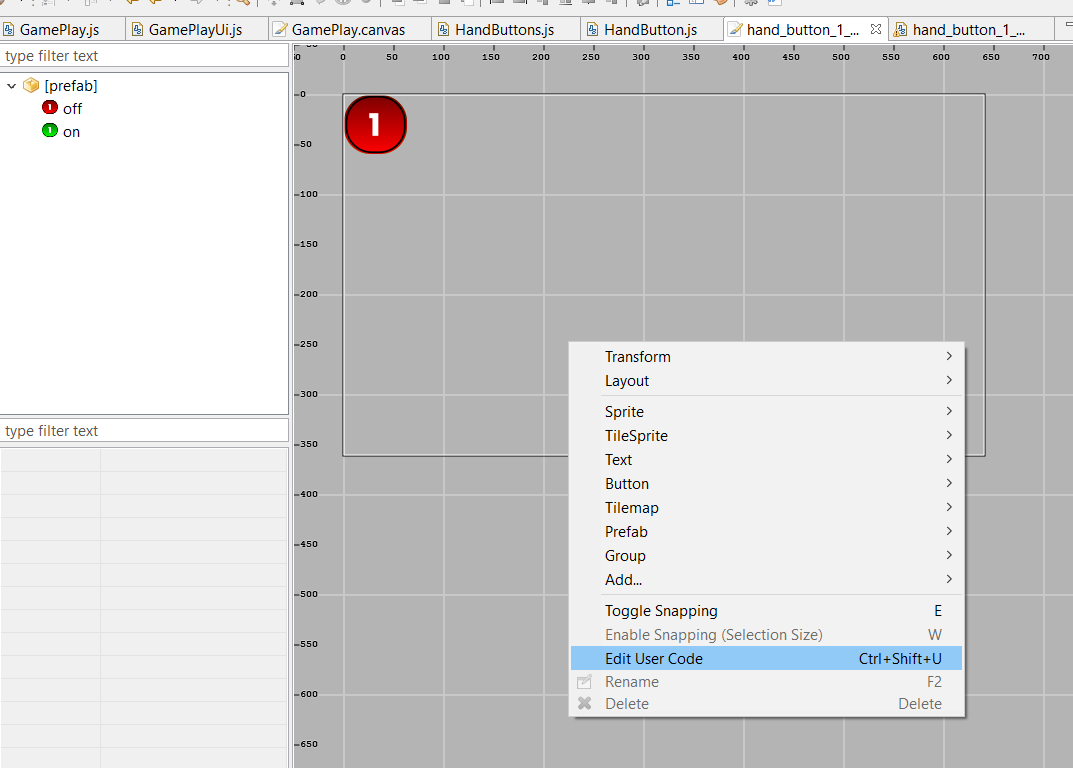
After you’ve decided which events that will play sounds, you need to add the sound files to your project. Phaser Editor can handle this. ⭐

Phaser Editor uses an asset pack manifest file that defines all the assets and the keys that Phaser uses to reference them. Instead of writing the code to load each asset, only this asset pack file needs to be loaded. It is a JSON file, and if you’d like to know more about assets management, visit this topic.

For this project, I have a manifest file called pack.json. After you have a pack file added to your project, this line of code is how Phaser loads the pack file:

phaserGame.load.pack('preload', 'assets/pack.json');

You’ll probably want to add that line to the preload function of your preloading game state.

Next, let’s add the sounds to the pack file using the following steps:

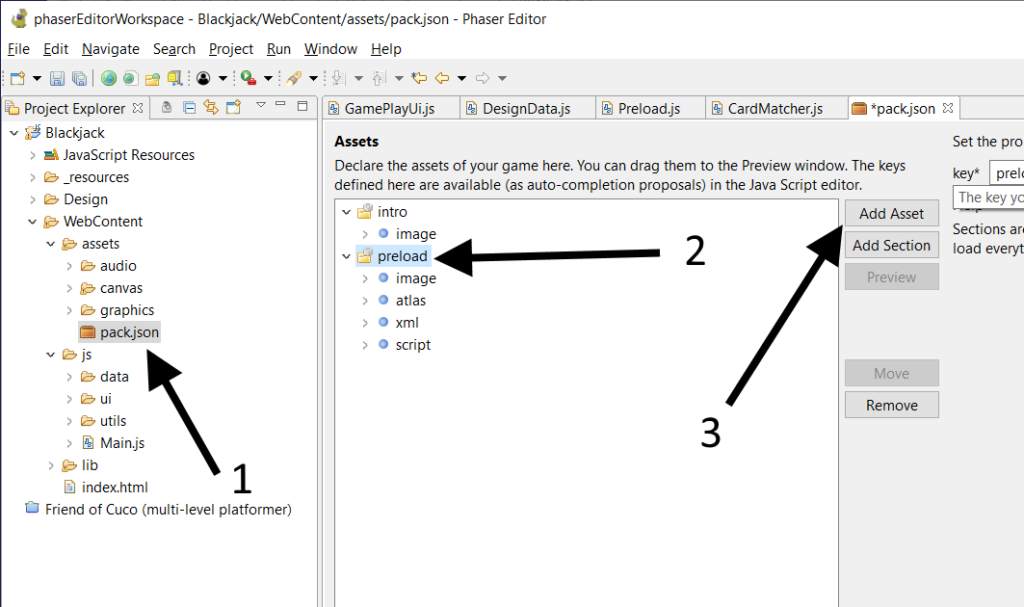
  1. Open the pack file in the project explorer by double-clicking on it.
  2. From the Assets window, select the preload folder (or a different section if you’d like to add the assets under a different one).
  3. Press the Add Asset button.
  4. On the Asset Type dialog, button, select audio from the list, then press OK.
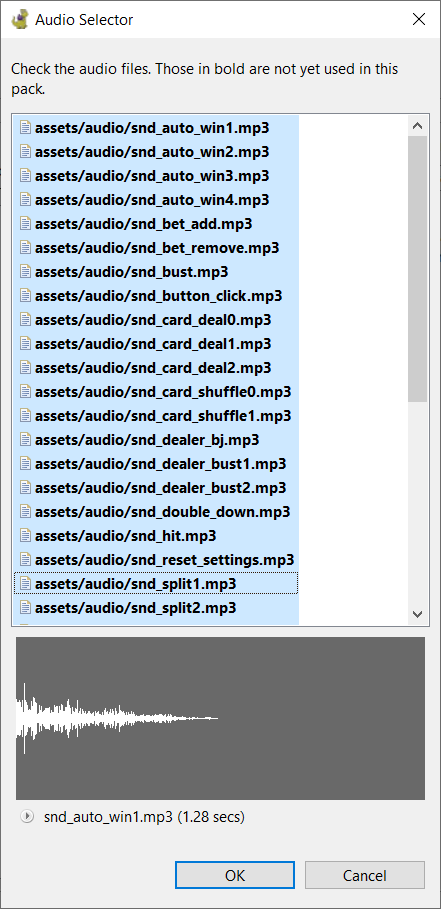
  5. In the Audio Selected dialog, select the sounds you want to add to the pack file under the section you selected, then press OK.
  6. Save the pack file.

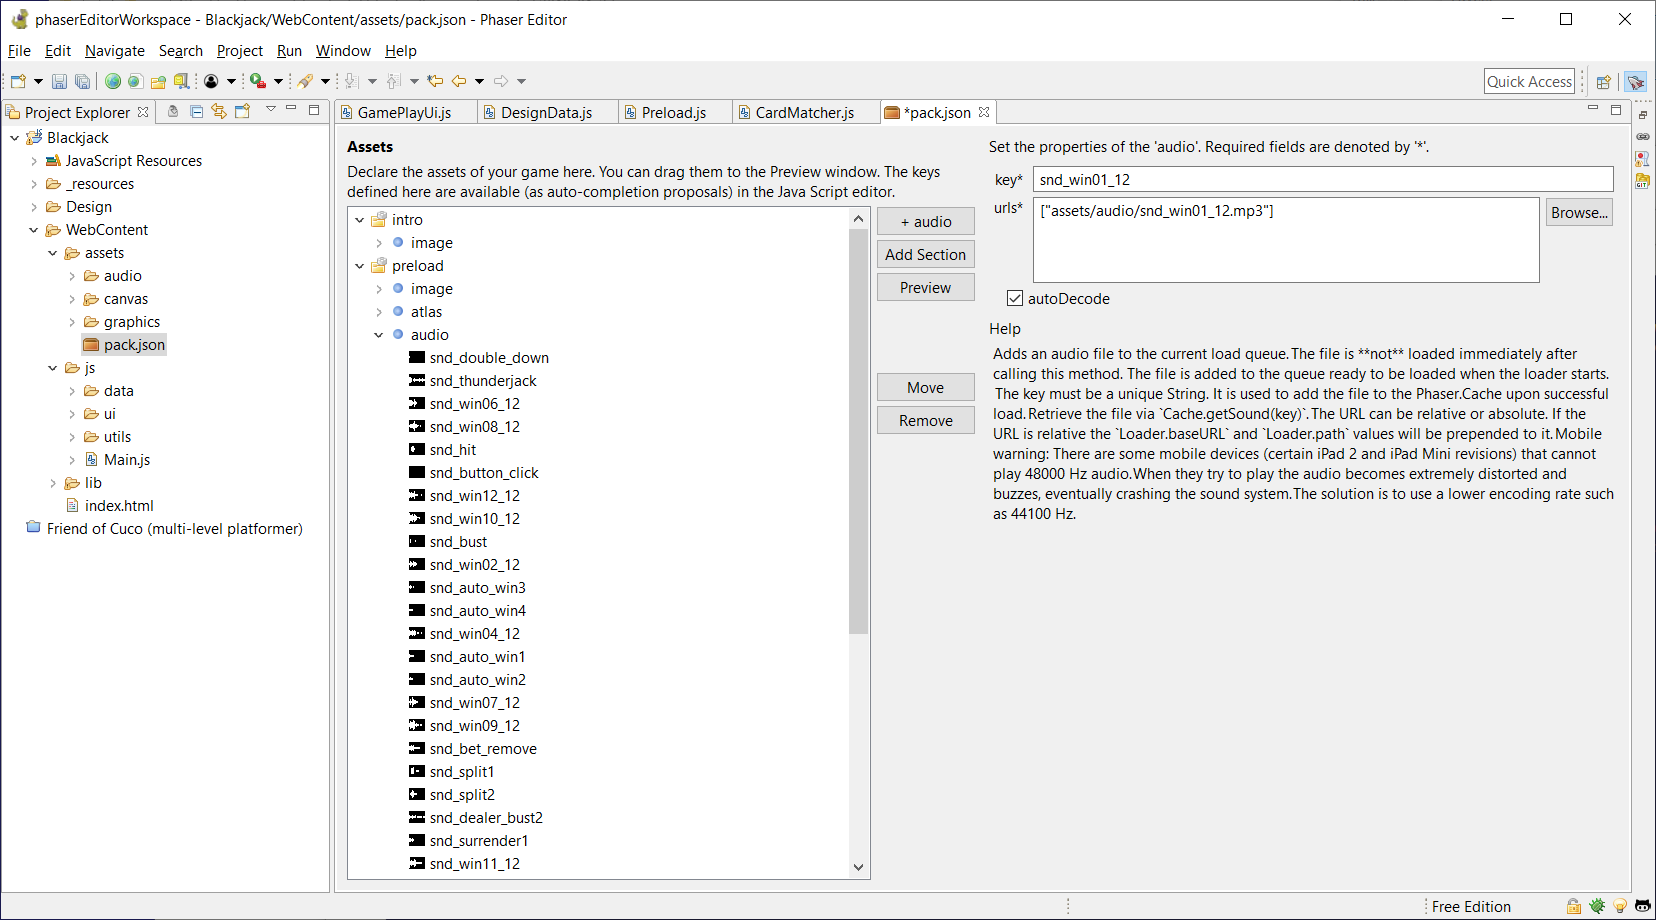
Note: After adding sounds by default, the key that Phaser Editor assigns to each sound is the name of the sound file. The key is how you will reference the sound in your code so you can play it. If you want, you can change the key of any sound by editing the key text field. If you do, make sure the key is unique to all the other keys.

Finally, if you need to later, you can add more sounds to the audio group later on, or remove sounds that you will not be using.

Now that the sound files have been added to the asset pack file, let’s start using them for some events in the game.

Add the Player Wins Sound

First, we’ll add a sound that plays when you win. “Winning” is defined as winning more credits that you spent during the round.

We’ll return to the endRound function that we last saw here. Make the following edits to it:

endRound
GamePlay.prototype._endRound = function() {
  if (this._dealerData.isBust) {
    this._presentPlayersWinViaDealerBust();
  } else {
    this._compareCards();
  }
  
  this._showBetUi();
  this._playWinSound();
};
playWinSound
GamePlay.prototype._playWinSound = function() {
  if (this._playerData.credits > this._startingCredits) {
    this.game.sound.play("snd_win01_12");
  }
};

The Phaser game object contains a sound property, which is a reference to SoundManager object. The SoundManager has a play function on it, and the first parameter is the asset key for the sound that was loaded.

Note: The snd_win01_12 string is the key of the win sound I used when loading the win sound in to the asset pack file. The key of your win sound will likely be different.

We’ve seen PlayerData.getTotalBet before, but what’s this this._startingCredits property? Hmm… 🤔

Well, we want to compare the number of credits the player has at the end of the round to the number of credits they had at the beginning of the round. The this._startingCredits property will track how many credits they had, just before they started the round (before having their credits deducted).

So, we can define this._startingCredits in our onBetButtonPressed function with this modification:

onBetButtonPressed
GamePlay.prototype._onBetButtonPressed = function() {
  if (!this._canAffordBet()) {
    //can't afford the bet - cancel the bet placing method, and don't start the game.
    return;
  }
  
  this._startingCredits = this._playerData.credits;
  this._payRoundCost();
  this._hideBetUi();
  this._beginRound();
};

That should do it for the win sound. Let’s see how it looks (and sounds like!) so far. The win sound should only play when you’ve won more credits than you spent:

Add The Player And Dealer Busts Sounds

Next, we’ll add a sound that plays each time a player or the dealer busts.

We’ll revisit the beginPlayerBust function, and make the following mods:

GamePlay.prototype._beginPlayerBust(player) {
  player.isBust = true;
  if (this._isPlayerId(s_playerId)) {
    this.game.sound.play("snd_bust");
  } else {
    var as_dealerBustSoundKeys = [ "snd_dealer_bust1", "snd_dealer_bust2" ];
    var s_dealerBustSoundKey = Phaser.ArrayUtils.getRandomItem(as_dealerBustSoundKeys);
    var dealerBustSound = this.game.sound.play(s_dealerBustSoundKey);
    if (dealerBustSound) {
      var f_onSoundStop = function(sound, marker) {
        this._setNextTurnPlayer();
      };
      
      dealerBustSound.onStop.addOnce(f_onSoundStop, this);
      return;
    } else {
      this._setNextTurnPlayer();
    }
  }
};

Added quite a bit to this one! 😅 If the player busts, we just play one sound. But if the DEEEEELUR busts, well, let’s get just a little fancy here. 😎

We’re doing two things here:

First, we’re choosing one of two sounds to play randomly (the dealer will have different busts sounds, just for the hell of it, and we want to stick it to the dealer when they lose).

Second, we want to wait until the sound has finish playing before we continue. Say the dealer busts, and the dealer bust sound plays. Also, say the player also won this game. What would happen is both sounds would be playing together – the dealer bust sound, and the player won sound. This isn’t what we want. So, we’ll wait until the dealer bust sound has completed playing before proceeding.

It’s worth pointing out that the f_onSoundStop variable is a function setup as a callback for the bust sound’s onStop Signal. We register the callback by calling the signal’s addOnce function, and specifying the callback as the first parameter. When the sound finishes playing, the Phaser will automatically call the f_onSoundStop function.

And here are the player and dealer bust sounds in action:

Add Blackjack and Thunderjack Sounds

Next, we’re adding sound effects that play every time a player wins with a Blackjack or a Thunderjack.

Let’s start with the Blackjack first.

Once again, we’ll be revisiting some code. In particular this pseudo code from this article will now be updated to:

var playerWithThunderjack = checkIfPlayerHasThunderjack();
var playersWithBlackjack = checkIfPlayersHaveBlackjacks();
var doesDealerHaveBlackjack = hasBlackjack(dealer);
if playerWithThunderjack {
  handleThunderjack(playerWithThunderjack);
  endRound();
} else {
  if doesDealerHaveBlackjack {
    handleDealerBlackjack();
    endRound();
  } else {
    if at least one player has blackjack {
      //play the blackjack sound here
    }
    setFirstTurnPlayer();
  }
}

The checkIfPlayersHaveBlackjacks will function return an array of all the players who have blackjack, so if this array has at least one player in it, we’re good.

Next, we’ll tackle playing a sound if a player has a Thunderjack.

Coming from the code above, we’ll modify the handleThunderjack function:

handleThunderjack
function handleThunderjack(player) {
  player.handData.hasThunderjack = true;
  //play the thunderjack sound here
}

That’s it for adding the Thunderjack sound! 👍🏿 And here are the sounds in play:

Most of the events are just finding the place in your code where it would seem most appropriate to add a playing sound. Only in special cases would you need to wait for a sound to complete playing before proceeding.

We’ll finish this article here. If you have any questions for me about anything I’ve discussed so far, feel free to ask in the comments below. If you’d like to add more sounds to more events, by all means have at it.

Or, if you’re looking to hire a coder to build your next card game (and add all your desired sounds into the game as well!), get in touch with me by e-mailing me at cartrell@gameplaycoder.com, or filling out my contact form.

Thanks guys, talk to you later. Take care,

– C. out.

Thunderjack! HTML5 Game Update: Added Logic for Blitz

There is one more type of hand the player can win: getting a Blitz. So we’re going to code that functionality into the game in this article.

If you’re familiar with Blackjack, you might also know what a Charlie is. If not, don’t worry about it. I gotcha. 👊🏿

A Charlie is when a hand has acquired so many cards – usually five, six, or seven – without busting. When a player gets a Charlie, they are paid immediately, just like when getting a Blackjack or a Thunderjack.Also, the player does not play against the dealer. The next player’s turn immediately begins afterwards.

Thunderjack! will adopt a six-card Charlie, and I’m calling it a Blitz. Why? Because Blitz just sounds cooler. 😎

Ha! But no, taking the definition of the word (currently defined by Merrima-Webster, which is being “a fast intensive nonmilitary campaign or attack”.

So, if you’re taking hit after hit after hit, and still haven’t busted, I’d say that’s a pretty “intensive attack” – on attempting to beat the dealer. Would you agree? 😉

Determining if the player has a Blitz can be checked each time the player takes a hit and has not busted. You can modify the the beginTurnPlayerHit function which was defined in the article that introduced the hit functionality. The updated function is shown below:

beginTurnPlayerHit
GamePlay.prototype._beginTurnPlayerHit = function() {
  //get the playerData of the current turn player. we'll be using this as a paramater to the other functions
  var turnPlayer = this._getTurnPlayer();
  
  this._dealCardToPlayer(turnPlayer);
  this.updateScores();
  if (this.didPlayerBust(turnPlayer)) {
    this._beginPlayerBust(turnPlayer);
    this._setNextTurnPlayer();
  } else {
    if (this._doesPlayerHaveBlitz(turnPlayer)) {
      this._beginPlayerBlitz(turnPlayer);
      this._setNextTurnPlayer();
    }
  }
};

doesPlayerHaveBlitz
GamePlay.prototype._doesPlayerHaveBlitz = function(playerData) {
  var playerHand = playerData.getHandData();
  var NUM_CARDS_FOR_BLITZ = 6;
  return(playerHand.getNumCards() === NUM_CARDS_FOR_BLITZ &&
    playerHand.score <= Thunderjack.DesignData.BLACKJACK_POINTS);        
};

This function checks that the player’s hand has exactly six cards, and that the score does not exceed 21 (the number of Blackjack points).

Note: Note: You can change NUM_CARDS_FOR_BLITZ to a different value if you like. If you do, make sure your player hand user interface can handle that number of cards. With the current setup of the player_prefab canvas defined in Phaser Editor.

beginPlayerBlitz
GamePlay.prototype._beginPlayerBlitz = function(playerData) {
  playerData.hasBlitz = true;
  //player is paid immediately here as well
};

A player who gets a Blitz does not play against the dealer. To start this off, the hasBlitz property is set to true in the beginPlayerBlitz function. Next, we’ll need this to update the isPlayingVsDealer function.

The isPlayingVsDealer function determines if a player is playing against the dealer. Our last implementation of the function looked like this:

function isPlayingVsDealer(handData) {
  return(
    !(playerHandData.hasBlackjack ||
    playerHandData.isPush ||
    playerHandData.isBust ||
    playerHandData.hasThunderjack));
}

We’ll update that so that to include players who have not Blitzed are eligible to play against the dealer:

isPlayingVsDealer
function isPlayingVsDealer(handData) {
  return(
    !(playerHandData.hasBlackjack ||
    playerHandData.isPush ||
    playerHandData.isBust ||
    playerHandData.hasBlitz ||
    playerHandData.hasThunderjack));
}

Finally, in the beginTurnPlayerHit function, after the player has Blitzed, the next player’s turn begins, with a call to the setNextTurnPlayer.

That does it for adding Blitz functionality in the game! This function required mostly a few modifications to the existing code.

Thanks for reading this article. We’ll talk to you next time. Take care.

– C. out.

Thunderjack! HTML5 Game Update: Recycling the Deck

Hey there,

Now that you’ve got most of the core gameplay completed, this article is about managing the deck of cards.

Each round of play draws cards from the deck. Just before each new round is started, all cards involved in play are moved to a discard pile. Cards in this pile cannot be used again until the deck is recycled.

Eventually, the deck will run out of cards. This is not good, especially considering it would happen in the middle of a game, while cards are being dealt. The process of recycling the deck starts after all the in-play cards have been discarded.

In the video, for the sake of brevity, the deck will recycled after one round. But in a real game, you’d want more cards to be played before the deck recycles. The discard pile is formed just to the left of the dealer’s hand. At the end of the round, after all the cards are discarded, they are then moved back into the deck. Afterwards, the deck is shuffled, and the next round begins.

But before you get into recycling the deck, let’s first go over discarding the cards.

Discarding the cards

At the end of each round, the game discards all players’ and dealer’s cards by moving them from their hands into the discard pile.

Just like the deck was defined as a DeckDataprototype, the discard pile can use the same prototype:

discardDeckData = new Thunderjack.DeckData();

The discard pile can be treated just like the deck, because cards will be added to and removed from it.

Note: The deck functions as a stack (LIFO – last in, first out), meaning that the cards added to the deck are removed in the reverse order in which they were added. The last card to be added (last in) is the first one to be removed (first out).

As mentioned, at the end of each round, all the cards in play are moved to the discard pile. The DeckData prototype currently does not have a way to add cards to it as needed, so here’s a function to add to the prototype to do that:

pushCardData
Thunderjack.DeckData.prototype.pushCardData = function(cardData) {
  this._cardsData.push(cardData);
};

When moving discarding all the cards, some pseudo code looks like this:

for each player in the game {
  discardPlayerCards (player)
}

discardPlayerCards (dealer) //don't forget the dealer
...
discardPlayerCards (player) {
  for each cardData in player's hand {
    remove cardData from hand
    add cardData to discardDeckData //using discardDeckData.pushCardData()
  }
}

Recycling the deck

Recycling is made of three steps:

1). Decide if the deck should be recycled. If so, proceed to step 2. Otherwise, begin the next round.
2). Move all cards from the discard pile back into the deck.
3). Shuffle the deck.

Once all the in-play cards have been discarded, we call this function:

handleDiscardCardsComplete
GamePlay.prototype._handleDiscardCardsComplete = function() {
  if (this._shouldRecycleDeck()) {
    this._recycleDeck();
  }
  
  this._beginRound();
};

Let’s start with the first step:

1). Decide if the deck should be recycled. If so, proceed to step 2. Otherwise, beGin the next round.

After all the cards have been discarded, you check the deck to see if it has few enough cards to be recycled. We’ll pick a hard number (you can make it a percentage of maximum number of cards in the deck).

The handleDiscardCardsComplete function should be called after all the cards have been discarded. It will first decide if the deck should be recycled. It so, it goes ahead wit hit. Otherwise, the next round begins.

shouldRecycleDeck
GamePlay.prototype._shouldRecycleDeck = function() {
  if (this._discardDeckData.getLength() === 0) {
    //shouldn't recycle deck if no cards have been discarded
    return(false);
  }
  
  var RECYCLE_DECK_THRESHOLD = 15;
  return(this._deckData.getLength() < RECYCLE_DECK_THRESHOLD);
};

This function determines if the deck should be recycled. The threshold is 15 cards. If the deck contains less than 15 cards, it should be recycled.

Note: Having a threshold of 15 cards is quite low, and can be risky, especially if you are playing three hands. Each hand can hold six cards max. That said, the max number of cards used in a game is 7 x 6 = 42 cards (three player hands with six cards each (3 x 6) + three split hands with six cards each (3 x 6) + one dealer hand of six cards (1 x 6). So, you have: 3 x 6 + 3 x 6 + 6 = 42.

It is unlikely that a single game would use this many cards, but there is the chance that the number of cards used in the game would completely empty the deck. You can reduce this from happening by increasing the threshold. A way to guarantee that it will never happen is to use more than one deck, and increase the threshold to 43 (not a typo: you want the deck to be recycled if there are less than 43; or you could change the comparison operator from < to <= and use 42 as the threshold).

Now you know if the deck should be recycled or not. (Let’s assume so, we you can move on to step 2! 😛 )

2). Move all cards from the discard pile back into the deck.

Going back to the handleDiscardCardsComplete, we’re assuming that shouldRecycleDeck returned true. So we’re now start the recycle process with this function:

recycleDeck
GamePlay.prototype._recycleDeck = function() {
  //move all cards from the discard pile to the deck
  var cardData = this._discardDeckData.popCardData();
  while (cardData !== null) {
    this._deckData.pushCardData(cardData);
    cardData = this._discardDeckData.popCardData();
  }
};

This function starts by “popping” (removing) the last card from the discard pile and storing it in the cardData variable.

Next it starts a while loop. As long as there are cards in the discard pile, the loop will do the following:

  1. Add the card data to the deck
  2. Pop the next card from the discard pile.

After the last card has been removed from the discard pile and popCardData is called when there are no cards left, cardData will be set to null.

Remember that the functions being called on the deckData and discardDeckData have been defined on the DeckData prototype.

3). Shuffle the deck.

Finally, after all the cards have been moved back into the deck, it is shuffled by calling the shuffle function.

You can do this by adding one more line at the bottom of your recycleDeck function:

GamePlay.prototype._recycleDeck = function() {
  ...
  this._deckData.shuffle();
};

Recycling the deck is now complete, and the game begins with the next round.

If you have any questions for me about anything I’ve discussed so far, feel free to ask in the comments below.

Also, if you’re looking to hire a coder to build your next card game, get in touch with me by e-mailing me at cartrell@gameplaycoder.com.

That’s it for this post, guys. Thanks, and talk to you later.

– C. out.

Thunderjack! HTML5 Game Update: Splitting and Surrendering

Happy New Year, guys! ⭐ I wish you a very fun, and happy 2019, complete with experiences that’ll challenge you and allow you to grow and become a stronger version of yourself.

In this article, we’ll be handling the final two moves you can perform in the game: splitting and surrendering.

We’ve already covered the first three moves, hitting, standing and doubling down.

  • Hit
  • Stand
  • Double
  • Split
  • Surrender

Splitting

If you have a pair in your opening hand, you have the option to split the cards into two hands. Each new will automatically be dealt another card. This gives you an additional hand to try and beat the dealer.

Like doubling down, you must place an addition bet equal to the original wager of the hand in order to split.

There are a few things to be aware of with splitting:

  • Split hands cannot win via a Thunderjack or Blackjack
  • Split hands may double down
  • Split hands may not surrender (will be covered in surrender functionality)
  • If splitting a pair of aces, both hands must stand after being dealt another card (can’t have more than two cards)

We’ll need a button that will allow the player to splir when pressed. Using the same steps as in previous articles, create the button (using Phaser Editor):

  1. Right-click on the main game canvas, then select Add, then Button.
  2. From the Add Sprite dialog, select the image you want to use as the main button sprite, then press OK.
  3. This will add a button to your canvas. You can drag it to position it where ever you want.
  4. In the button’s properties, set the field property to true. This will create a reference to the button in the code that the canvas compiler generates, allowing you to reference it as well.
  5. Set a varName for the button. I decided to use the game_button_split.
  6. Set the callback to this._onSplitButtonPressed, and set the callbackContext to this.
  7. Set the four “Frame” properties to the appropriate sprite images, so that the button appears responsive when the it is moused over, pressed, and released.

When the canvas is saved, it’ll add the code that creates and positions the button. We also want to ensure there is the callback function, onSplitButtonPressed. We’ll write it like:

onSplitButtonPressed
GamePlay.prototype._onSplitButtonPressed = function() {
  this._beginTurnPlayerSplit();
};
beginTurnPlayerSplit
GamePlay.prototype._beginTurnPlayerSplit = function() {
  var splitPlayerId = this._insertUpperPlayerIdIntoTurnPlayerIds();
  this._setSplitStatusForPlayers(splitPlayerId);
  this._paySplitCostForSplitPlayer(splitPlayerId);
  
  var turnPlayerId = this._getTurnPlayerId();
  this._moveCardFromPlayerToPlayer(turnPlayerId, splitPlayerId);
  
  this._dealCardTo(turnPlayerId);
  this._dealCardTo(splitPlayerId);
};

The beginTurnPlayerSplit function is where the actual splitting functionality takes place.

First, we’re adding a new player into the game: the player that is created from the split. This is what insertUpperPlayerIdIntoTurnPlayerIds does, as well as return the player ID of the new player.

Player IDs

Each player is assigned a unique “player ID”. We use these to reference the PlayerHandData for the player we want. From there, we can access the cards in the player’s hand, as well as other information about that player.

So far, we’ve only used the “lower” IDs, not the “upper” ones. Here are all six player hand IDs:

Thunderjack.PlayerHandIds.LOWER_RIGHT = "lowerRight";
Thunderjack.PlayerHandIds.LOWER_MIDDLE = "lowerMiddle";
Thunderjack.PlayerHandIds.LOWER_LEFT = "lowerLeft";

Thunderjack.PlayerHandIds.UPPER_RIGHT = "upperRight";
Thunderjack.PlayerHandIds.UPPER_MIDDLE = "upperMiddle";
Thunderjack.PlayerHandIds.UPPER_LEFT = "upperLeft";

A split is always initiated from one of the three “lower” hands. The new had that is created is its “upper” counterpart.

We split the original hand into two by moving its top card to the new hand. In the beginTurnPlayerSplit function, the turnPlayerId represents the original player’s (the player’s whose turn it is), and splitPlayerId presents the new hand.

We want to insert the new player ID into the array of turn player IDs, (this._turnPlayerIds) after the current turn player’s ID. The insertUpperPlayerIdIntoTurnPlayerIds function does this, and the pseudo code for it looks like:

insertUpperPlayerIdIntoTurnPlayerIds

insertUpperPlayerIdIntoTurnPlayerIds() {
  get the splitPlayerId, which is the corresponding "upper" ID of the turn player
  get the array index of the turn player ID within the turnPlayerIDs array
  insert the splitPlayerId into the turnPlayerIDs array after the turn player ID
};

We can use the JavaScript function, Array.prototype.splice to insert the split player ID directly after the current turn player ID, so that when the turn player is finished, the next turn will be the split player. After the split player’s turn, game play normally resumes.

When getting the splitPlayerId, which is the corresponding “upper” ID of the turn player, the mapping is:

Thunderjack.PlayerHandIds.LOWER_RIGHT ==> Thunderjack.PlayerHandIds.UPPER_RIGHT
Thunderjack.PlayerHandIds.LOWER_MIDDLE ==> Thunderjack.PlayerHandIds.UPPER_MIDDLE
Thunderjack.PlayerHandIds.LOWER_LEFT ==> Thunderjack.PlayerHandIds.UPPER_LEFT

An example of how the turnPlayerIds is modified is below.

Say, you have two players (left and right) and the dealer in the game. The turnPlayerIds would look like:

[
  Thunderjack.PlayerHandIds.LOWER_LEFT,
  Thunderjack.PlayerHandIds.LOWER_RIGHT,
  Thunderjack.PlayerHandIds.DEALER
]

It’s currently the “lower left” player’s turn. They split their hand, creating the “upper left” hand. The turnPlayerIds would then look like:

[
  Thunderjack.PlayerHandIds.LOWER_LEFT,
  Thunderjack.PlayerHandIds.UPPER_LEFT,    //<-- new player ID inserted via splice
  Thunderjack.PlayerHandIds.LOWER_RIGHT,
  Thunderjack.PlayerHandIds.DEALER
]

You can see that Thunderjack.PlayerHandIds.UPPER_LEFT was inserted directly after the current turn player’s ID, Thunderjack.PlayerHandIds.LOWER_LEFT. And when the “lower left” player’s turn is done, the next turn is the “upper left”. After that, play resumes with “lower right” (same is it would, had the “lower left” player never split).

Now that we have created the new split player, we’re going to set the split status of both players. We’ll set up the rule that player hands that have been involved in a split during the round cannot split again. The setSplitStatusForPlayers will accomplish this.

In order to set the split status, the function could look like:

setSplitStatusForPlayers
GamePlay.prototype._setSplitStatusForPlayers = function(splitPlayerId) {
  var turnPlayerHandData = this._getTurnPlayerHandData();
  turnPlayerHandData.hasSplit = true;
  
  var splitPlayerHandData = getPlayerHand(splitPlayerId);
  splitPlayerHandData.hasSplit = true;
  splitPlayerHandData.betValue = turnPlayerHandData.betValue;
};

There is a new property on the PlayerHandData object that we’ve not seen yet, hasSplit. We’ll add that to the constructor function so it now looks like:

PlayerHandData
PlayerHandData = function(s_handId) {
  HandData.call(this, s_handId);
  this.betValue = 0;
  this.hasThunderjack = false;
  this.isPush = false;
  this.hasBlitz = false;
  this.hasDoubled = false;
  this.hasSurrendered = false;
  this.hasSplit = false;
};

One of the rules of splitting is that we don’t want to split a hand that was already involved in a split. That means, for the current turn player, and the new hand that was created, you want to set their hasSplit property to true.

After splitting, when resuming the current player’s turn, or on the split player’s turn, that player can’t split, even if they have a pair. And of course, splitting isn’t free; it costs an additional wager equal to that placed on the hand that is splitting.

Note: Optionally, if you want to make it so that both players must automatically stand if aces are split, you can check if the turn player’s hand is a pair of aces. Then, when the split functionality is down, you can stand twice (once for the turn player, and again for the split hand).

Now that we have all the functionality for splitting done, we can update our showGameButtonsForPlayer function to include eligibility for splitting for the current turn player. If the player is allowed to split, we’ll show the split button. Otherwise, we’ll hide it.

showGameButtonsForPlayer
GamePlay.prototype._showGameButtonsForPlayer = function(playerHandData) {
  this.fGame_button_hit.visible = true;
  this.fGame_button_stand.visible = true;
  this.fGame_button_double.visible = this._isDoubleEligible(playerHandData);
  this.fGame_button_split.visible = this._isSplitEligible(playerHandData);
};

The isOpeningHand function has already been covered here.

canAffordSplit
GamePlay.prototype._canAffordSplit = function(playerHandData) {
  return(this._playerData.credits >= playerHandData.betValue);
};

We also want to make sure that the opening two cards are a pair, meaning, they have the same value. For face cards, they both must be the same face. For example, you can split two jacks or two queens, but not a jack and a queen.

areCardsPair
GamePlay.prototype._areCardsPair = function(playerHandData) {
  if (!playerHandData || playerHandData.getNumCards() != 2) {
    return(false);
  }
  
  var cardData0 = playerHandData.getCardAt(0);
  var cardData1 = playerHandData.getCardAt(1);
  return(cardData0 && cardData1 && cardData0.value == cardData1.value);
};

That’s it for splitting! That was quite a bit to go through. If you have any questions on anything, please ask in the comments section below. Now, let’s move onto the final player move: surrendering.

Surrender

You can do this if your opening hand does not look good against the dealer’s revealed card, and you’re not feeling confident. If a player surrenders, they:

  • forfeit half their bet (they’re immediately paid)
  • automatically end their turn
  • will not play against the dealer

Also, a split hand may not surrender.

First, we create the surrender button. Follow the same steps as creating the split button, except:

  1. Set the varName for the button to game_button_surrender.
  2. Set the callback to this._onSurrenderButtonPressed, and set the callbackContext to this.
  3. Set the four “Frame” properties to the appropriate sprite images, so that the button appears responsive when the it is moused over, pressed, and released.

Write the code for the onSurrenderButtonPressed, so it looks like:

onSurrenderButtonPressed
GamePlay.prototype._onSurrenderButtonPressed = function() {
  this._beginTurnPlayerSurrender();
};
beginTurnPlayerSurrender
GamePlay.prototype._beginTurnPlayerSurrender = function() {
  var playerHandData = this._getTurnPlayerHandData();
  this._presentPlayerSurrender(playerHandData);
  this._setNextTurnPlayer();
};

Here, we present the player as surrendering. This will include forfeiting half the bet, updating the player hand status, and moving onto the next turn player.

presentPlayerSurrender
GamePlay.prototype._presentPlayerSurrender = function(playerHandData) {
  var n_betValue = playerHandData.betValue;
  var WIN_RATIO_SURRENDER = -1 / 2;
  var n_amountWon = this._calcWinAmount(n_betValue, WIN_RATIO_SURRENDER); 
  
  playerHandData.hasSurrendered = true;
  
  this._playerData.credits += n_amountWon;
};

The presentPlayerSurrender function is very similar to the presentPlayerWon function discussed here. There is also another use of the calcWinAmount function. Except this time, we’re passing a different win ratio, WIN_RATIO_SURRENDER, defined as -1 / 2. When this ratio is passed into calcWinAmount, it will return only half of the original bet value.

We also set the hasSurrendered property of the PlayerHandData object to true.

Remember that a player has surrendered won’t play against the dealer. We previously defined a function isPlayingVsDealer, that determines if a player plays against a dealer. We’ll update that function to exclude players who’ve surrendered from playing against the dealer:

isPlayingVsDealer
function isPlayingVsDealer(handData) {
  return(
    !(playerHandData.hasBlackjack ||
    playerHandData.isPush ||
    playerHandData.isBust ||
    playerHandData.hasThunderjack ||
    playerHandData.hasSurrendered));
}

That’s it for the surrender functionality! It’s one of the shorter moves to implement, and most of the code that builds it has already been discussed in earlier articles.

We’re now finished with all five moves hit, stand, double down, split, and surrender… woot! 👍🏿

Now that most of the core gameplay is complete, we can finish off the game. Here’s what’s to come in the near future:

  • Recycling the deck (so the deck never runs out of cards)
  • Adding sound effects (yeah!)
  • Adding the Thunderjack effect (HELL YEAH!! 😠)

That’s it for this post, guys. Thanks, and talk to you later.

– C. out.

Thunderjack! HTML5 Game Update: Stand and Double Down

Hello! I hope your holiday season has been a safe and fun one. I spent Christmas day out with extended family, and got to spend some time with some people I don’t see that often. 🎄 And of course the food was outstanding – gotta get a little of everything! 🍖🍠💪🏿

In this article, we’ll be handling two more moves you can perform in the game: standing, and doubling down.

We’ve already covered the first move, hitting, which you can check out here.

  • Hit
  • Stand
  • Double
  • Split
  • Surrender

Stand

cIn the game of Thunderjack!, if you feel you have a competitive score, or do not wish to risk busting with a hit, you can stand. This will end your turn, and pass the turn to the next player. If there are no more players playing against the dealer, then it will be the dealer’s turn. Standing is a perfectly safe move, and can be performed at any time during your turn.

Here, after a cuppa hits, you have a pretty strong hand with four cards and 19 points. 😎 Standing sounds like a good idea… unless you’re crazy of course. You could go for another hit – you never you – you just might draw an Ace or a two! But no. Keeping your sanity, you decide to stay, and as you can see it’s now the next player’s turn. You will play against the dealer with 19 points.

(Even though the dealer has 12 points with both cards exposed, haha! You may have noticed that throughout the development of this game. It was intentional during the development of the game. Later on, we’ll hide one of the dealer’s cards until later in the round.)

First, let’s create a button that will allow the player to stand when pressed. The steps we use to create the button (using Phaser Editor are similar to what we did in the previous article with the hit button:

  1. Right-click on the main game canvas, then select Add, then Button.
  2. From the Add Sprite dialog, select the image you want to use as the main button sprite, then press OK.
  3. This will add a button to your canvas. You can drag it to position it where ever you want.
  4. In the button’s properties, set the field property to true. This will create a reference to the button in the code that the canvas compiler generates, allowing you to reference it as well.
  5. Set a varName for the button. I decided to use the game_button_stand.
  6. Set the callback to this._onStandButtonPressed, and set the callbackContext to this.
  7. Set the four “Frame” properties to the appropriate sprite images, so that the button appears responsive when the it is moused over, pressed, and released.

When the canvas is saved, it’ll add the code that creates and positions the button, as well as specify the callback function onStandButtonPressed. That function:

onStandButtonPressed
GamePlay.prototype._onStandButtonPressed = function() {
  this._beginTurnPlayerStand();
};
beginTurnPlayerStand
GamePlay.prototype._beginTurnPlayerStand = function() {
  this._setNextTurnPlayer();
};

When the stand button is pressed, it calls another function, beginTurnPlayerStand. Hmm, why not just put that here? Because, we’ll be using this functionality for both, the players, and the dealer. Standing is also used by the dealer, after doubling down, and if you want the player to automatically stand after splitting a pair of aces. So, we want the function to be easily accessible to those moves as well. Also, should we need to add other functionality that is exclusive to standing, we can add it to this function.

As you can see, beginTurnPlayerStand simply calls setNextTurnPlayer, which we’ve already seen when setting up our hit function earlier.

That’s it for implementing the standing move. We’ll move onto the next move: doubling down.

Double Down

This move can only be performed on your opening hand. At the cost of a new wager equal to the bet of the hand, you can take one more card (a hit). Then, you must stand; the game will automatically end your turn. If you beat the dealer, you will win twice your original wager. Beware: like a hit, there is a risk that you will bust, causing you to lose your new wager. There is also that, even after the hit, your score may still not be high enough to beat the dealer, resulting in lost wages.

With a score of 9, the bottom center player decided to take a chance and double their original bet of 10, making it 20.

One more card was dealt, then they must automatically stand.

The dealer busted, and the player won double their winnings, bringing their total winnings to 40.

So, we’ll break the double down function into four sections in this article:

  1. Adding the double down button to the canvas
  2. Showing the double down button when appropriate during a player’s turn
  3. Implementing the actual double down function
  4. Awarding double the winnings if the player beats the dealer
1. Adding the double down button to the canvas

First, we’ll create a button that will allow the player to double down when pressed. The steps we use to create the button very similar to what we did in the the stand button. The varName will be game_button_double, and the callback is onDoubleDownButtonPressed.

onDoubleDownButtonPressed
GamePlay.prototype.onDoubleDownButtonPressed = function() {
  this._beginTurnPlayerDoubleDown();
};
2. Showing the double down button when appropriate during a player’s turn

Next, we’ll implement thebeginTurnPlayerDoubleDown later in this article. For now, you can leave it as an empty function.

Doubling down is only available on the opening hand of a player’s turn, so the button should only be available during their first move. We have a setTurnPlayer function that we defined earlier:

setTurnPlayer
GamePlay.prototype._setTurnPlayer = function(i_turnPlayerIndex) {
  this._hideAllGameButtons();
  
  this._turnPlayerIndex = i_turnPlayerIndex;
  var s_playerId = this._getTurnPlayerId();
  if (!s_playerId) {
    //no turn player to set 
    return(false);
  }
   
  if (this._isDealerId(s_playerId)) {
    this._beginDealerTurn();
  } else {
    this._beginPlayerTurn(s_playerId);
  }
  
  return(true);
};

First, we want to hide all the game buttons, because the state of each player will be different after every move. When we are done setting the player’s turn, the updated setTurnPlayer will have only the appropriate game buttons visible for the player. We’ll add this new function:

hideAllGameButtons
GamePlay.prototype._hideAllGameButtons = function() {
  this.fGame_button_hit.visible = this.fGame_button_stand.visible = this.fGame_button_double.visible = false;
};

Also in setTurnPlayer, there is the _beginPlayerTurn function. We’ll use this to set up which move buttons. We haven’t really needed it until now, because the hit and stand buttons are always visible during a player’s turn.

beginPlayerTurn
GamePlay.prototype._beginPlayerTurn = function(s_playerId) {
  var playerHandData = this._playerData.getHandData(s_playerHandId);
  this._showGameButtonsForPlayer(playerHandData);
};

In this function, we first get the PlayerHandData of the current turn player. On the PlayerData class, we’ll add a new function, getHandData.

getHandData
PlayerData.prototype.getHandData = function (s_playerHandId) {
  return(this._hands[s_playerHandId]);
};

Next, there is a showGameButtonsForPlayer function. This will display the buttons appropriate for the current player, and hide the rest.

showGameButtonsForPlayer
GamePlay.prototype._showGameButtonsForPlayer = function(playerHandData) {
  this.fGame_button_hit.visible = true;
	this.fGame_button_stand.visible = true;
  this.fGame_button_double.visible = this._isDoubleEligible(playerHandData);
};

The hit and stand buttons are always visible for every move. However, setting visibility of the double down button is not a simple true or false. In order to keep showGameButtonsForPlayer simple, an isDoubleEligible function is created, which will determine whether or not the double down button should be shown.

isDoubleEligible
GamePlay.prototype._isDoubleEligible = function(playerHandData) {
return(
  this._isOpeningHand(playerHandData) &&
  this._canAffordDouble(playerHandData));
};

The double down button will be visible only on the player’s opening hand (when the player has two cards), and the player must have enough credits to afford placing the double wager.

isOpeningHand
GamePlay.prototype._isOpeningHand = function(playerHandData) {
  var NUM_CARDS_IN_OPENING_HAND = 2;
  return(playerHandData.getNumCards() === NUM_CARDS_IN_OPENING_HAND);
};
canAffordDouble
GamePlay.prototype._canAffordDouble = function(playerHandData) {
  return(this._playerData.credits >= playerHandData.betValue);
};

With these changes, adding and showing the double down button is complete. It will only appear on the opening hand of each player’s turn, and if the player has enough credits to afford doubling down. Next, we’ll focus on the double down functionality.

3. Implementing the actual double down function

This step is much easier than the the last, because we’ve already seen most of the code. The implementation consists of:

  • deducting the cost of the double down wager from the player’s credits
  • updating the player hand’s status to indicate double down
  • drawing one card (taking a hit)
  • automatic standing (if the player did not bust)

We’ll revisit our empty beginTurnPlayerDoubleDown method and place the code in it.

beginTurnPlayerDoubleDown
GamePlay.prototype._beginTurnPlayerDoubleDown = function() {
  this._setTurnPlayerDoubleDownStatus();
  this._payDoubleDownCostForTurnPlayer();
  this._dealDoubleDownCardToTurnPlayer();
};
setTurnPlayerDoubleDownStatus
GamePlay.prototype._setTurnPlayerDoubleDownStatus = function() {
  this._getTurnPlayer().hasDoubled = true;
};
payDoubleDownCostForTurnPlayer
GamePlay.prototype._payDoubleDownCostForTurnPlayer = function() {
  var playerHandData = this._getTurnPlayer();
  this._playerData.credits -= playerHandData.betValue;
};
dealDoubleDownCardToTurnPlayer
GamePlay.prototype._dealDoubleDownCardToTurnPlayer = function() {
  var turnPlayer = this._getTurnPlayer();
  
  this._dealCardToPlayer(turnPlayer);
  this.updateScores();
  if (this.didPlayerBust(turnPlayer)) {
    this._beginPlayerBust(turnPlayer);
    this._setNextTurnPlayer();
  } else {
    this._beginTurnPlayerStand();
  }
};

The dealDoubleDownCardToTurnPlayer is very similar to the beginTurnPlayerHit, except that if the player did not bust, they will automatically stand. Either way, the player’s turn ends after doubling down.

4. Awarding double the winnings if the player beats the dealer.

If the player beats the dealer, they will be awarded double their winnings. This final piece of code handles that. This is where setting the hasDoubled property of the player’s hand to true.

You may have seen an endRound function used in the pseudo code from this article, and we’ll begin coverage for that here.

endRound
GamePlay.prototype._endRound = function() {
  if (this._dealerData.isBust) {
    this._presentPlayersWinViaDealerBust();
  } else {
    this._compareCards();
  }
  
  this._showBetUi();
};

If the dealer busts, all players that are playing against the dealer automatically win. And players who doubled down will win double their winnings. Otherwise, those same players will have their scores compared against the dealer’s.

presentPlayersWinViaDealerBust
GamePlay.prototype._presentPlayersWinViaDealerBust = function() {
  var a_playerHands = this._playerData.getAllHands();
  
  for (var i_index = 0; i_index < a_playerHands.length; i_index++) {
    var playerHandData = a_playerHands[i_index];
    if (this._isPlayingVsDealer(playerHandData)) {
      this._presentPlayerWon(playerHandData);
    }
  }
};

The isPlayingVsDealer determines if a player is playing against the dealer. Our last implementation of the function looked like this:

function isPlayingVsDealer(handData) {
  return(
    !(playerHandData.hasBlackjack ||
    playerHandData.isPush ||
    playerHandData.hasThunderjack));
}

We need to update this to include players that have not busted are also eligible to play against the dealer:

isPlayingVsDealer
function isPlayingVsDealer(handData) {
  return(
    !(playerHandData.hasBlackjack ||
    playerHandData.isPush ||
    playerHandData.isBust ||
    playerHandData.hasThunderjack));
}
presentPlayerWon
GamePlay.prototype._presentPlayerWon = function(playerHandData) {
  var n_betValue = playerHandData.betValue;
  var WIN_RATIO_WIN = 1 / 1;
  var n_amountWon = this._calcWinAmount(n_betValue, WIN_RATIO_WIN); 
  
  if (playerHandData.hasDoubled) {
    n_amountWon *= 2;
  }
  
  this._playerData.credits += n_amountWon;
};

The presentPlayerWon function is where the winnings are added to the player’s credits. Inside the function, if the player has doubled down, the amount won is doubled.

But, what’s this calcWinAmount function, you ask? (:

That’s what determines how much the player won, based on the hand’s bet value.

calcWinAmount
GamePlay.prototype._calcWinAmount = function(n_betValue, n_winRatio) {
  return(n_betValue + n_betValue * n_winRatio);
};

The WIN_RATIO_WIN value is treated as a constant and is defined as 1 / 1. This reads as “one-to-one”, or “1:1”, meaning equal to the wager. For example, if the player placed a bet of 10 credits and won, they’d win (10 + 10 * 1) = 20 credits. There are also other ratios for other types of wins, such as blackjack (3:2), or dealer busts (1:1).

If the player is playing against the dealer, we want to compare the player’s score with the dealer’s. This is what the compareCards function does.

compareCards
GamePlay.prototype._compareCards = function() {
  var i_dealerScore = this._dealerData.score;
  
  var a_playerHands = this._playerData.getAllHands();
  for (var i_index = 0; i_index < a_playerHands.length; i_index++) {
    var playerHandData = a_playerHands[i_index];
    if (!this._isPlayingVsDealer(playerHandData)) {
      continue;
    }
    
    if (i_dealerScore < playerHandData.score) {
      this._presentPlayerWon(playerHandData);
    } else if (i_dealerScore === playerHandData.score) {
      this._presentPlayerPush(playerHandData);
    }
  }
};
presentPlayerPush
GamePlay.prototype._presentPlayerPush = function(playerHandData) {
  playerHandData.isPush = true;
  this._playerData.credits += playerHandData.betValue;
};

Finally in the endRound function, the showBetUi function will show all the controls that help us place bets, these are the:

  • hand buttons
  • bet chip buttons
  • bet button
  • clear button

That does it for this standing and doubling down. The next article will cover splitting, which allows us to create two hands from a hand of two cards with the same face value.

Whew! We covered a lot in this article, including payouts, comparisons against the dealer, and helping set the stage for future development of the remaining two moves, splitting and surrendering. If you read all of this, and you’re still with me, kudos! ⭐

And here is a video that shows standing and doubling down. On the third round, I did win a double-down bet, turning my original wager of 10 into winnings of 40.

Thanks, and take care,

– C. out.

Thunderjack! HTML5 Game Update: Hit – Take a Card

Welcome back again!

Now that betting and dealing cards is in place, we cover all five moves that the player can perform: hit, stand, double, split, and surrender. We’ll be able to activate these moves by using those five colorful buttons you’ve seen at the bottom.

Starting with this article, the next few will cover adding all five of these moves that the player can perform: hit, stand, double, split, and surrender. This particular article will cover hitting.

  • Hit
  • Stand
  • Double
  • Split
  • Surrender

Hitting is the same in Thunderjack! as it is in Blackjack. The object of the game is not to get 21 points; not to get closest to 21 without going over; but to beat the dealer. If you want to bolster your score, you can take a hit. You will be dealt another card, and your score will be updated. If you did not win the hand on the opening deal of the first two cards, or you already don’t have a high score, you can take a hit to get your score closer to 21 points.

Here, you have nine points. It is safe to take a hit. You were dealt a 10, giving you 19 points. A fairly strong hand! ✔

This comes at a risk, because if your score goes over 21 points, you bust, losing the hand.

You’ve got 14 points here. Taking a hit is a bit risky… Dammit! You drew a king, giving you 24 points and busting! 😒

If you’re new to this series of the blog of building this Thunderjack! game, we’re using Phaser Editor, an IDE for HTML5 games creation using Phaser to build the game layout and user interface.

First, create a button that will allow the player to hit when pressed. Using the Editor:

  1. Right-click on the main game canvas, then select Add, then Button.
  2. From the Add Sprite dialog, select the image you want to use as the main button sprite, then press OK.
  3. This will add a button to your canvas. You can drag it to position it where you want.
  4. In the button’s properties, set the field property to true. This will create a reference to the button in the code that the canvas compiler generates, allowing you to reference it as well (which we’ll do later).
  5. Set a varName for the button. I decided to use the game_button_hit.
  6. Set the callback to this._onHitButtonPressed, and set the callbackContext to this.
  7. Set the four “Frame” properties to the appropriate sprite images, so that the button appears responsive when the it is moused over, pressed, and released.

When the canvas is saved, it’ll add the code that creates and positions the button, as well as specify the callback function onHitButtonPressed. That function:

onHitButtonPressed
GamePlay.prototype._onHitButtonPressed = function() {
  this._beginTurnPlayerHit();
};

When the hit button is pressed, it calls another function, beginTurnPlayerHit. Well, why didn’t we just put the code that implements the hit functionality here? Because, we’ll be using this functionality for both, the players, and the dealer. We’ll cover this in a later article.

beginTurnPlayerHit
GamePlay.prototype._beginTurnPlayerHit = function() {
  //get the playerData of the current turn player. we'll be using this as a paramater to the other functions
  var turnPlayer = this._getTurnPlayer();
  
  this._dealCardToPlayer(turnPlayer);
  this.updateScores();
  if (this.didPlayerBust(turnPlayer)) {
    this._beginPlayerBust(turnPlayer);
    this._setNextTurnPlayer();
  }
};

What this code does is:

  • deals a card to the current turn player
  • updates the points of the players points to include the value of the new card dealt
  • if the player has busted
    • updates player status that they have busted
    • sets the next player’s turn

Some of these functions have already been introduced:

  • dealCardToPlayer – This function is the meat of the hit move. This deals another card to the turn player from the deck.
  • updateScores– After the player has received the new card, the scores need to be updated.

The new functions introduced here are:

didPlayerBust
GamePlay.prototype._didPlayerBust(player) {
  return(player.handData.score > Thunderjack.DesignData.BLACKJACK_POINTS);
};

This function will return true if the player’s score went over 21.

beginPlayerBust
GamePlay.prototype._beginPlayerBust(player) {
  player.isBust = true;
};

This function will set the isBust property on the Thunderjack.HandData class to true. This property is used when determining if this player plays against the dealer.

setNextTurnPlayer
GamePlay.prototype._setNextTurnPlayer = function() {
  var i_nextTurnPlayerIndex = this._getNextTurnPlayerIndex(this._turnPlayerIndex + 1);
  if (!this._setTurnPlayer(i_nextTurnPlayerIndex)) {
    this._endRound();
  }
};

This function sets the turn to the next available player. The getNextTurnPlayerIndex has already been introduced, and it will return the index of the next available player, or -1 if all the players (including the dealer) have already played their turn.

The setTurnPlayer function was hinted at when we wrote some pseudo code for the setFirstTurnPlayer function. Here is the implementation for it:

setTurnPlayer
GamePlay.prototype._setTurnPlayer = function(i_turnPlayerIndex) {
  this._turnPlayerIndex = i_turnPlayerIndex;
  var s_playerId = this._getTurnPlayerId();
  if (!s_playerId) {
    //no turn player to set 
    return(false);
  }
  
  if (this._isDealerId(s_playerId)) {
    this._beginDealerTurn();
  } else {
    this._beginPlayerTurn(s_playerId);
  }
  
  return(true);
};

This function first gets the player ID of the player to whom we’re setting the turn. Then we want to attempt to set the turn to that player.

Turn Player Setup

When calling setTurnPlayer, we pass in the turn player index (not the ID) of the current turn player. We discussed turnPlayerIds in an earlier article. This is an array of all the player IDs, in the order in which they will take their turns. The turn player index is the array index of the current turn player within that array.

If we’ve placed bets on all three hands, for example, we’d set up the the turnPlayerIds array to look like this:

turnPlayerIds = [
  Thunderjack.PlayerHandIds.LOWER_RIGHT,
  Thunderjack.PlayerHandIds.LOWER_MIDDLE,
  Thunderjack.PlayerHandIds.LOWER_LEFT,
  Thunderjack.PlayerHandIds.DEALER
];

There is another variable we need to track, let’s call it this._turnPlayerIndex, and it’s initialized to ‘0’. When setNextTurnPlayer is called, it will get the next index value by adding 1 onto the current turnPlayerIndex value, and passes this value into setTurnPlayer. It’s this setTurnPlayer function that actually updates the this._turnPlayerIndex variable.

If the player ID represents the dealer, we’ll resume play for the dealer’s turn (which is controlled by the game code AI – we’ll get into this in a later article). If the player ID represents a player, play resumes with that player to make a move (hit, stand, etc.).

We’ll also get into resuming play on the player’s turn in the later article as well. This will detail which move buttons to show, depending on the player’s hand.

One more note about that this function is that it returns true if the turn was successfully set, and false if the turn could not be set. This return value is used by the setNextTurnPlayer function. If setNextTurnPlayer was unable to set the next turn player, it ends the game.
(If this._turnPlayerIndex has been incremented, such that it is out of the upper range of the array limit of this._turnPlayerIds, then setTurnPlayer will return false.)

This video shows three players demonstrating the hit functionality. Players that bust will not play against the dealer.

That’s it for the hit move. We’ve also covered some very important functionality with setting player turns, as other moves will use these functions as well.

Next, we’ll cover ability to stand. Thanks for reading, and take care.

– C. out.

Thunderjack! HTML5 Game Update: Placing Bets, Setup the Bet Chip Buttons

Hey what’s up!

We’re continuing working on the bet placing functionality. Looking at our four-step process, we’re now on step two, setting up the bet chip buttons:

  • Setup the hand buttons
  • Setup the bet chip buttons
  • Setup the bet button
  • Setup the clear button

We recently finished the hand buttons. You can view part 1 and part 2 of this function.

The bet chip buttons work like this: When a bet chip is pressed, it applies its bet value to all the selected hands.

For example, say we:

  1. Select hand #2
  2. Press the 10 bet chip. This will add 10 credits onto hand #2
  3. Select hand #1 (both hands #1 and #2 are now selected)
  4. Press the 50 bet chip. This will add 50 credits onto hand #1, and hand #2. The total credits of hand #2 is now 10 + 50 = 60.

Building the bet chip buttons and functionality put into four parts, explained below.

First, let’s add the chip buttons to the canvas.

  1. Right-click on the canvas, then select Add…, then Button.
  2. From the Add Sprite dialog, select the image you want to use as the main button sprite, then press OK.
  3. This will add a button to your canvas. You can drag it to position it where you want.
    In the button’s properties, set the field property to true . This will create a reference to the button in the code that the canvas compiler generates, allowing you to reference it as well (which we’ll do later).
  4. Set a name for the bet chip button. I decided to use the name that matches the color of the bet chip.
  5. Set the callback to this._onBetChipButtonPressed, and set the callbackContext to this.
  6. Set the four “Frame” properties to the appropriate sprite images, so that the button appears responsive when the it is moused over, pressed, and released.
  7. Follow these steps for the other bet chip buttons.

Second, once you have all the bet chip buttons made, we’ll turn them into a single prefab. You can select all the chip buttons, convert them to a group, then create a group prefab from the group. When creating my prefab, I named it bet_chips_prefab. The editor then created bet_chips_prefab.canvas, and the bet_chips_prefab.js source file. My bet chips prefab canvas looks like this:

Once you have the prefab added to your main canvas, set a varName for the prefab (I used bet_chips), and set the field property to true. In the main canvas, the canvas compiler will create a reference to this prefab as this.fBet_chips (which we’ll use later).

Third, we need to add some custom code to the bet_chips_prefab JS class file. We want to be able to fire a notification each time a chip button is pressed. A Phaser signal will be added as a property of this class to be referenced from other functions. The following code is added under the -- user code here -- comment:

bet_chips_prefab.prototype.init = function(buttonClickCallback, context) {
  this.buttonClickSignal = new Phaser.Signal();
  this.buttonClickSignal.add(buttonClickCallback, context);
};

This code is meant to be called once from the outside – from the code that sets up the UI. Supply the callback function that is called each time the signal fires, and the context in which that callback is used.

bet_chips_prefab.prototype._onBetChipButtonPressed = function(button) {
  this.buttonClickSignal.dispatch(button.name);
};

This function is the callback function we assigned to each button as their callback property in the editor. Each time a bet chip button is pressed, this function is called. It then dispatches the signal, which in turn, fires the buttonClickCallback function that was passed into the init function.

We need to identify which button was pressed. So, the buttonClickCallback function accepts one parameter of type string, which is the name of the button. This is the same as the name property used when creating each button.

This finishes the setup of the bet chip buttons. The fourth and final step is initializing the bet_chips_prefab and handling what happens when a bet chip button is pressed.

When setting up your main canvas, you can initialize the bet chips prefab class. In the user code (under the -- user code here -- comment), add this:

this.fBet_chips.init(this.onBetChipPressed, this);

This is the init function we created earlier on the bet_chips_prefab class earlier. The onBetChipPressed function, which we’ll create next, will be called by the bet_chips_prefab signal each time a bet chip button is pressed.

function onBetChipPressed(s_betKey) {
  var selectedPlayerIds = this.handButtons.getSelectedHands();
  for (var s_playerId in selectedPlayerIds) {
    this.addToPlayerBet(s_playerId, s_betKey);
  }
}

The s_betKey is the name of the bet chip button that was pressed. This is the parameter we pass onto the buttonClickSignal of the bet_chips_prefab._onBetChipButtonPressed when the signal is dispatched.

There is a new function on the handButtons object called getSelectedHands. From this previous article, we defined a HandButtons class that manages the three hand buttons for selecting which player hands that we want to apply bets to.

The getSelectedHands function will return an array of string IDs of all the player hand buttons that have been selected. Let’s add the getSelectedHands to the HandButtons class, which looks like this:

HandButtons.prototype.getSelectedHands = function() {
  var ids = [ ];
  
  for (var s_id in this._handButtonsById) {
    var button = this._handButtonsById[s_id];
    if (button.getIsOn()) {
      ids.push(s_id);
    }
  }
  
  return(ids);
};

Back to the onBetChipPressed function, we now know which player hands have been selected at the time the bet chip button was pressed. We can now add the bet value of the selected bet chip to these selected hands with this function:

GamePlay.prototype.addToPlayerBet = function(s_playerId, s_betKey) {
  var i_betValue = BetChipValues[s_betKey];
  this.playerData.addBet(s_playerId, i_betValue);
  this.updateTotalBet();
};

There is a BetChipValues object which we’ll define as a key/values pairs, where we’ll map the bet chip ID (which we’ll define as the name of the bet chip) to its bet value:

BetChipValues = {
  green: 10,
  purple: 50,
  red: 250,
  blue: 1000
};
The PlayerData class

There is also this.playerData.addBet method. This function adds the value of the bet to each selected hand. The playerData is an object that we’ll create from a PlayerData prototype:

PlayerData = function() {
  //key: string (player id)
  //data: PlayerHandData
  this._hands = this._initPlayerHands(); 
};

PlayerData.prototype._initPlayerHand = function (playerHands, s_handId) {
  playerHands[s_handId] = new PlayerHandData(s_handId);
};

PlayerData.prototype._initPlayerHands = function () {
  var playerHands = {};
  
  this._initPlayerHand(playerHands, PlayerHandIds.LOWER_RIGHT);
  this._initPlayerHand(playerHands, PlayerHandIds.LOWER_MIDDLE);
  this._initPlayerHand(playerHands, PlayerHandIds.LOWER_LEFT);
  this._initPlayerHand(playerHands, PlayerHandIds.UPPER_RIGHT);
  this._initPlayerHand(playerHands, PlayerHandIds.UPPER_MIDDLE);
  this._initPlayerHand(playerHands, PlayerHandIds.UPPER_LEFT);
  
  return(playerHands);
};

Inside the user code of the game play canvas (in this project, we’re using  GamePlay, you can add playerData as a property of that prefab class like this:
this._playerData = new PlayerData();

We are using values from the PlayerHandIds object we set up earlier, as well as the PlayerHandData, which stores data about each individual hand.

With the this.playerData.addBet(s_playerId, i_betValue); function, we want to first retrieve the PlayerHandData that matches the player ID, then add the specified bet amount to its betValue property.

You can eventually go on to update the UI with bet chips. This is what the updateTotalBet() function is reserved for. Your bet interface can include elements, such as:

  • the player’s credits
  • the player’s total bet value
  • the bet amount for each hand

I’ll leave that as an exercise to you, but if there is enough demand for it, I’ll post an article on it.

The final result here does include the updated UI. In the next update, we’ll set up the bet and clear buttons.

Thanks for reading, and stay tuned!

– C. out.

Thunderjack! HTML5 Game Update: Placing Bets, Let’s Finish the Hand Buttons

In the last article, we discussed the first part of step one of allowing the player to place bets. We broke the process into four steps, which I’ll reiterate here:

  • Setup the hand buttons (we are finishing up this one in this article)
  • Setup the bet chip buttons
  • Setup the bet button
  • Setup the clear button

We left off with being able to toggle the hand button 1 on and off. So that it does this:

Next, we’ll create toggle buttons to represent hand buttons 2 and 3.

For hand button 2, first in the Project Explorer of Phaser Editor, copy and paste the file hand_button_1_prefab.canvas, renaming it to hand_button_2_prefab.canvas. Then copy and paste hand_button_1_prefab.js, renaming it to hand_button_2_prefab.js.

Next, open the hand_button_2_prefab.canvas file in the editor. Click on the Configuration tab at the bottom. Under the Source section, look for a className property. Change it’s value to hand_button_2_prefab, then Save the file.

What this does is allow the proper class name (which is hand_button_2_prefab) in the corresponding hand_button_2_prefab.js file to be to be written when the canvas compiler automatically generates the code.

Next, click the Generate Code icon in the top toolbar of the editor. It looks like a gear. When you are changing configurations and update the canvas file, it may not automatically update the corresponding JavaScript file. Clicking this button forces it to do so.

Remember, however, our user code is not touched by the canvas compiler, so we’ll need to update part manually. If you look inside hand_button_2_prefab.js, it has updated generated code to use hand_button_2_prefab, but hand_button_1_prefab in our _onButtonPressed user code. So, you’ll want to update all occurrences of hand_button_1_prefab with hand_button_2_prefab in your user code. Then save the JavaScript file.

hand_button_2_prefab.prototype._onButtonPressed = function() {
  if (this.clickCallback !== null) {
    this.clickCallback.dispatch(this);
  }
};

For hand button 3, follow the same steps for hand button 2 above, except you’d use the class name, hand_button_2_prefab.

Once you have all three hand button toggle button prefabs set up, you can add them to your game’s main canvas. Here are two quick ways to add a prefab to your canvas.

The first is:

  1. Right-click on the canvas
  2. Mouse over Prefab from the context menu
  3. Choose Add… from the secondary menu
  4. Select one of the hand button prefabs from the list, and click OK.

Alternatively, you can use a very similar method:

  1. Right-click on the canvas
  2. Mouse over Add… from the context menu
  3. Choose Prefab from the secondary menu
  4. Select one of the hand button prefabs from the list, and click OK.

Once you’ve done that, the prefab should appear on your canvas. You can then drag it to position it wherever you like.

Managing the Hand Buttons

Now that we have all the hand buttons created, we need a way to manage them.

As mentioned in the last article, we place a bet by selecting one or more hands, then pressing a bet chip button to place bets on those hands. But what happens if none of the hand buttons are selected when you press one of the bet chip buttons?

Well, we could provide some kind of “error” feedback, or simply not place the bet. But this might create a slight frustration for your end users. In my opinion, it would be better to prevent all three buttons from being turned off. So this implies two things:

  1. One of the buttons must always be on by default (it can be any button you want, but for our purpose, let’s have hand button 2 on by default; or
  2. If only one hand button is on, disable that button, so that it cannot be turned off. If another button is then turned on, that button can then be re-enabled.

Yes, this is little more work on our part, but it creates a smoother user experience, in my opinion, of course.

Having a “manager” class that works with all the hand buttons would be very helpful here, so let’s create that class:

HandButtons = function(gameCanvas) {
  //this is the game canvas that you pass in when you construct your `HandButtons` object
  this.gameCanvas = gameCanvas;
  
  //here's another key-value object that references all three hand buttons by their id
  //key: string (button id)
  //data: HandButton
  this._handButtonsById = { };
  
  this._init();
};

There is an _init function that sets up all three hand buttons, and it looks like this:

HandButtons.prototype._init = function() {
  //setup the three hand buttons
  this._initHandButton(Thunderjack.PlayerHandIds.LOWER_LEFT, this.gameCanvas.fHand_button_1);
  this._initHandButton(Thunderjack.PlayerHandIds.LOWER_MIDDLE, this.gameCanvas.fHand_button_2, true);
  this._initHandButton(Thunderjack.PlayerHandIds.LOWER_RIGHT, this.gameCanvas.fHand_button_3);
  
  //enable/disable buttons as necessary
  this._updateButtons();
};

Each hand button is setup in an _initHandButton function, as in:

HandButtons.prototype._initHandButton = function(s_playerHandId, handButtonPrefab, b_isOn) {
  var handButton = new HandButton(s_playerHandId, handButtonPrefab);
  handButton.setIsOn(b_isOn === true);
  handButton.callbackSignal.add(this._onHandButtonPressed, this);
  
  this._handButtonsById[s_playerHandId] = handButton; 
};

We’re creating a HandButton object from the class we created here. The toggle button will will be turned on if b_isOn is true.

The click callback, which is a Phaser Signal, is assigned the method, this._onHandButtonPressed, which we’ll look at later in this article. Finally, the button is added to the collection of buttons, indexed by the player hand ID.

There’s another function being called in the _init function, and that’s _updateButtons:

HandButtons.prototype._updateButtons = function() {
  var button = this._getLoneOnButton();
  if (button !== null) {
    button.setEnabled(false);
  } else {
    this._enableAllButtons();
  }
};

Earlier in this article, we discussed disabling a button if it’s the only one on. After the buttons are first set up, and every time the state of the buttons changes, we want to call _updateButtons. In this function, there is  a_getLoneOnButton function. I won’t go into details on it, but returns a button if that button is the only one selected. Otherwise, it function returns null.

Finally, from this setup of the buttons, there is the click callback function, _onHandButtonPressed:

HandButtons.prototype._onHandButtonPressed = function(s_id) {
  this._updateButtons();
};

You’ll see that _onHandButtonPressed accepts a single parameter, a string ID. This is the button ID, the same as the property that is being dispatched in the HandButton.prototype._onButtonCallback function we defined in the earlier article. Each time a toggle button is pressed (either turned on or off), we want to update all the buttons. If only one button is left on, that button will be disabled. This prevents the player from turning off all the buttons, which would create a problem when we set up the bet chip buttons in a later article.

That completes adding the functionality of the hand buttons. We can now select which hand (or hands) on which we want to place bets. Also, we made sure that at least one of these hand buttons is on at all times.

In the next article, we’ll set up the bet chip buttons, so we can place bets on our selected hands. Thanks, and talk to you soon.

– C. out.

Thunderjack! HTML5 Game Update: Placing Bets

Hello!

In this article, we’re going to look at how you place your bets before starting a round of Thunderjack!.

You can play from one to three hands against the dealer, and each hand has its own individual bet.

We’ll accomplish this through the following steps:

  1. Setup the hand buttons
  2. Setup the bet chip buttons
  3. Setup the bet button
  4. Setup the clear button

There’s quite a bit to these four steps, so the first step will be covered in two articles.

1. Setup the hand buttons

First, we’ll start with the three hand buttons. Each of these buttons represents a player hand:

  • button 1 is for the left player;
  • button 2 is for the middle player; and
  • button 3 is for the right player

These are toggle buttons, meaning, like check boxes, you can press them to turn them on, off, and back. This means we will need two images for each button, one to represent each state.

Phaser does not have native support for a toggle button, nor does the Phaser Editor, so we’re going to create our own. We’ll do this by creating two buttons, one for the on state, and one for the off state, and switching their visibility depending whether or not the state is on or off.

Let’s start with button 1.

Phaser Editor manages your buttons (and all other UI you create with it) in a JavaScript file, by using its Canvas, which is a visual, WYSIWYG (what-you-see-is-what-you-get) game level/object editor.

On the Canvas of, you can create a prefab and include in it two buttons. Both buttons should be the same size and shape, and in the same position (at 0,0 in the prefab). For the button that will represent the on state, set its varName to on. Likewise, for the off button, set its varName to off.

Save the canvas UI as hand_button_1_prefab.js.

Important!

Every time you make changes to the UI elements and save the file, the Canvas compiles the UI and updates the JavaScript file corresponding to that UI. This file is the prefab class that represents all the UI on the canvas. Thus, you can only directly modify the file in certain areas, otherwise, your changes will be lost the next time Phaser Editor updates it. The editor adds comments to the code, indicating the areas you can safely modify without your edits being lost.

In the source code, look for this comment:

-- user code here --

You can add your code under those lines.

However, watch for these comments:

/* --- start generated code --- */
...
/* --- end generated code --- */

You may not directly edit code in between these comment lines. If you do, your changes will be overwritten by the canvas compiler the next time you save your .canvas file, which causes it to update the code.

However, you can so indirectly by using the User Code dialog.

There are two ways you can access this (both from the Canvas UI):

  1. Right click on the Canvas UI and select Edit User Code from the menu; or
  2. Use the keyboard shortcut Ctrl + Shift + U.

There are two text boxes in the User Code dialog where you can enter text. I recommend adding your own comment at the beginning of each of those, so that you can easily locate where your code was inserted by the Canvas when it rebuilds the JS file.

When you set a varName to a UI object, like we did by naming our buttons “on” and “off”, the canvas compiler will generate attach those objects as properties of the prefab class:

// fields
this.fOn = _on;
this.fOff = _off;

You can reference them in your user code with this.fOn and this.fOff.

This works for any valid varName. For example, if you assigned a varName of myTextBox to a UI object on the canvas. The compiler will assign it to this.fMyTextBox.

You may find yourself needing to add user code for things like custom initialization or responding to button callbacks.

If you’d like more information on the Canvas Editor, please see here. For more on User Code, see here.

We also want to be notified when either the on or off button is pressed, so that we can switch buttons. We do this by adding a callback function to each button.

To do this:

  1. Click on a button on the Canvas.
  2. The properties for the button will appear in the properties panel. Look for “Button”.
  3. In the “callback” field, add this._onButtonPressed (You can name the button whatever you want, but be sure to precede it with this.).
  4. In the “callbackContext” field, add this.

Follow the above steps for the other button as well.

In user code, add the following button click callback function:

hand_button_1_prefab.prototype._onButtonPressed = function() {
  if (this.clickCallback !== null) {
    this.clickCallback.dispatch(this);
  }
};

You’ll notice a this.clickCallback that we haven’t seen before. We’re going to use this as a Phaser.Signal. The signal will allow us to be notified from another location (which we’ll setup later) that a hand button has been clicked. Let’s create a reference to the click callback and set it to null in the middle section of the user code:

this.clickCallback = null;

Why we’re setting up to be notified from another location

I’m a firm believer that the UI code should be separated from the logic code as much as possible. Sure, we could put all the code in this hand_button_1_prefab class, but it would a jumble of the UI code (which what the Canvas compiler uses), and our logic code. I’d rather put the logic code into another file, and leave the prefab files to handle the UI and user code (which should also be kept to a minimum as much as possible, in my opinion).

You can create a new class, for example, HandButton.js, and place it in the WebContent/js folder of your project. The constructor might look something like this:

HandButton = function(s_handButtonId, handButtonPrefab) {
  this._id = s_handButtonId;
  this._handButtonPrefab = handButtonPrefab;
  
  //here's the same clickCallback we setup in the user code of the hand_button_1_prefab canvas.
  this._handButtonPrefab.clickCallback = new Phaser.Signal();
  this._handButtonPrefab.clickCallback.add(this._onButtonCallback, this);
  
  this._isOn = false;
  this.callbackSignal = new Phaser.Signal();
};

The other two hand buttons will eventually use this HandButton class, so this is not exclusive to hand button 1.

You’ll see a this._onButtonCallback referenced when setting up the signal. That’s the function that the signal will call when it’s dispatched in the button prefab user code. (See this.clickCallback.dispatch(this); in the hand_button_1_prefab.prototype._onButtonPressed function written previously.)

HandButton.prototype._onButtonCallback = function(button) {
  this.setIsOn(!this._isOn);
  this.callbackSignal.dispatch(this._id);
};

What this does is toggle the _isOn property between true (on) and false (off) each time the hand toggle button is clicked. We also have yet another signal, this.callbackSignal, which passes notification onto the main logic of the game that the button has been pressed. Another reason that we setup the first this._handButtonPrefab.clickCallback is so that we can provide the UI function of toggling between the button states. We’ll handle this callbackSignal at a later time.

Next, we’ll handle the functionality that updates the current state of the toggle button.

HandButton.prototype.setIsOn = function(b_value) {
  this._isOn = b_value;
  this._handButtonPrefab.fOn.visible = this._isOn === true;
  this._handButtonPrefab.fOff.visible = this._isOn === false;
};

Here, we’re referencing the buttons setup in the canvas, so that we can change their visibility. When one is visible, the other is not.

This covers most of the hand button functionality for all three buttons. We’ll finish off the hand button setup in the next article.

Thanks and stay tuned!

– C. out.

Thunderjack! HTML5 Game Update: Completed the Logic for Thunderjack Hands

Hey there.

Welcome back!
Next we’re going to add what happens when a player gets a hand of the same name as the game itself: a Thunderjack!

PFCHSHSH-KCGHOGHOGHOUGHOGHOUGHWGHWGHW… “THUNDERJACK!!” (spelling of a thunder sound effect)

A Thunderjack is a suited (both cards have the same suit) Blackjack, and the non-ace card is a Jack or higher. The following hands are examples of Thunderjack hands:

Ace Clubs + Jack Clubs
Queen of Hearts + Ace of Hearts
King of Spades + Ace of Spades

However, an Ace of Diamonds and 10 of Diamonds is not a Thunderjack, but a regular Blackjack, even though the cards are of the same suit.

There are also some additional criteria for a Thunderjack:

  1. Only one player hand can get a Thunderjack. If more than one player gets a Thunderjack, those affected hands cancel each other out and push.
  2. The one player with a Thunderjack is payed out immediately.
  3. That player also does not play against the dealer.
  4. If the dealer gets a Blackjack, the player is still paid the Thunderjack payout. The result is not a push.
  5. The dealer can not get a Thunderjack. Even if the dealer gets a suited Blackjack with the non-ace card being a Jack or higher, the result is still a Blackjack.

Just like checking for a regular Blackjack, we will check for a Thunderjack after all the players and dealer have received been dealt their first two cards. We’ll need to change our original code that involves checking the opening hands for Blackjack. If you recall from the previous article, the pseudo code looks like this:

if hasBlackjack(dealer) {
   handleDealerBlackjack();
   endRound();
 } else {
   checkIfPlayersHaveBlackjacks();
   setFirstTurnPlayer();
 }

First, we need to store a few variables. We want to determine which player, if any, has a Thunderjack. This code checks every player’s hand for a suited Blackjack where the non-ace card is a face card. The pseudo code now looks like:

var playerWithThunderjack = checkIfPlayerHasThunderjack()
var playersWithBlackjack = checkIfPlayersHaveBlackjacks()
var doesDealerHaveBlackjack = hasBlackjack(dealer)
if playerWithThunderjack {
  handleThunderjack(playerWithThunderjack)
  endRound()
} else {
  if doesDealerHaveBlackjack {
    handleDealerBlackjack()
    endRound()
  } else {
    setFirstTurnPlayer()
  }
}

All of the Thunderjack handling happens in the checkIfPlayerHasThunderjack() function. If there is more than one player with a Thunderjack, all affected players push. If only one player qualifies, we return that player for later use.

function checkIfPlayerHasThunderjack() {
  var playersWithTj = getAllPlayersWithTj();
  if playersWithTj.length > 1 {
    handleMultipleThunderjacks(playersWithTj);
    return null;
  } else if (playersWithTj.length == 0) {
    return null;
  }
  return playersWithTj[0];
}

This function determines all players, if any, that have a Thunderjack, and returns them in an array. The array will be empty if no players qualify.

function getAllPlayersWithTj() {
  var playersWithTj = []; // set up an empty array
  //do not include the dealer here - only the players, because dealer can not get a thunderjack
  for each player in the game {
    if hasThunderjack(player) {
      playersWithTj.push(player); // add this player to the array
    }
  }
  return playersWithTj;
}

If we have more than one player with a Thunderjack, they all push:

function handleMultipleThunderjacks(playersWithTj) {
  for each player in playersWithTj {
    player.handData.isPush = true;
  }
}

The criteria for getting a Thunderjack is defined in this function:

function hasThunderjack(player) {
  return hasBlackjack(player) &&
    isFlush(player) &&
    isLowCardAtLeast(player, Thunderjack.CardValues.JACK);
}

This function handles the one player that has Thunderjack:

function handleThunderjack(player) {
  player.handData.hasThunderjack = true;
}

One requirement for a Thunderjack is that both cards must be the same suit (like a flush in Poker). Since this will only be run against the player’s opening hand of two cards, was can assume indexes 0 and indexes 1 in the player.cardsData array.

function isFlush(player) {
  var firstCardData = player.cardsData[0];
  var secondCardData = player.cardsData[1];
  return firstCardData.suit == secondCardData.suit;
}

We’re using the same two cards. Let’s use a lowestCardValue parameter instead of making a function “isLowCardAtLeastAJack()”. That way, if we want to change this requirement in the future, all we have to do is change what is being passed as lowestCardValue.

function isLowCardAtLeast(player, lowestCardValue) {
  var firstCardData = player.cardsData[0];
  var secondCardData = player.cardsData[1];
  return
    isCardValueAtLeast(firstCardData, lowestCardValue) &&
    isCardValueAtLeast(secondCardData, lowestCardValue);
}

function isCardValueAtLeast(cardData, lowestCardValue) {
  var indexOfLowestCardValue = Thunderjack.CardValues.ALL.indexOf(lowestCardValue);
  var indexOfCardDataValue = Thunderjack.CardValues.ALL.indexOf(cardData.cardValue);
  return indexOfCardDataValue >= indexOfLowestCardValue;
}

In the Thunderjack.CardValues.ALL array, all the card values are defined in order of lowest rank to highest rank (Ace being the highest here). The JavaScript Array class has a method called indexOf, which will search the array for a specified value, and return it’s index, or position, within the array. So, what we do here is get the index of the cardValue of our CardData, and compare it to the index of the specified indexOfLowestCardValue.

The CardData’s index must be at least as high lowCardValue’s in order to qualify. Since we specified Thunderjack.CardValues.JACK as the lowest card value, our CardData’s card value must be at least a Jack, just like it was defined in the Thunderjack requirements.

This completes handling of players with Thunderjacks. After all opening hands have been resolved, and the game has not ended due to a player’s Thunderjack, or a dealer’s Blackjack, we want to set the first turn player.

From the previous article, we had a setFirstTurnPlayer function that sets the turn to the first player eligible to play against the dealer.

function setFirstTurnPlayer() {
  var turnPlayerIndex = getNextTurnPlayerIndex(0); 
  if (turnPlayerIndex !== -1) {
    setTurnPlayer(turnPlayerIndex);
  } else {
    endRound();
  }
}

The function that setFirstTurnPlayer uses to determine which player goes first is getNextTurnPlayerIndex. This function gets the index of the next player that is eligible to play against the dealer. Players are stored in an array, in this order: right, middle, left, dealer. When setFirstTurnPlayer runs, it calls getNextTurnPlayerIndex with startTurnPlayerIndex value set to 0. This allows us to check the first array index.

Note: Later in the game, when we’re moving onto the next player, getNextTurnPlayerIndex will have a value of whatever the current turn player index sent to it, plus one. For now, don’t worry about it. We’ll get to this in the next article.

function getNextTurnPlayerIndex(startTurnPlayerIndex) {
  var index = startTurnPlayerIndex;
  while (index < turnPlayerIds.length) {
    var playerId = turnPlayerIds[index];
    var handData = playerHandsData[playerId];
    if (isPlayingVsDealer(handData)) {
      return(index);
    }
    index++;
  }
  return(-1);
}

The getNextTurnPlayerIndex function in turn, calls isPlayingVsDealer, and this is the function we’re interested in. As shown, a player is eligible to play against the dealer if the player does not have a Blackjack, and has not pushed.

function isPlayingVsDealer(handData) {
  return(
    !(playerHandData.hasBlackjack ||
    playerHandData.isPush));
}

We want to edit this function so that it includes checking if the player does not have a Thunderjack. If so, the player is eligible.

function isPlayingVsDealer(handData) {
  return(
    !(playerHandData.hasBlackjack ||
    playerHandData.isPush ||
    playerHandData.hasThunderjack));
}

The game now allows us to properly determine if any players have a Thunderjack, and to obtain the first turn player, skipping over any players with a Thunderjack (because they are ineligible to play against the dealer).

In the next article, we’ll get into placing bets, which I touched on in an earlier post, but will cover in more detail.

Let me know if you have any questions. Thanks for staying with me, guys. Take care.

– C. out.